
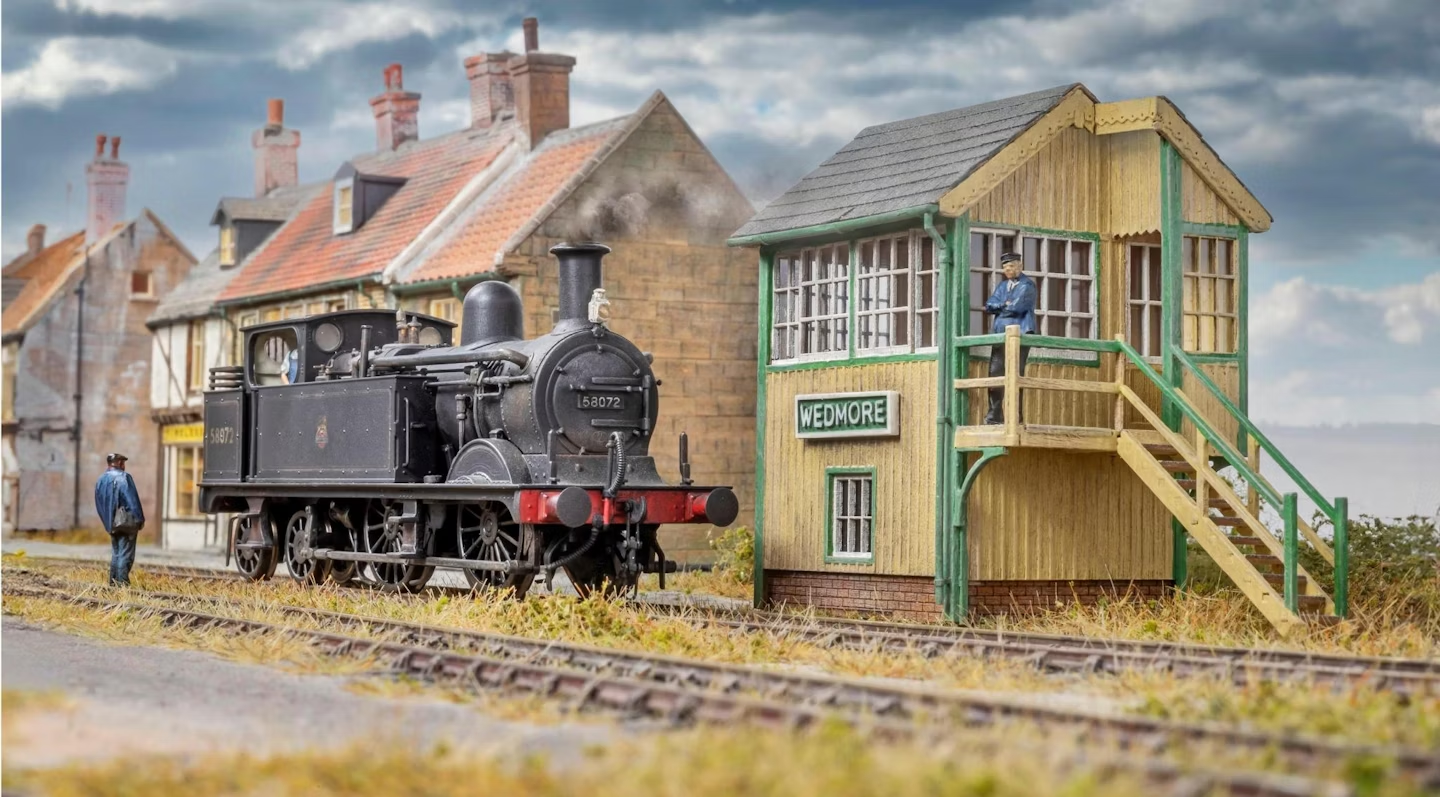
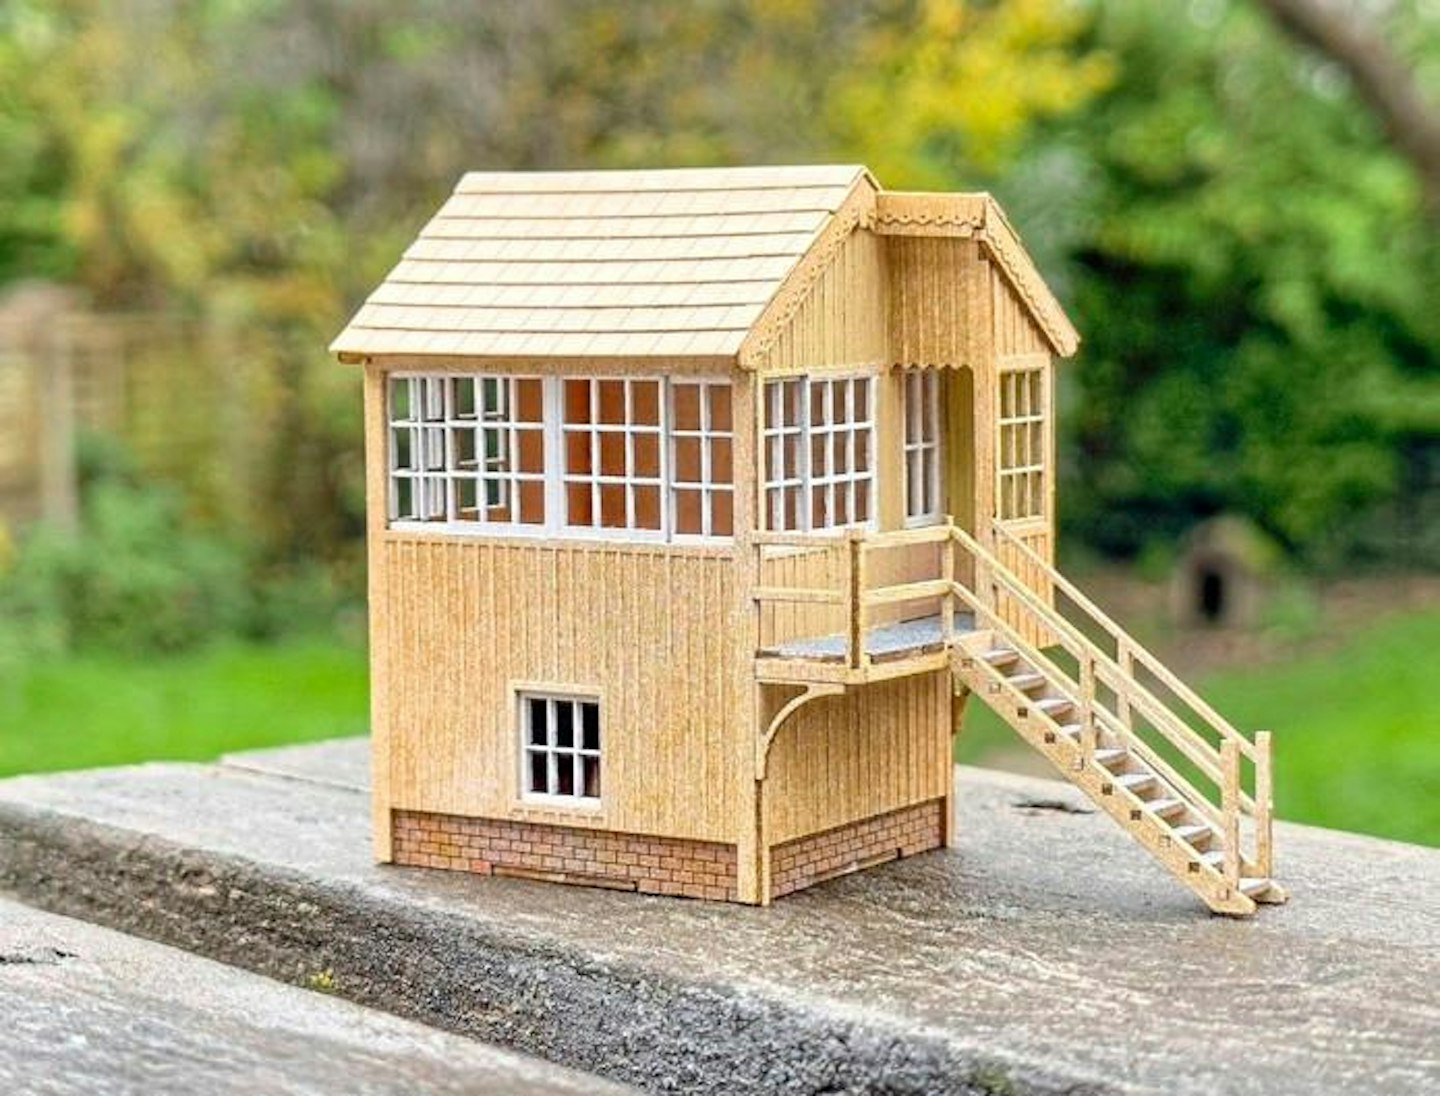
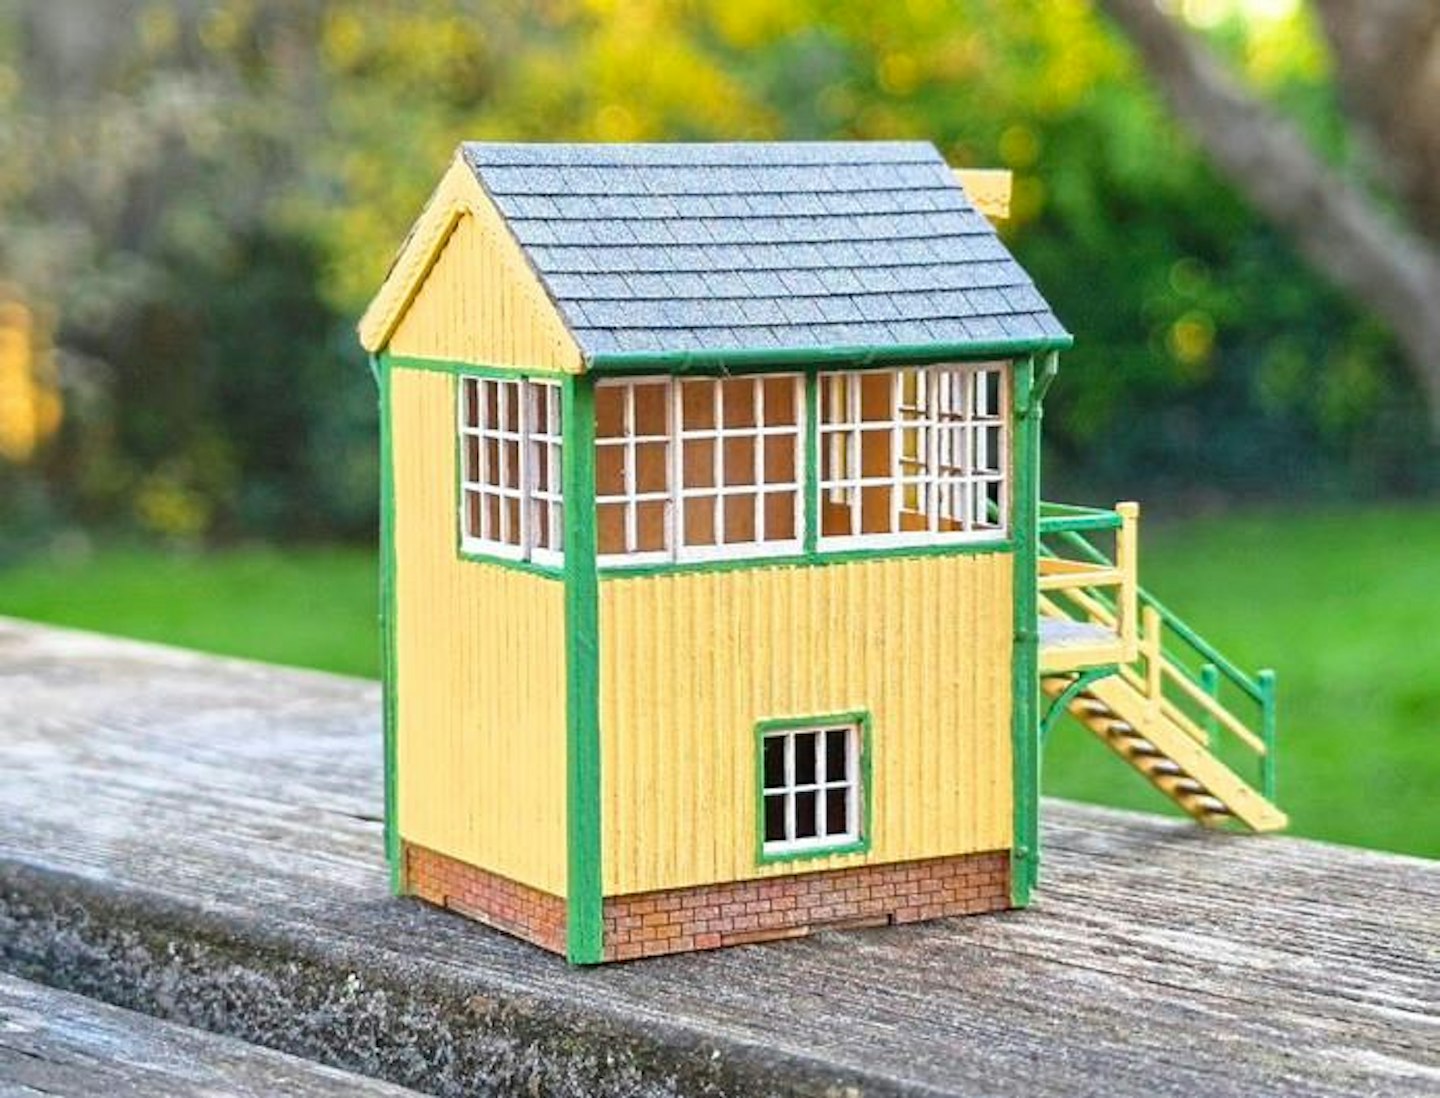
Chris Nevard tweaks Peco’s new Highland Railway signal box kit and transplants it to a light railway setting in the South West of England.
PHOTOGRAPHY: CHRIS NEVARD
Laser-cut kits have been around for some time, especially in the USA, but they’ve only become mainstream here in the UK relatively recently, with several suppliers like Petite Properties, Scale Model Scenery, LCUT Creative and Fair Price Models to name just a few championing the medium which is frequently based around thin plywood, card, paper and MDF.
Peco has also joined the scene with a range of buildings, many of which are currently based on Scottish prototypes. The kit employed here is based on the now-listed former Highland Railway signal box at Helmsdale in Sutherland, Scotland.
I’d seen the kit lurking on the shelf in my local model shop several times, and wondered if it might just pass for a more southerly building on a Colonel Stephens-inspired light railway, with just a slight modification and a suitable paint scheme.
It’s a lovely kit, featuring lots of finely rendered detail. A choice of roofs is provided, with the laser-cut parts depicting a corrugated iron covering, while a generic set of plastic mouldings offer a slate or tile roof, although these parts require marking and cutting to size.
After a little consideration, I plumped for some laser-cut roof slate strips from Scale Model Scenery, which are applied in overlapped layers, as per the real thing, providing a more realistic appearance. Indeed, I feel that a set of similar tile strips would be a great option for Peco to include with this kit instead of the moulded plastic parts.
This was a fun project, and it’s certainly nice to do a bit of (virtually) plastic-free modelmaking for a change. While the prototype is a Scottish one, having perused several old books, I see that the overall design isn’t too
What you will need dissimilar to signal boxes seen elsewhere in the country, especially in rural areas.
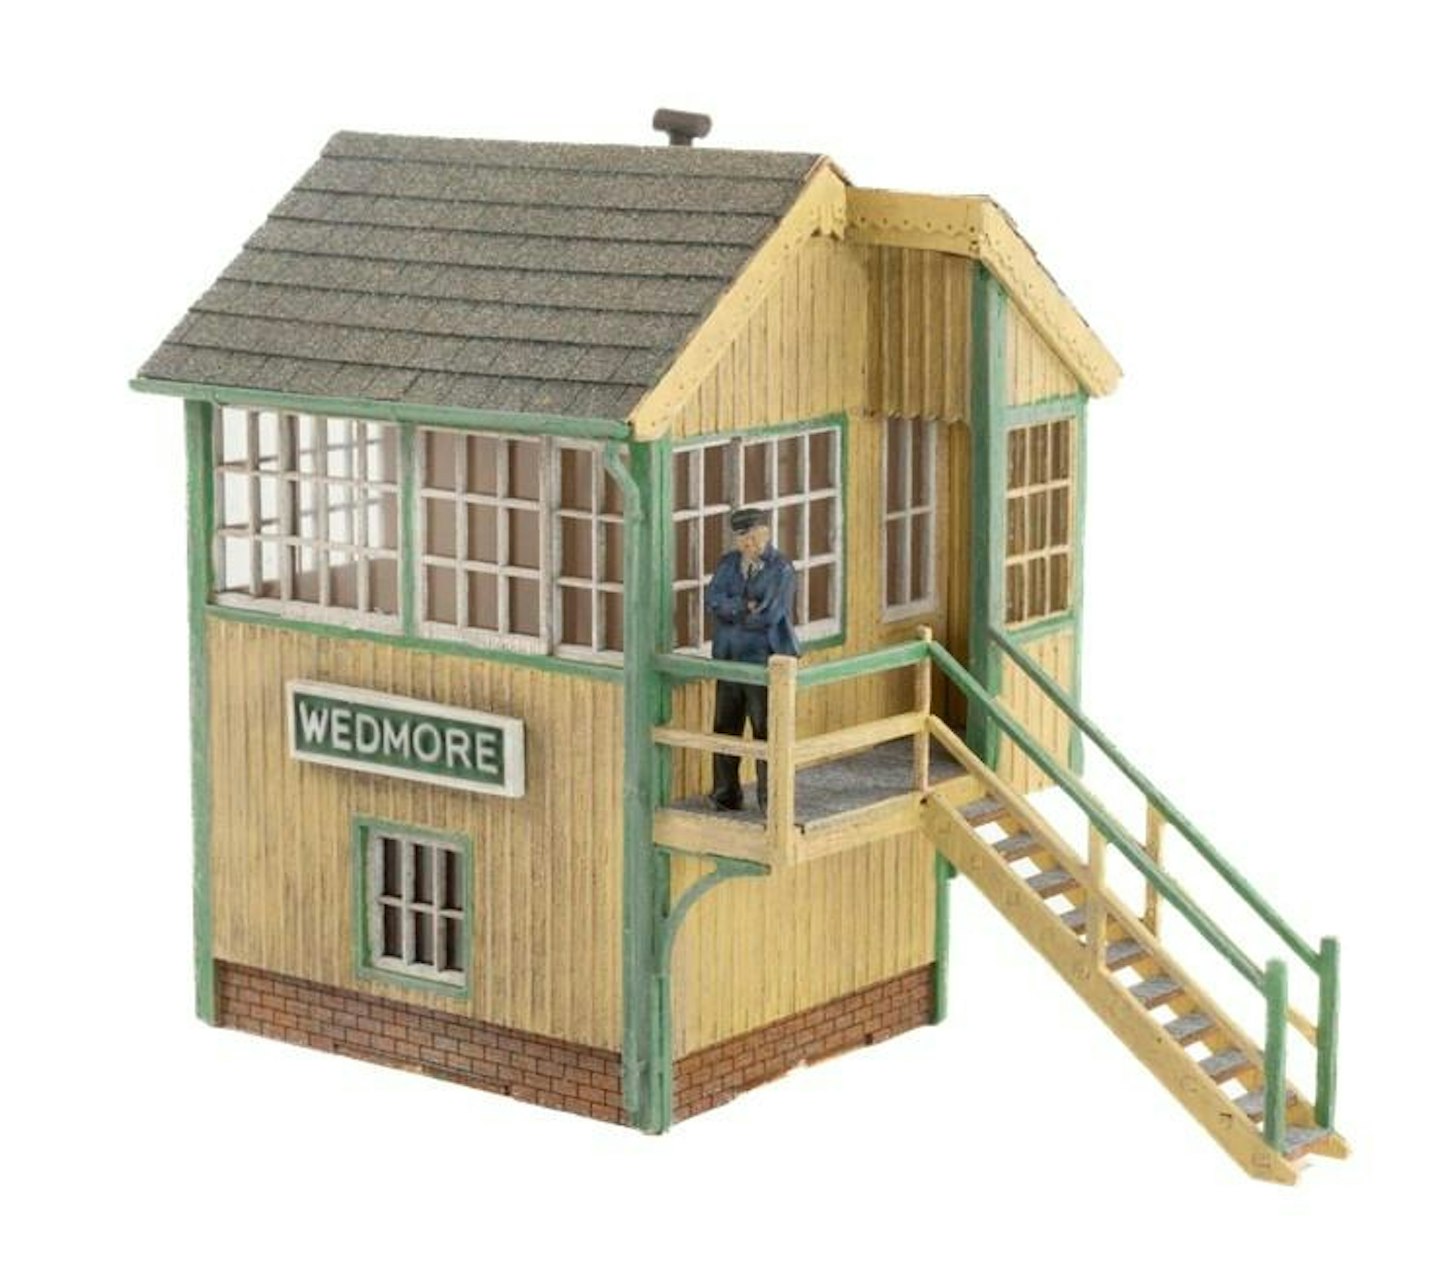
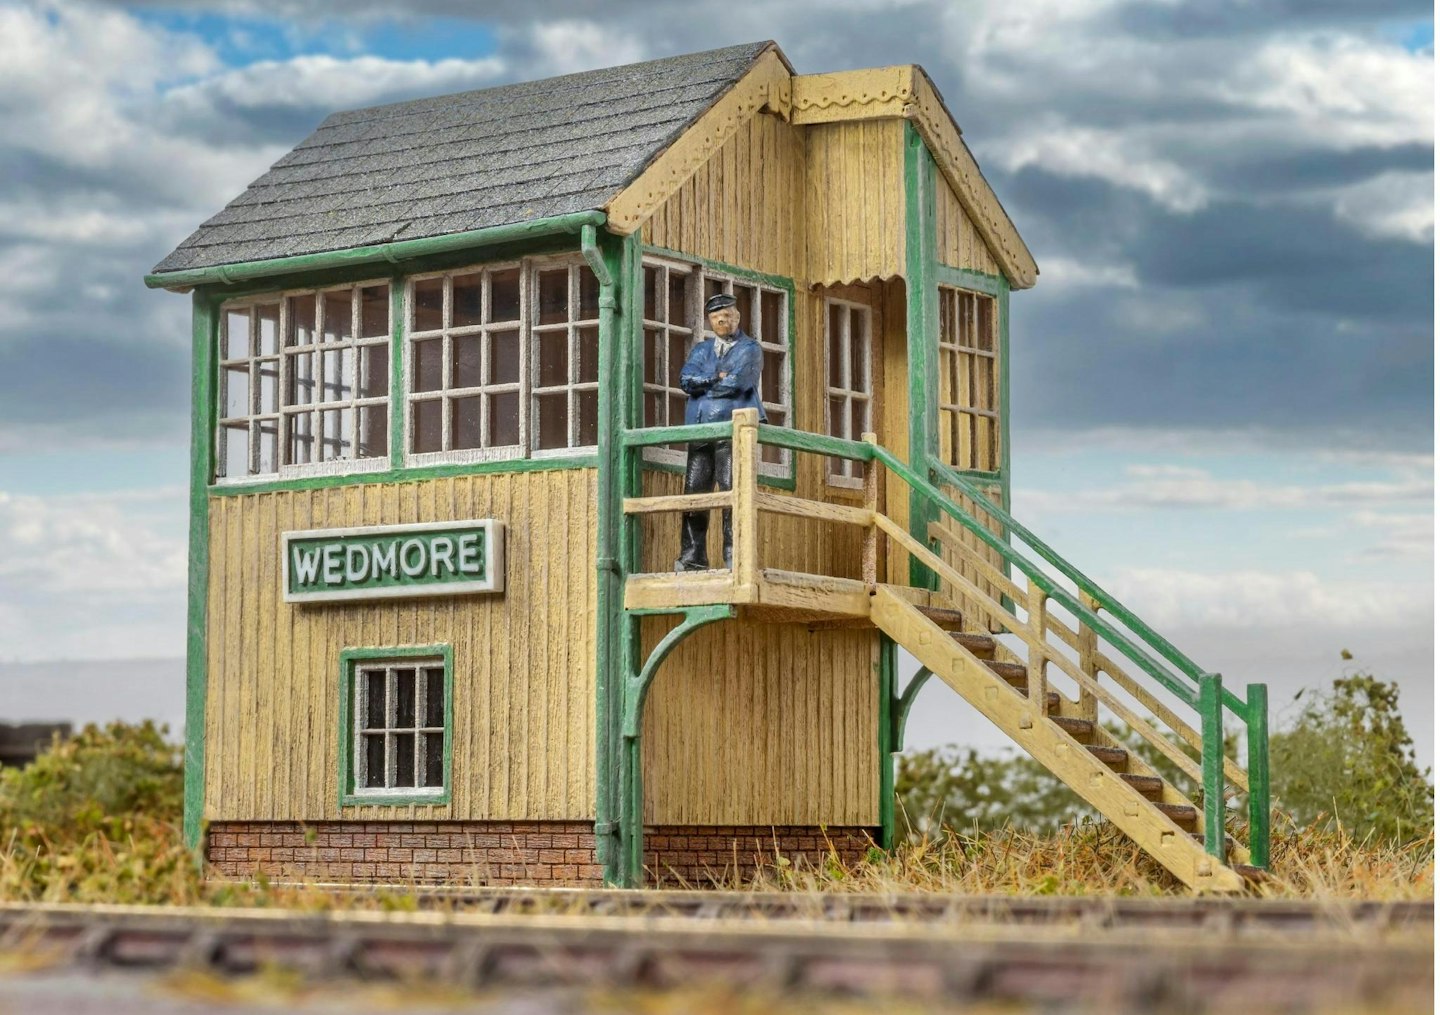
So, what’s with the Wedmore name on my signal box? It’s actually the beginning of a possible new layout project for myself, based on a little-known Somerset & Dorset Joint Railway line which would have run between Shapwick Junction on the Evercreech Junction to Highbridge line, through Wedmore across to Cheddar, where it would have linked up with the GWR.
A Google search suggests that there were plans for Wedmore to have a railway, but it never happened. But those rose-tinted glasses are so very wonderful I’m sure you’ll agree!
What you will need
SHOPPING LIST
✦ Peco LK-201 Highland Railway Signal Box kit Price: £26.50 Availability: Peco stockists Web: www.peco-uk.com
✦ Laser-cut roof slates LX228-00 Price: £8.99
Availability: Scale Model Scenery
✦ Grey, Red, Filler (yellow) primers and Matt Black aerosols
Availability: Halfords stores Web: www.halfords.com
✦ Humbrol paints • Matt 101 Mid Green • Matt 103 Cream (acrylic or enamel) • Gorilla Glue PVA
• Modpodge ‘Gloss Lustre-Lustre’
Availability: Model/hardware stores
TOOLS
✦ Scalpel or hobby craft knife
✦ Needle file or disposable nail file
✦ Metal ruler
✦ Cutting mat
✦ Tweezers
✦ Paintbrushes
✦ Masking tape
STEP BY STEP
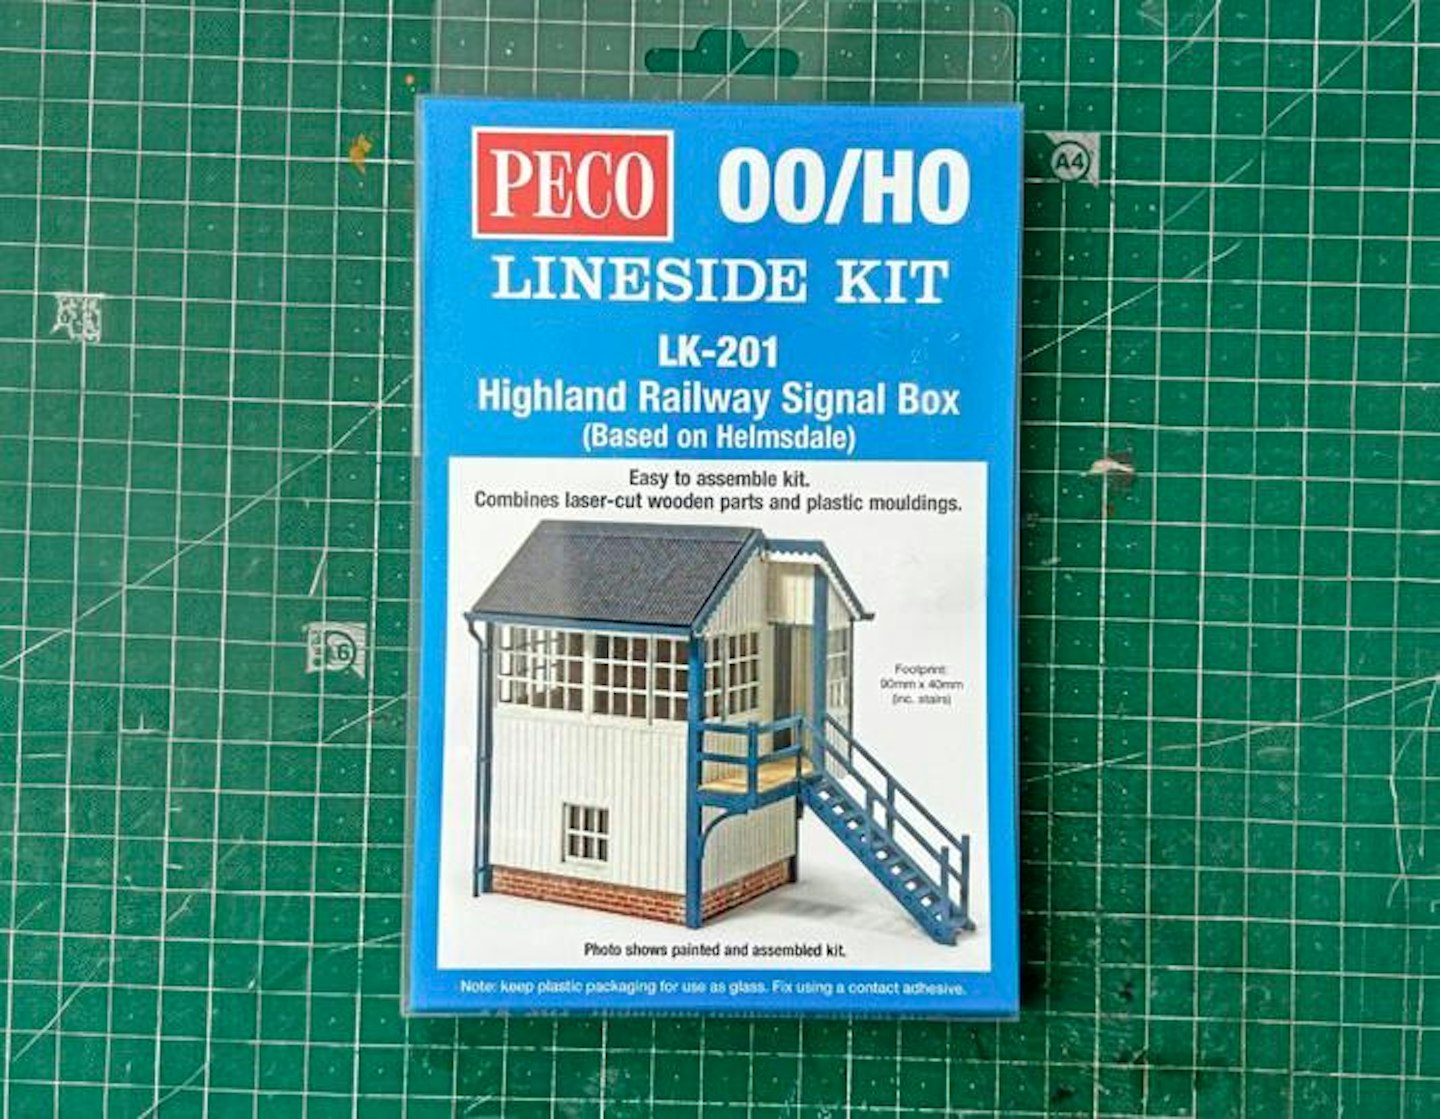
1 Peco’s Highland Railway signal box kit comes with excellent instructions and an optional plastic roof. Be sure to keep the clear packaging for glazing, which is often the norm for building kits these days.
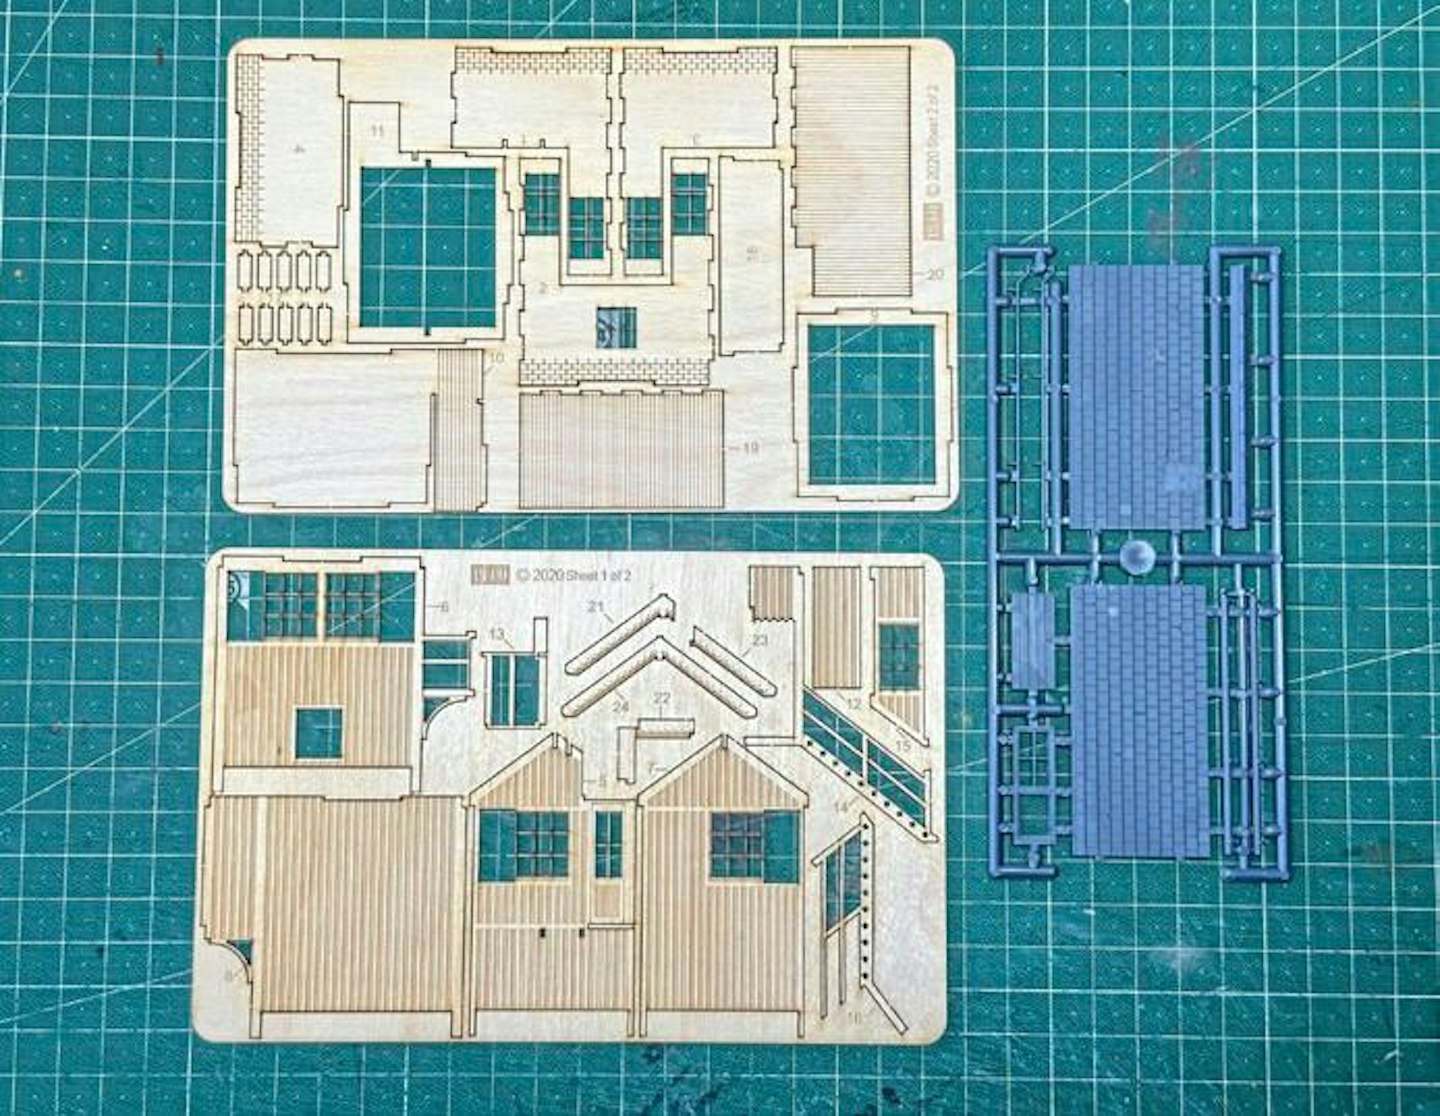
2 It’s worth laying everything out to see exactly what’s involved, and reading through the instructions of course – even if you’re a bloke! Give yourself an idea of how the parts are intended to go together and in which order.
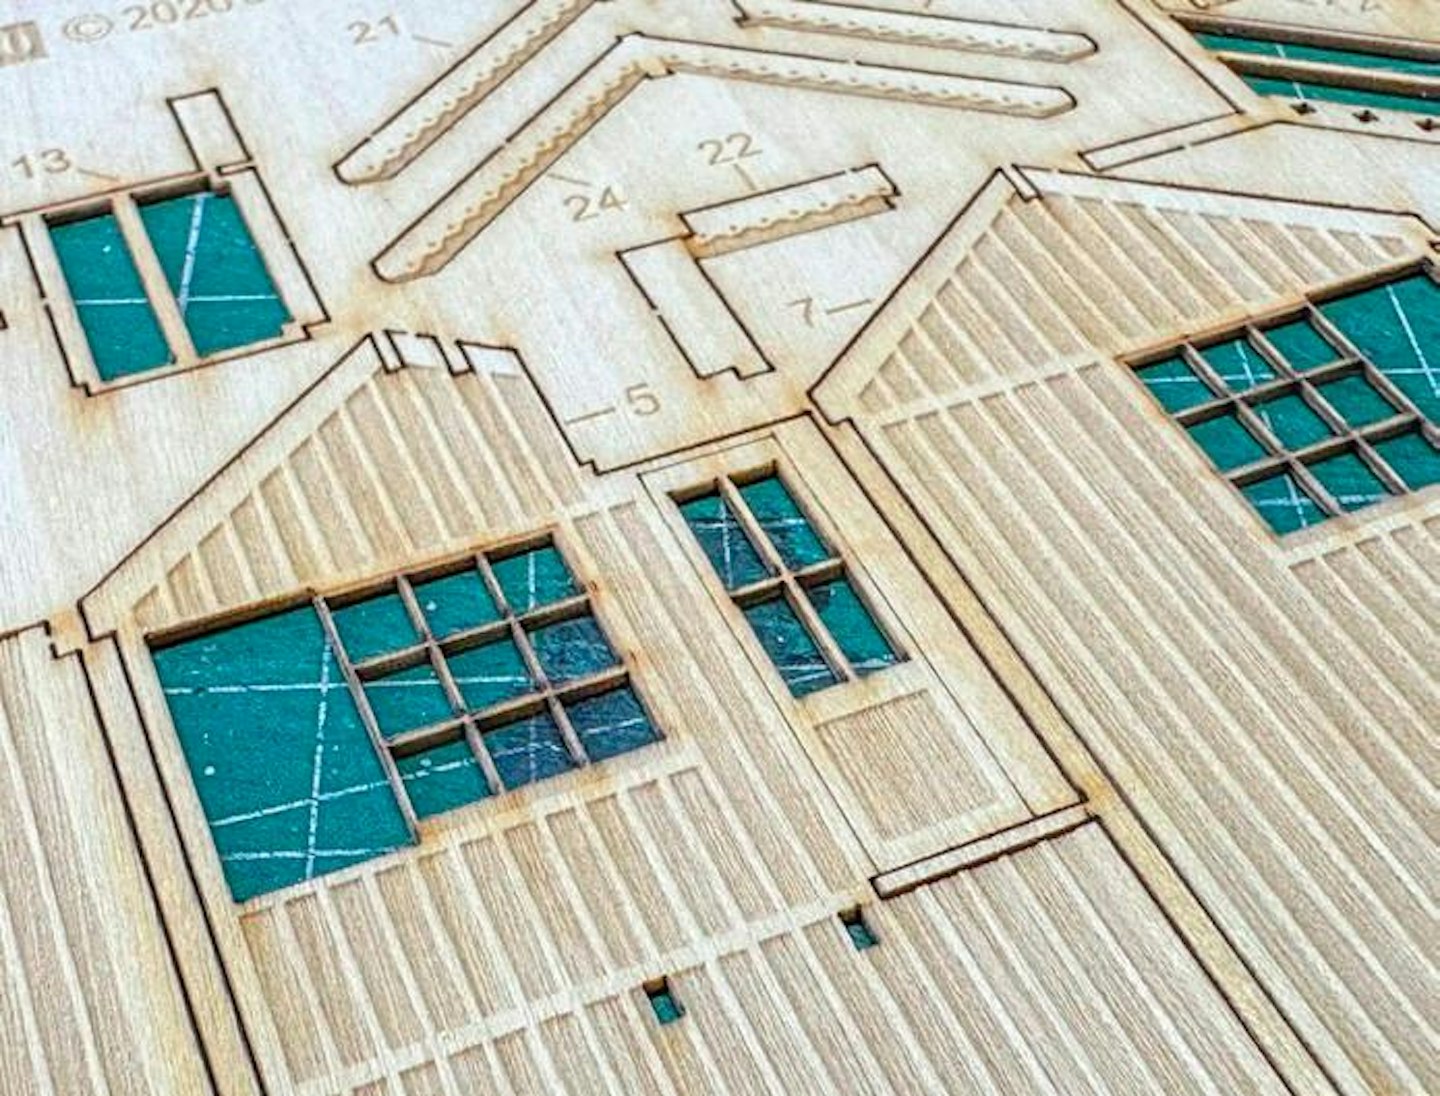
3 It’s impressive what can be achieved laser-cutting. The kit’s components feature sharp panel lines and superbly aged grain texture on the wooden planks. Parts are easily removed with a scalpel loaded with a fresh blade.
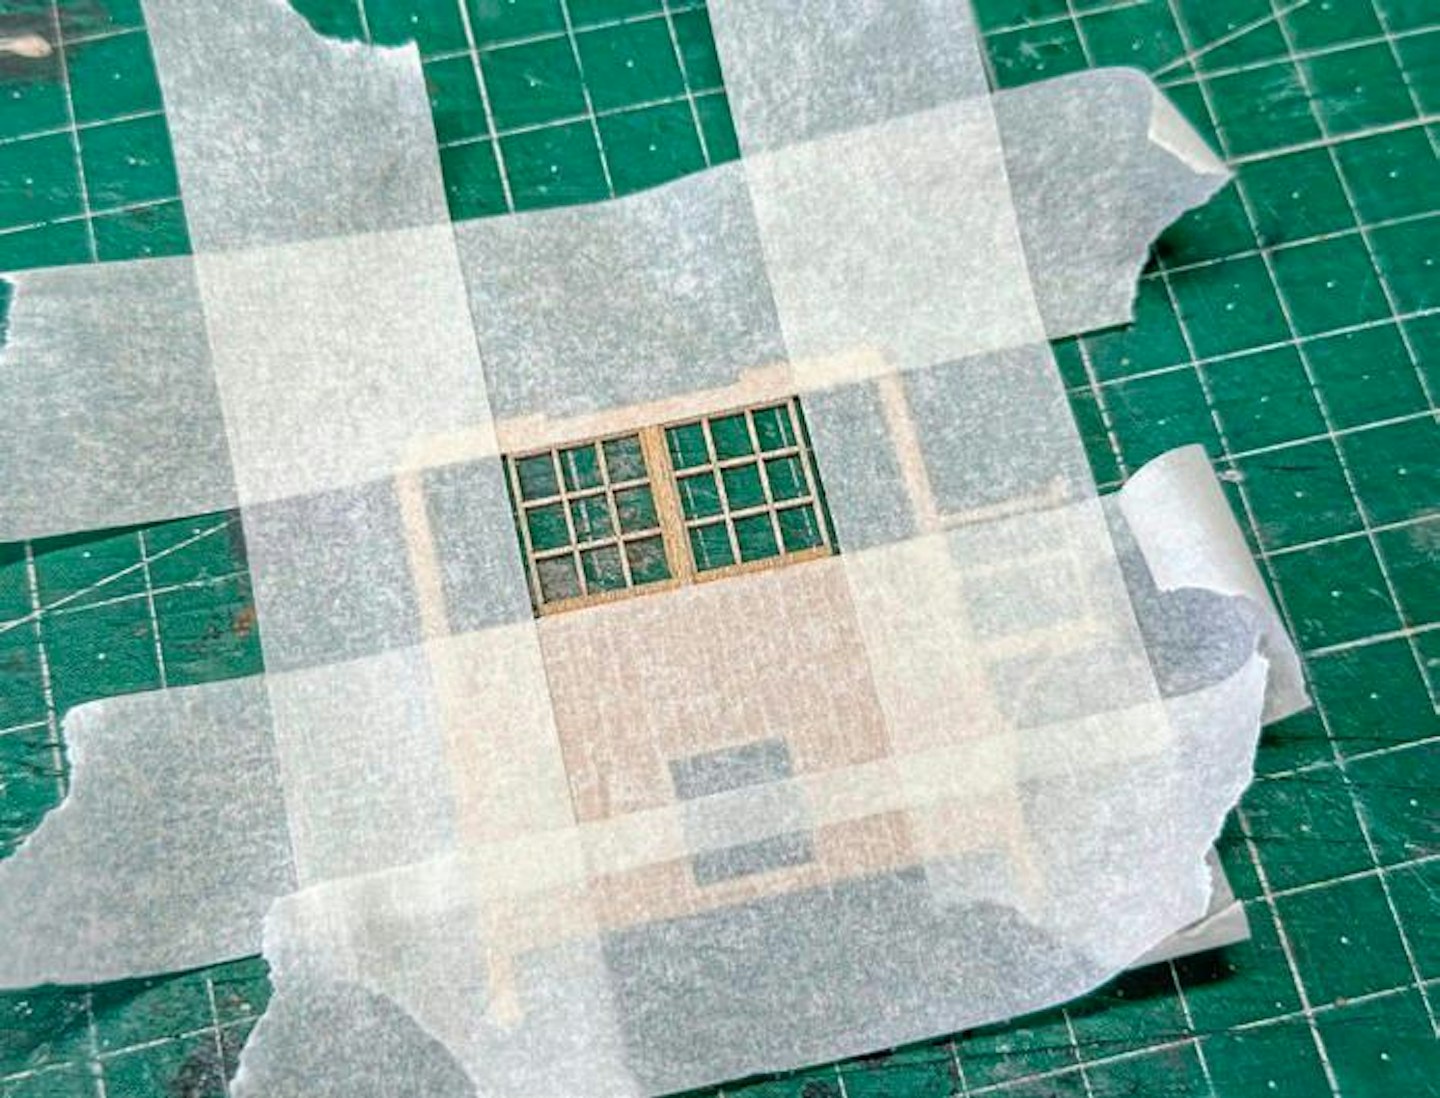
4 As an experiment I painted some of the parts before assembly using Halfords white primer for the window frames. Primer covers well, dries quickly and doesn’t clog up. Mask off areas as required.
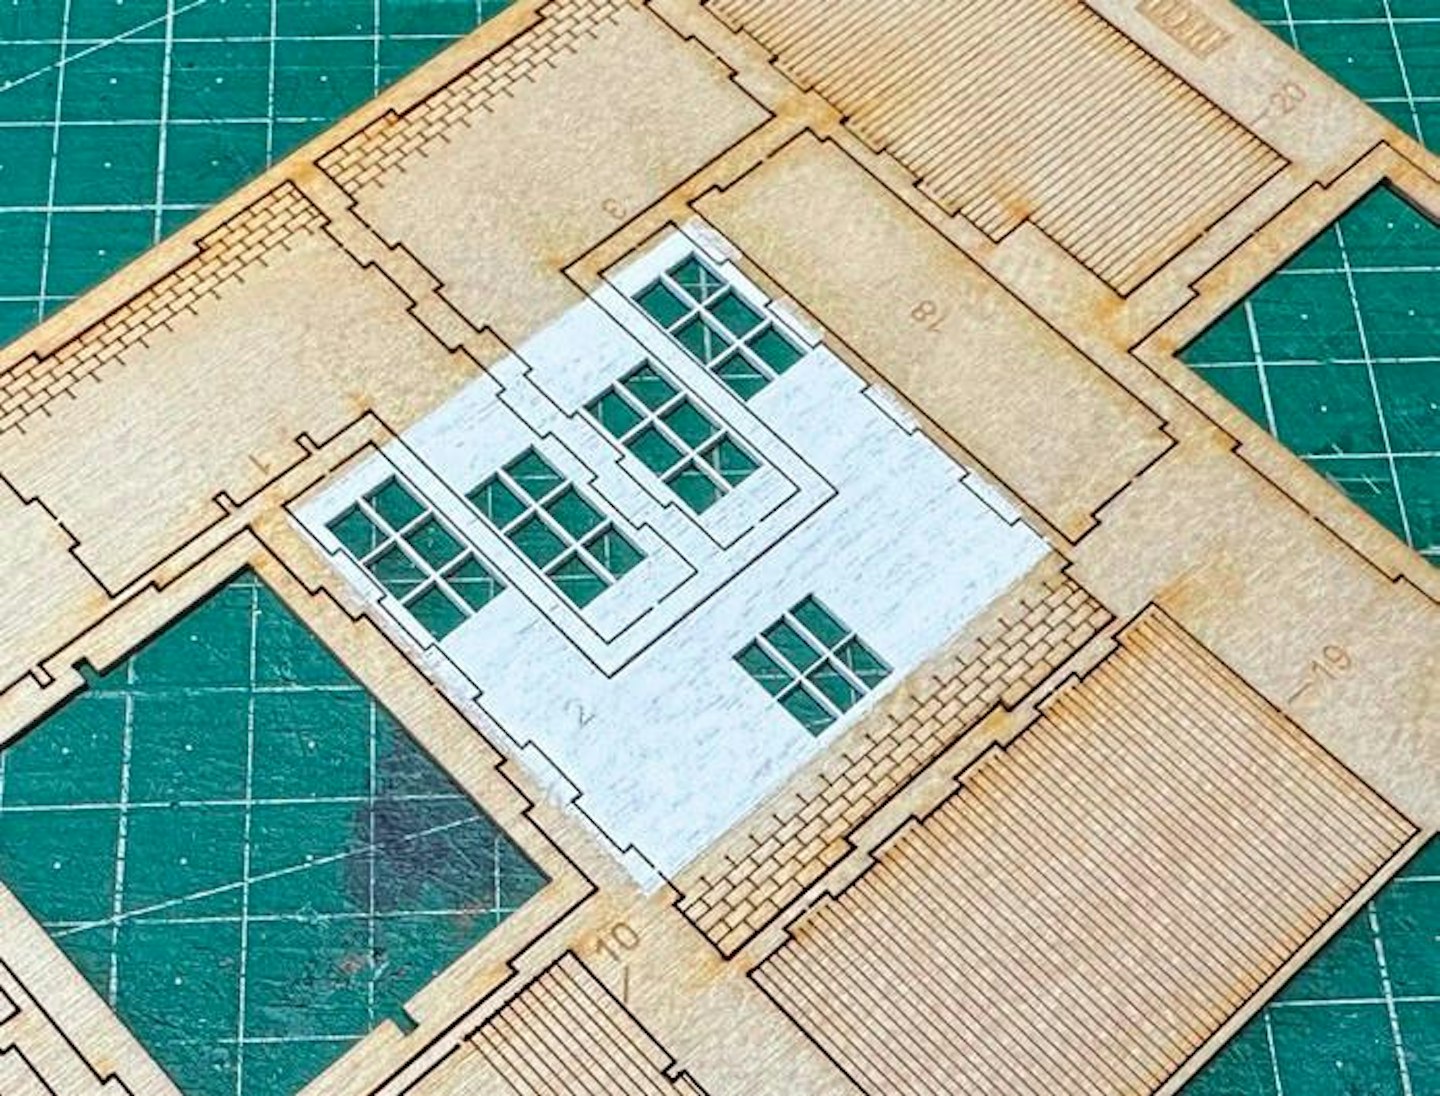
5 Here’s the result after a couple of quick coats of the white aerosol primer. It’s best to use aerosol paints outdoors, preferably on a still day, as the fumes can be toxic.
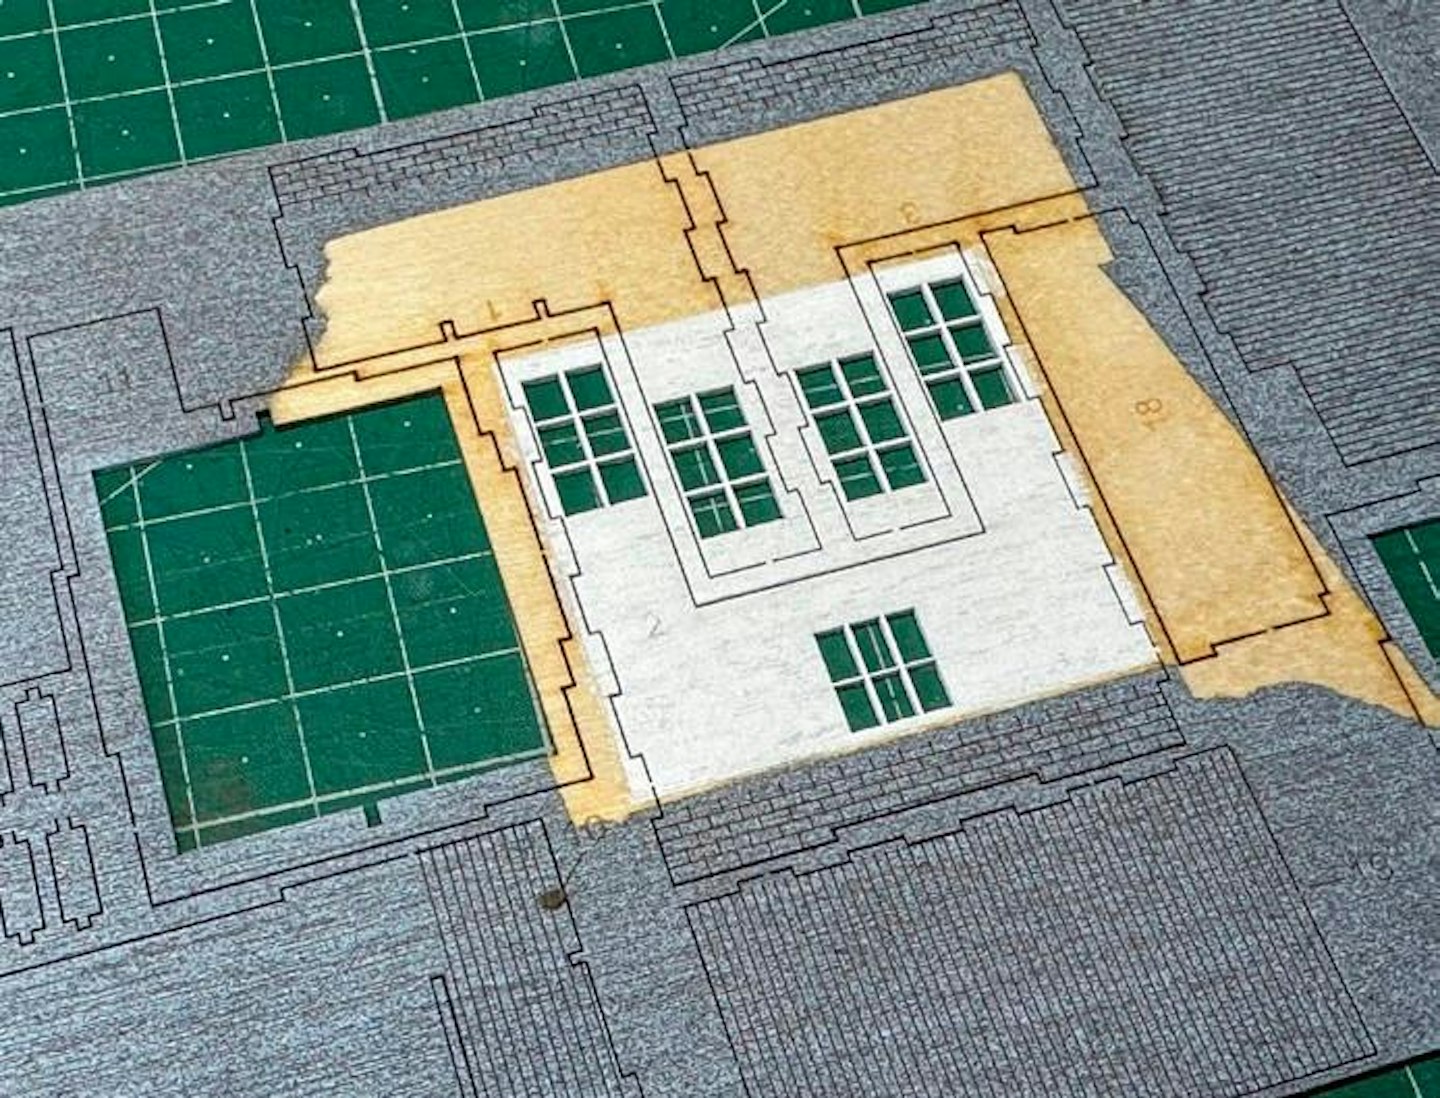
6 I also masked off other areas that needed to retain a bare wood finish, then primed other parts, such as the roof panels and brick wall sections with Halfords Grey Primer, followed by a dusting of matt black.
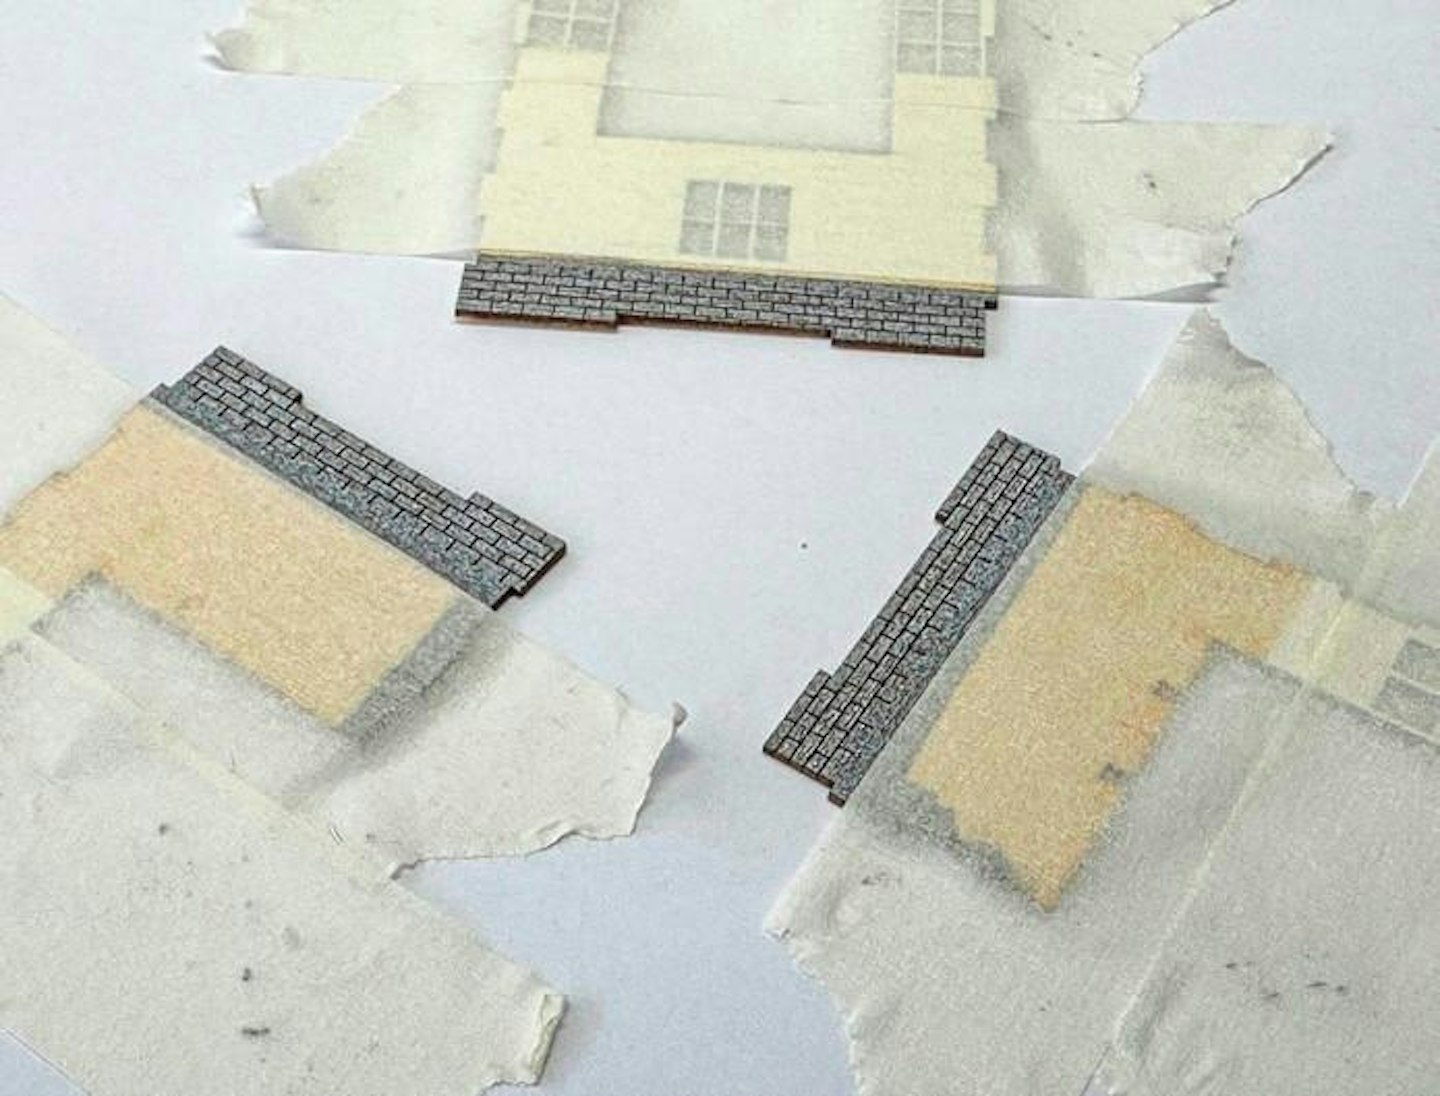
7 This isn’t essential, of course – it was more of an experiment. But I figured that the dark grey/ black coating would provide an ideal colour for the mortar courses. You may, of course, just decide to paint everything after assembly.
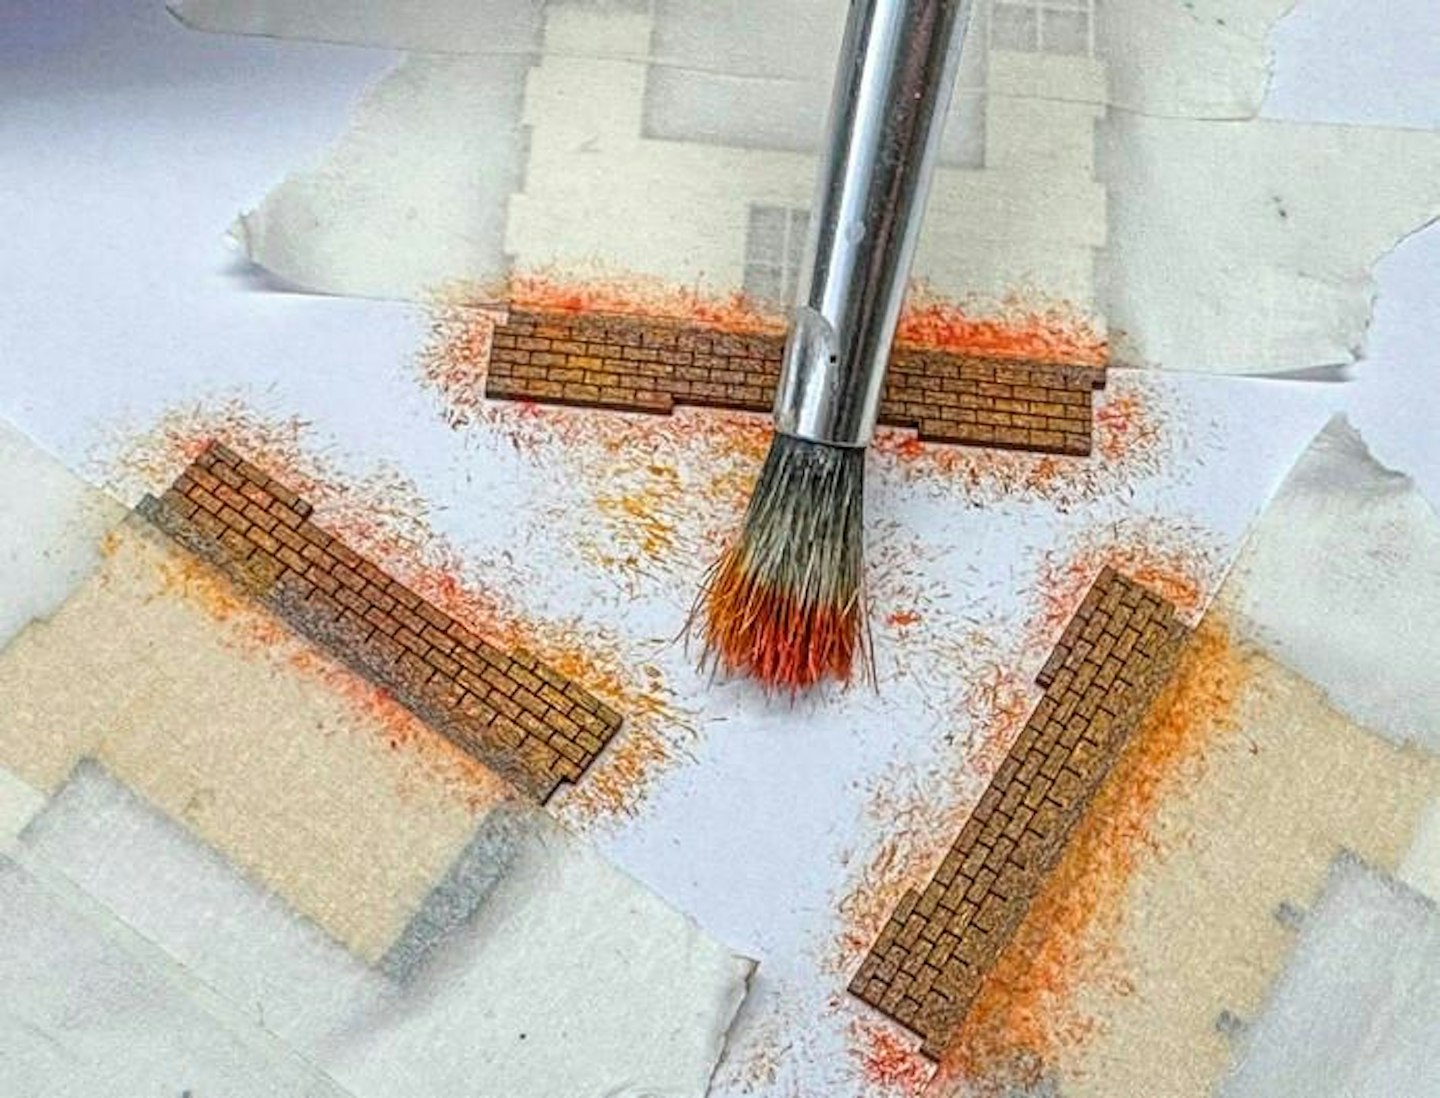
8 Using different shades of red-brown acrylic paints and a stiff flat brush, I dry-brushed the areas of masonry to pick out the bricks without disturbing the dark primer in the recessed mortar courses.
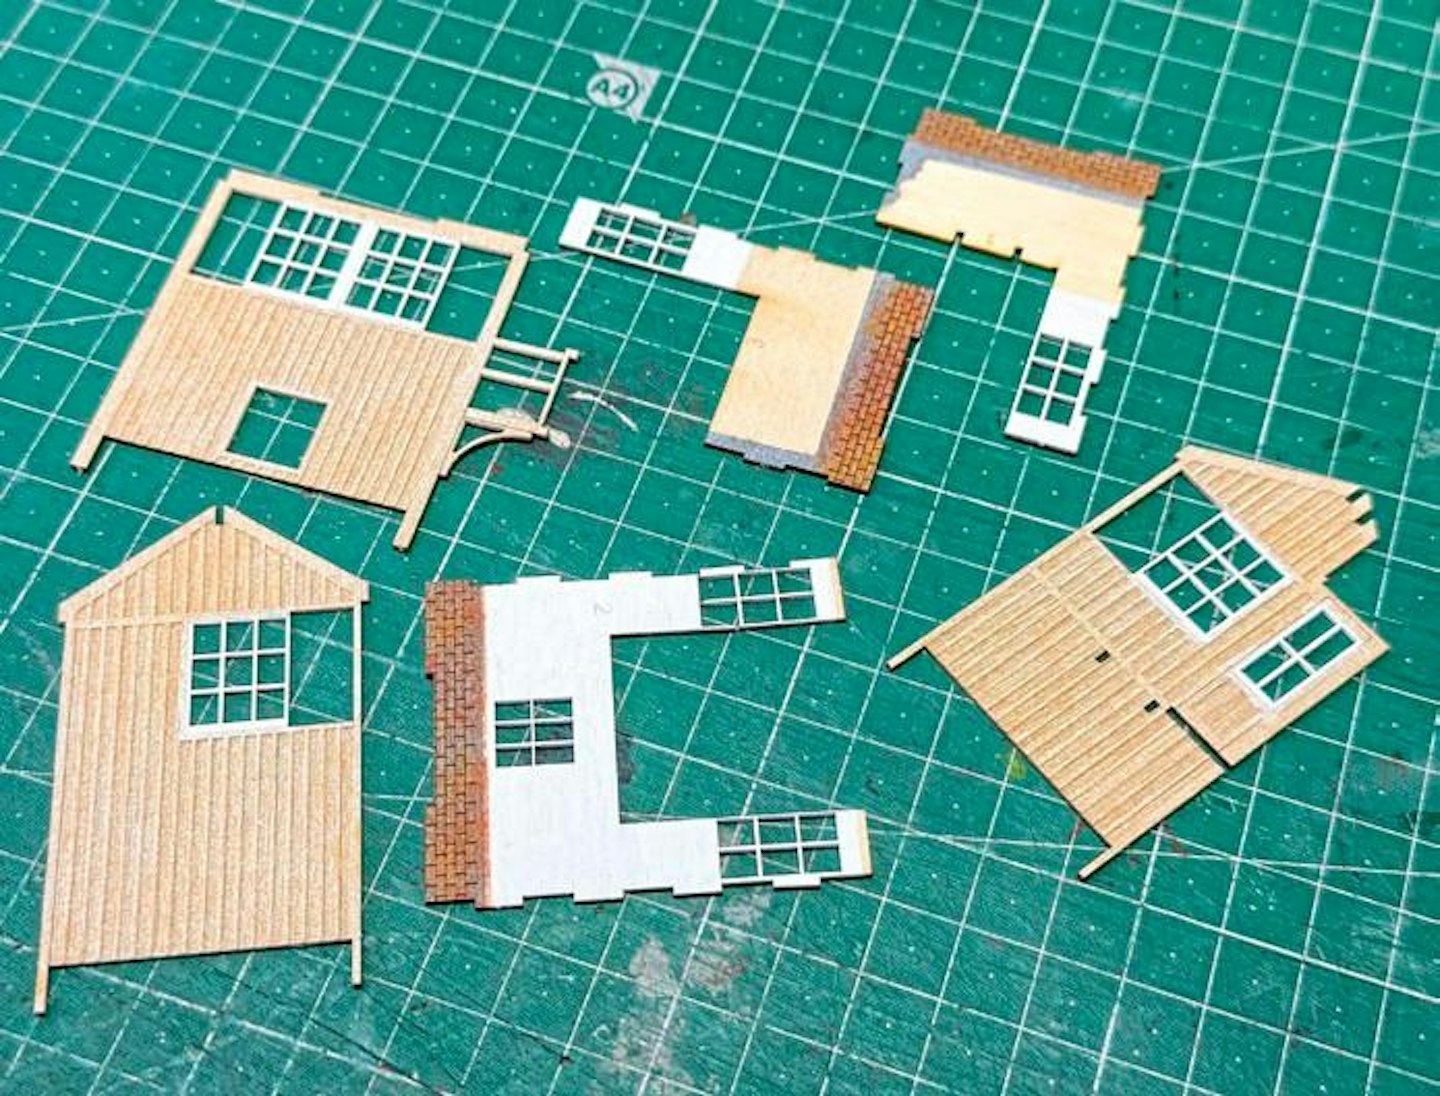
9 Here are the main components for the four walls, with the brickwork and windows pre-painted. All ready for assembly to begin! A trial run, without glue, is recommended to ensure everything slots together. With this kit everything fitted perfectly.
10 Following Peco’s instructions, assembly began. Special laser-cut kit glues exist, but I found that PVA glue is equally effective. Gorilla’s Wood Glue produced a good bond very quickly indeed, and any excess can be wiped away with a damp cloth before it dries.
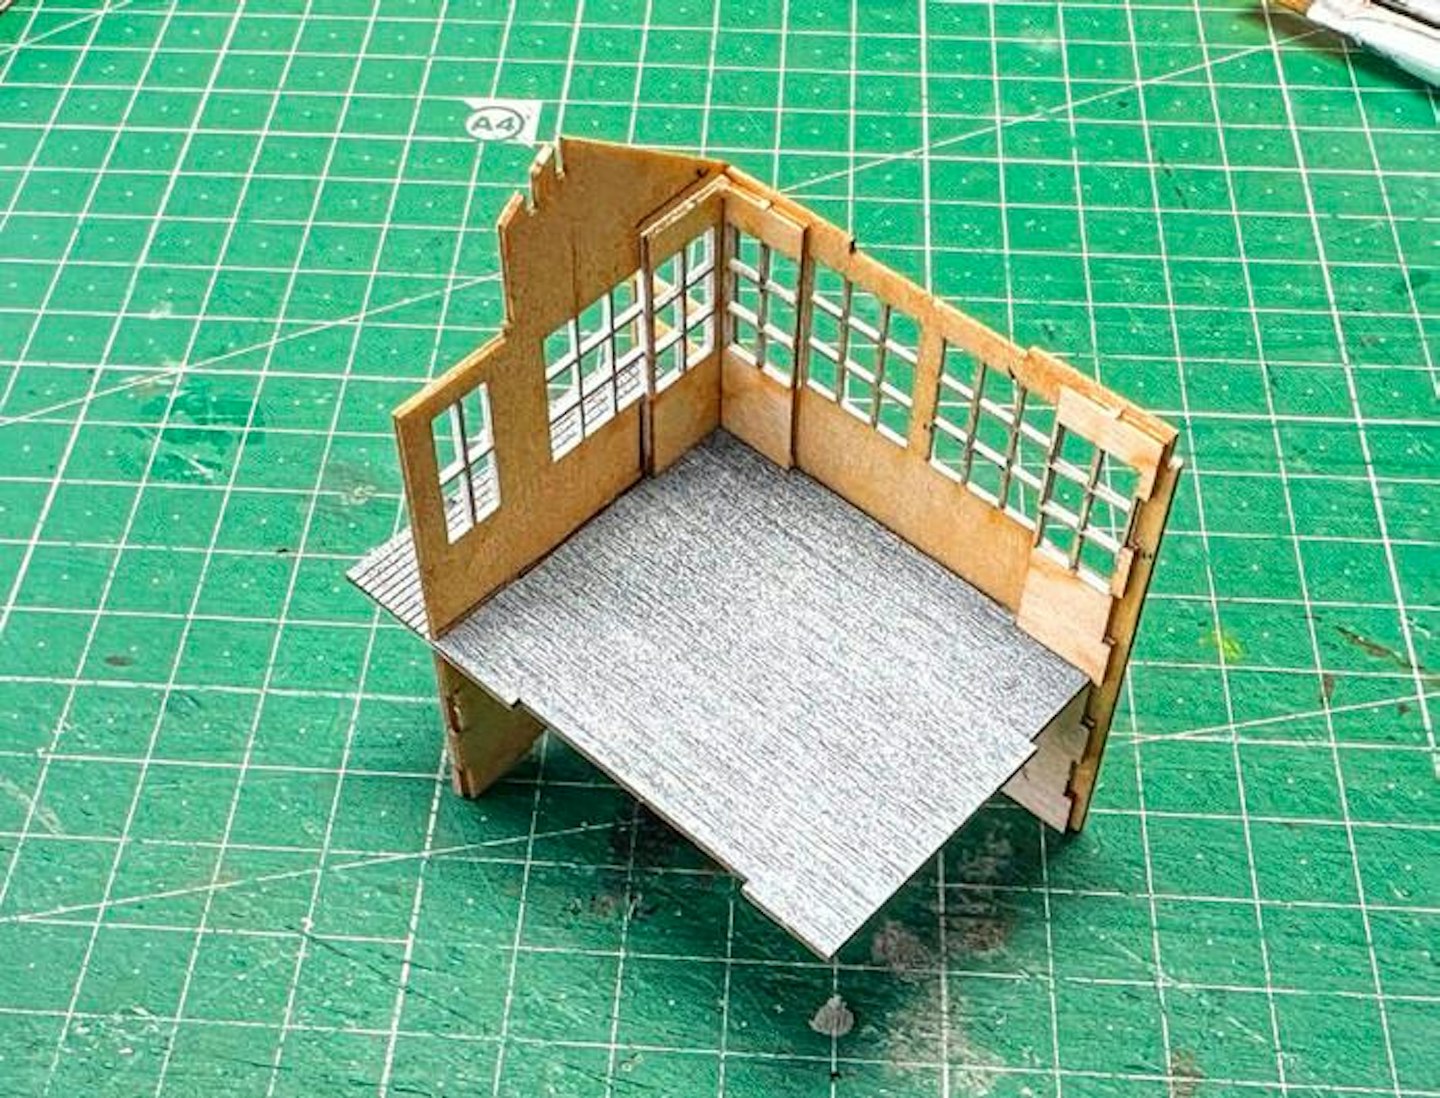
11 The walls are erected around the inner floor. I found generic decorator’s masking tape great for holding things in place while the glue cured. Don’t leave the tape in place too long, as it may leave behind stubborn residue.

12 With three of the four walls in position, the character of the signal box is beginning to show. It doesn’t hurt to check the corner angles with a set square or simply use the grid pattern on your cutting mat as a reference.
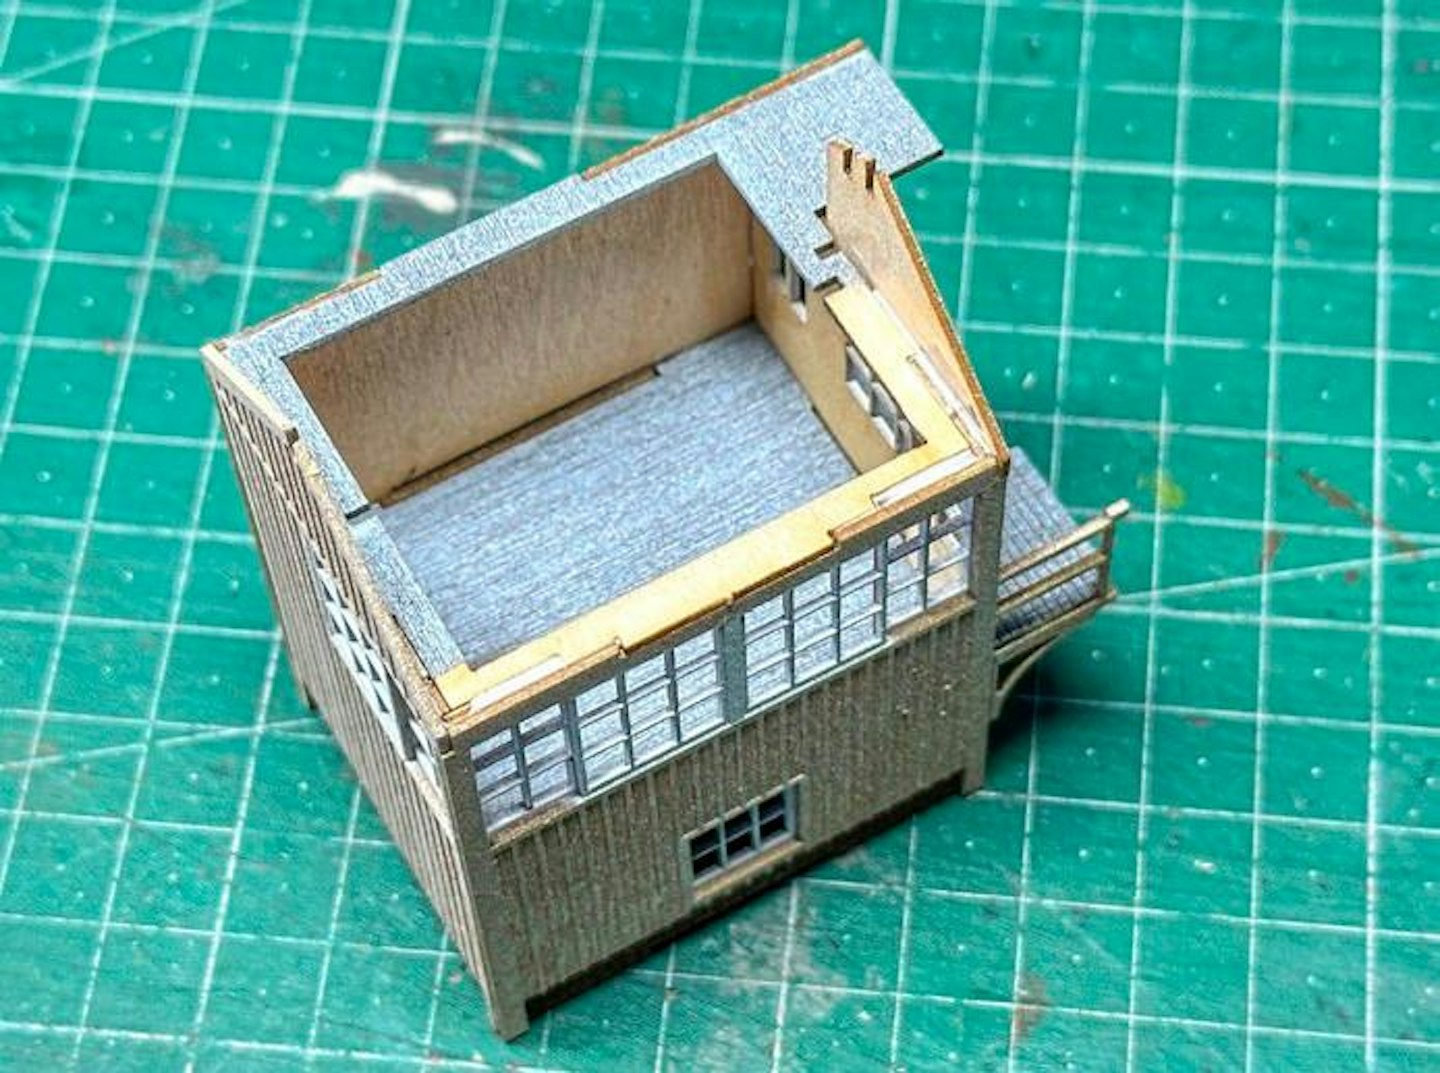
13 Once all the walls are in place, the upper internal former is installed, creating an impressively rugged construction which should resist warping or distortion in future, if the model is kept in a stable environment.
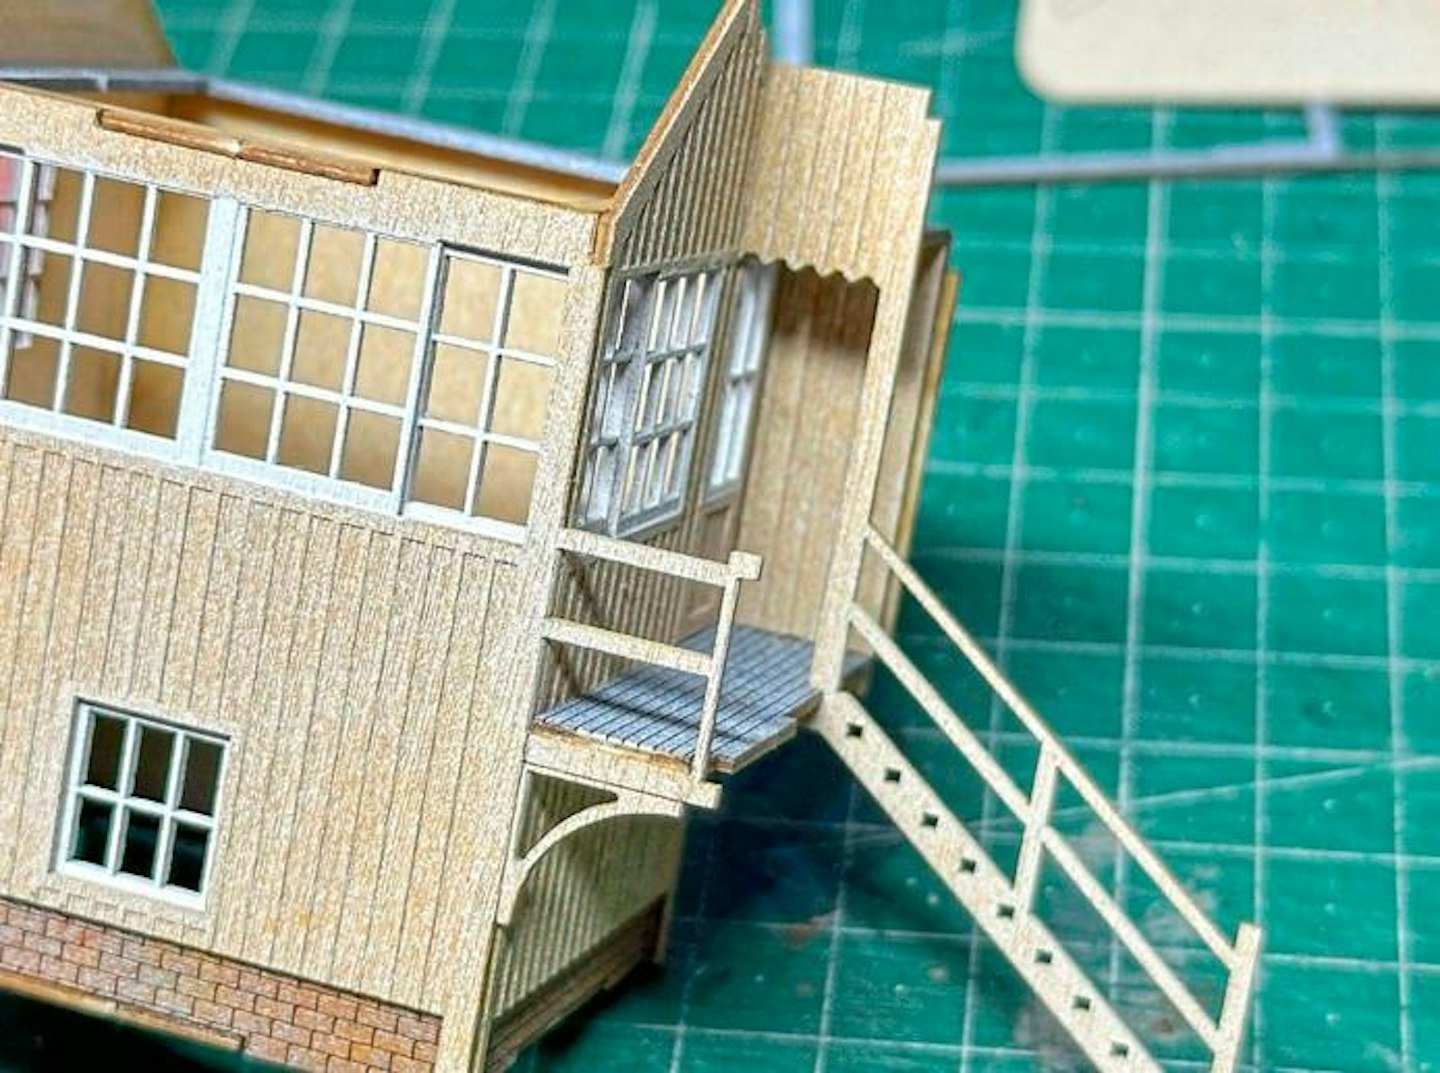
14 The trickiest part of the build was about to begin, as the staircase is formed. The first section consists of one banister frame, incorporated into the vestibule framework.
COLOUR THEORY
Being of a certain age, I remember buildings in BR Southern region cream and green, the latter in particular being almost copper oxide in colour unlike what you see on preserved railways which almost certainly have far more love and attention than those in the steam era ever had. And of course, I imagine modern exterior paints are far better and hardier.
Luckily there are several wonderful books available these days, in colour, which make a great window into the past, allowing us to see what colours were really like, subject to the limitations of old colour film and scanning.
Therefore, rather than rely on authentic railway colour paints to represent BR’s Southern region colours of the pre-1965 era, I prefer to use Humbrol 103 cream and Humbrol 101 mid-green, which provide a softer, more lived-in appearance, suggesting a building that’s probably not had a fresh coat of paint for several years.
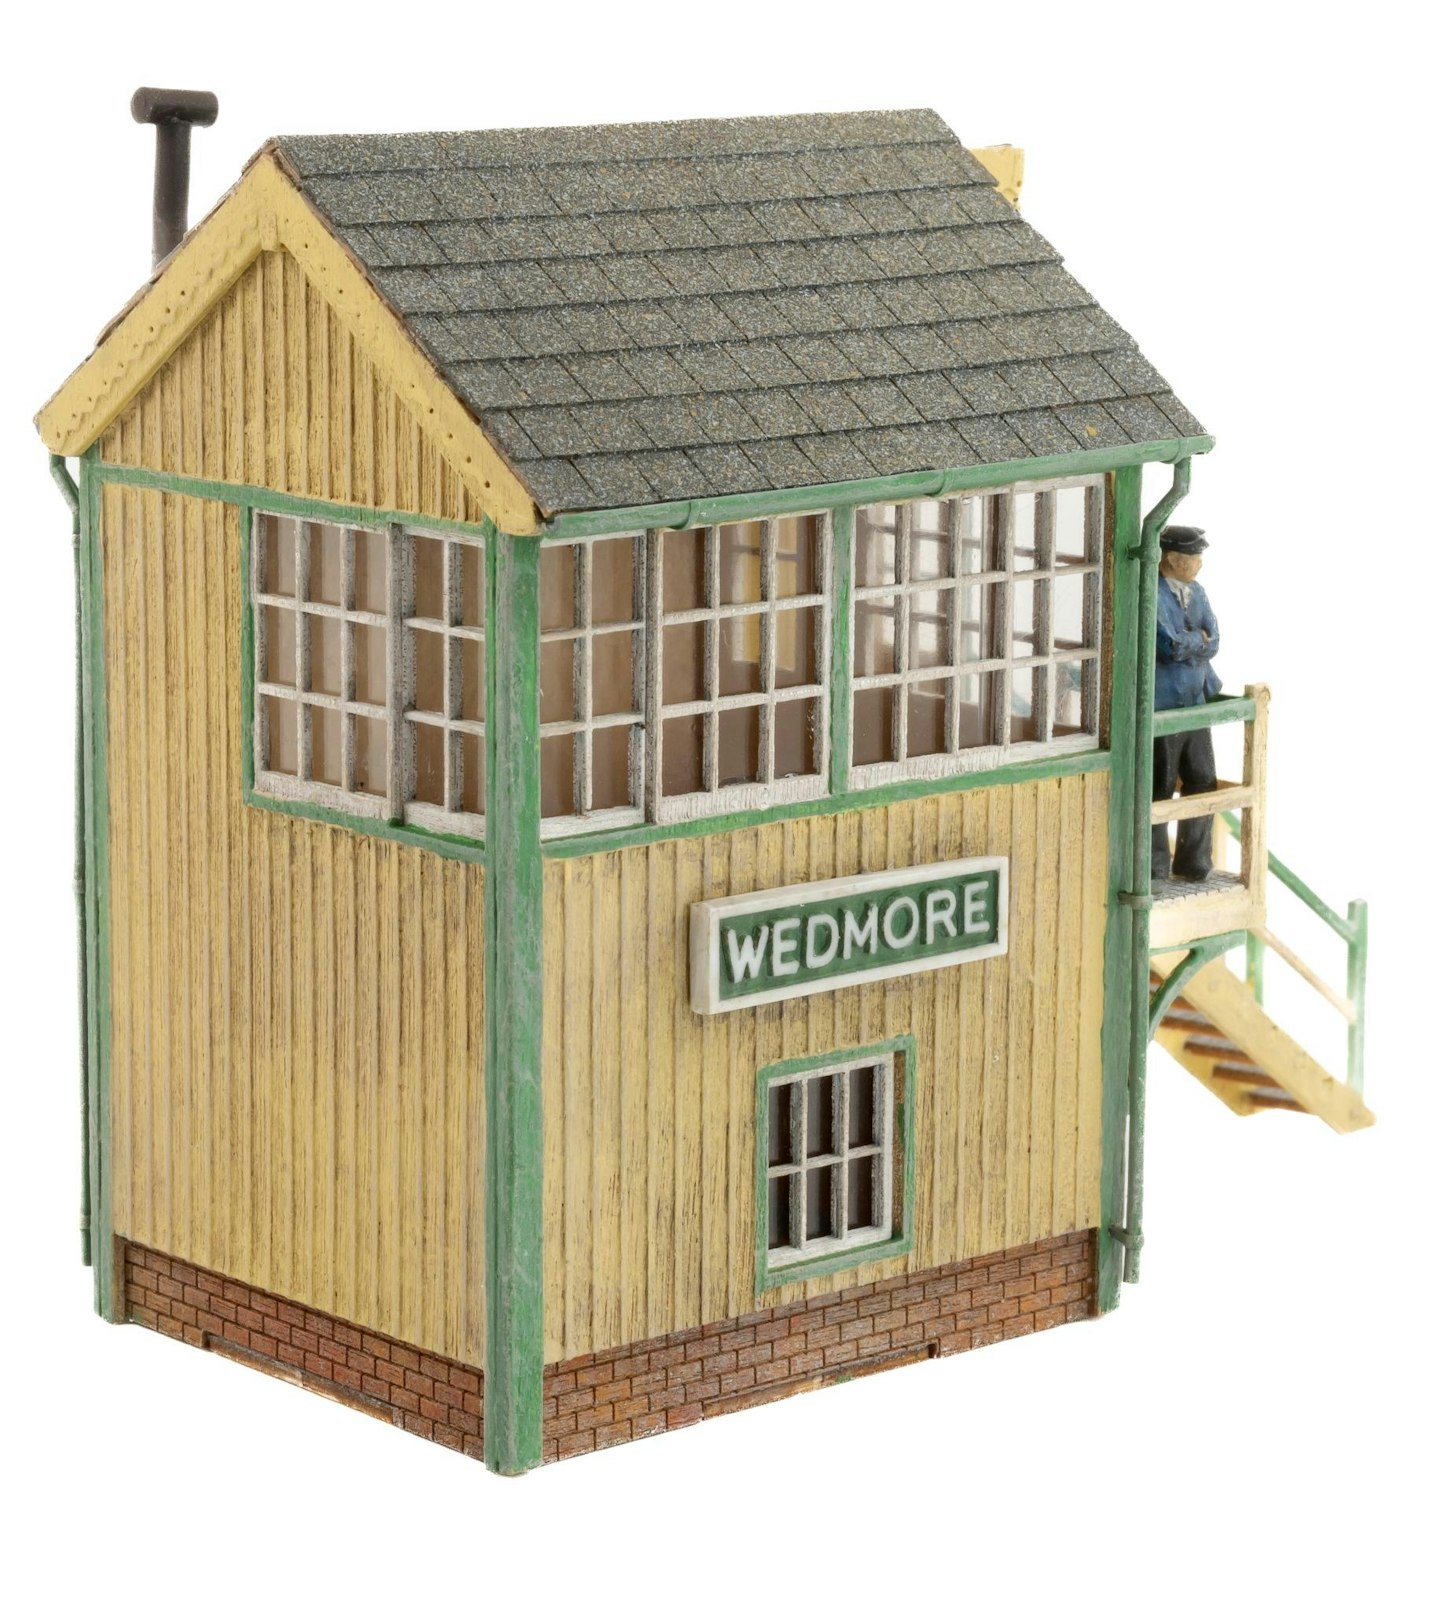
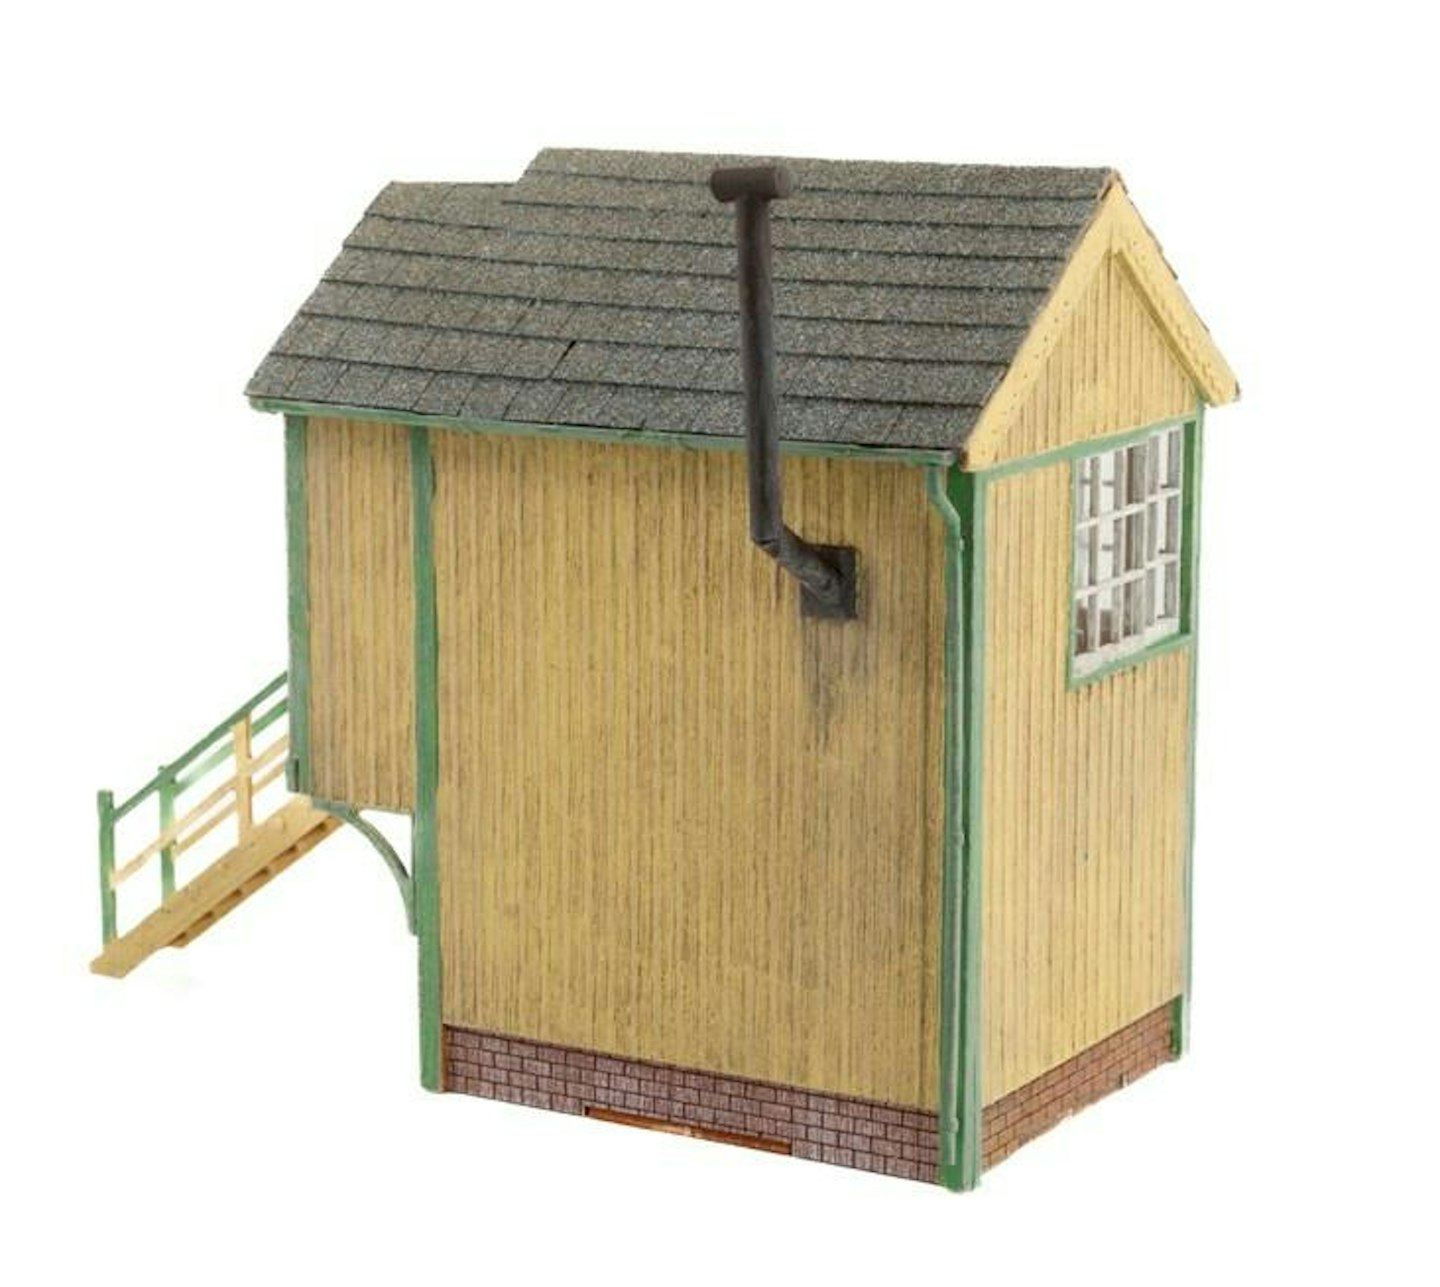
Peco’s laser-cut wood kit may be based on a Highland Railway prototype, but similar structures could be found in other areas of Britain.

15 Luckily, the stair treads fit firmly into the side frame, so they don’t slop around. However, getting the opposite banister frame attached was a little trying. The trick is to be nice and calm, and with a bit of fettling I got there.
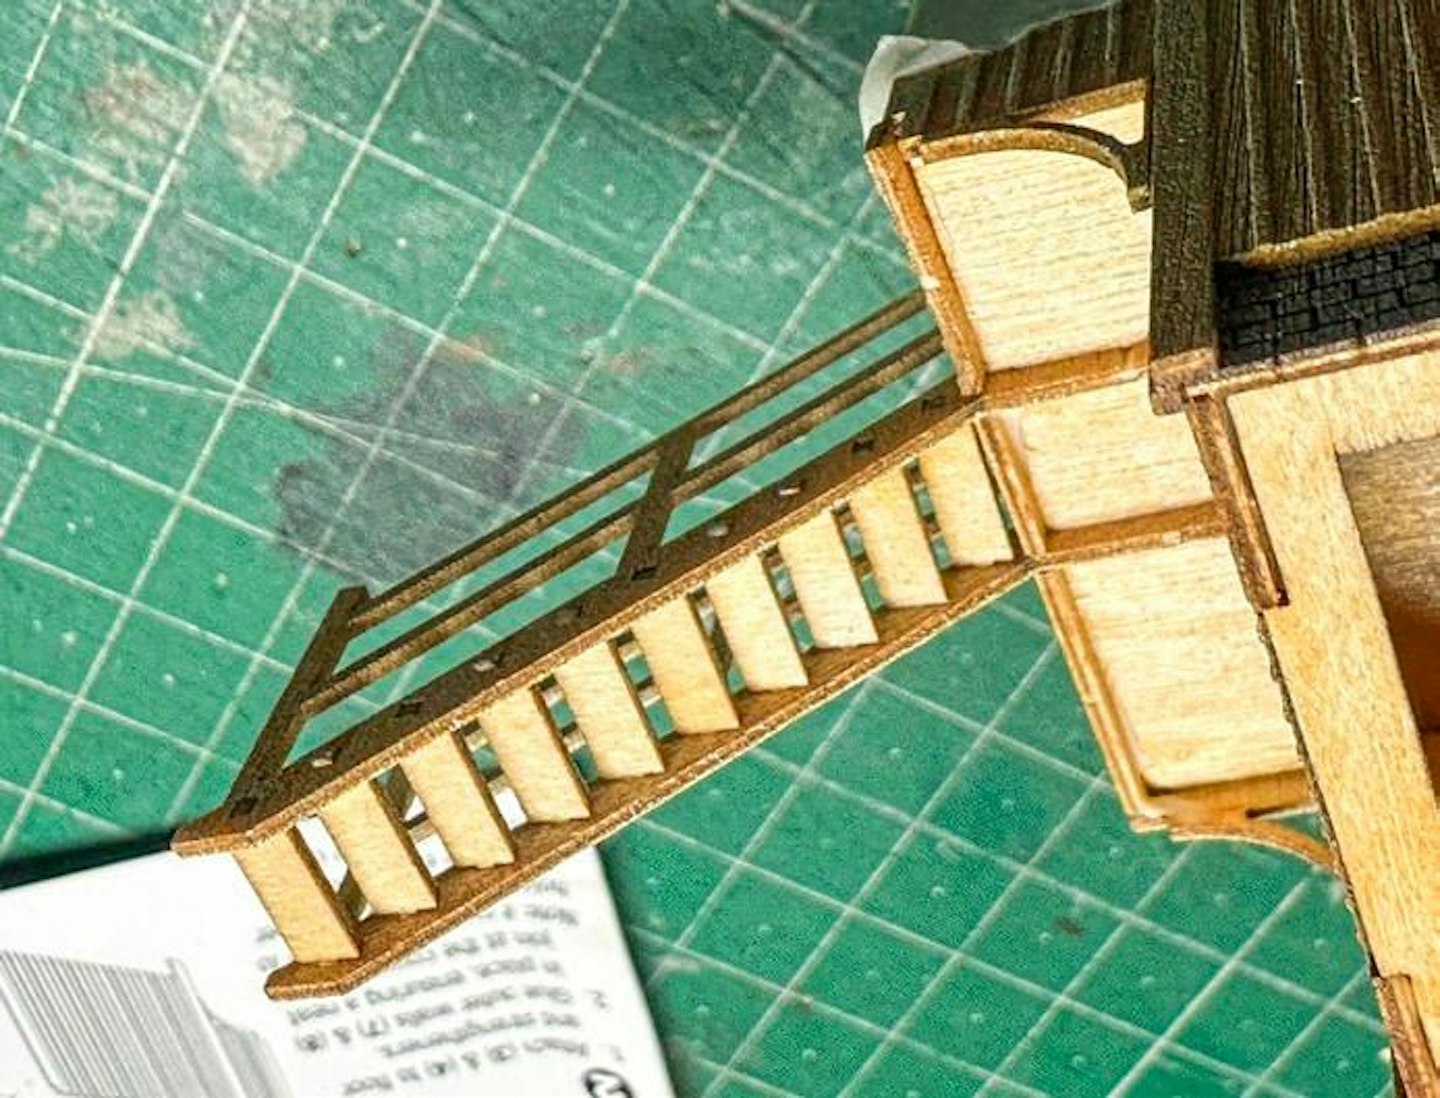
16 Luckily the thin wood is flexible and can take a little abuse as you shoehorn the steps into the locating holes.
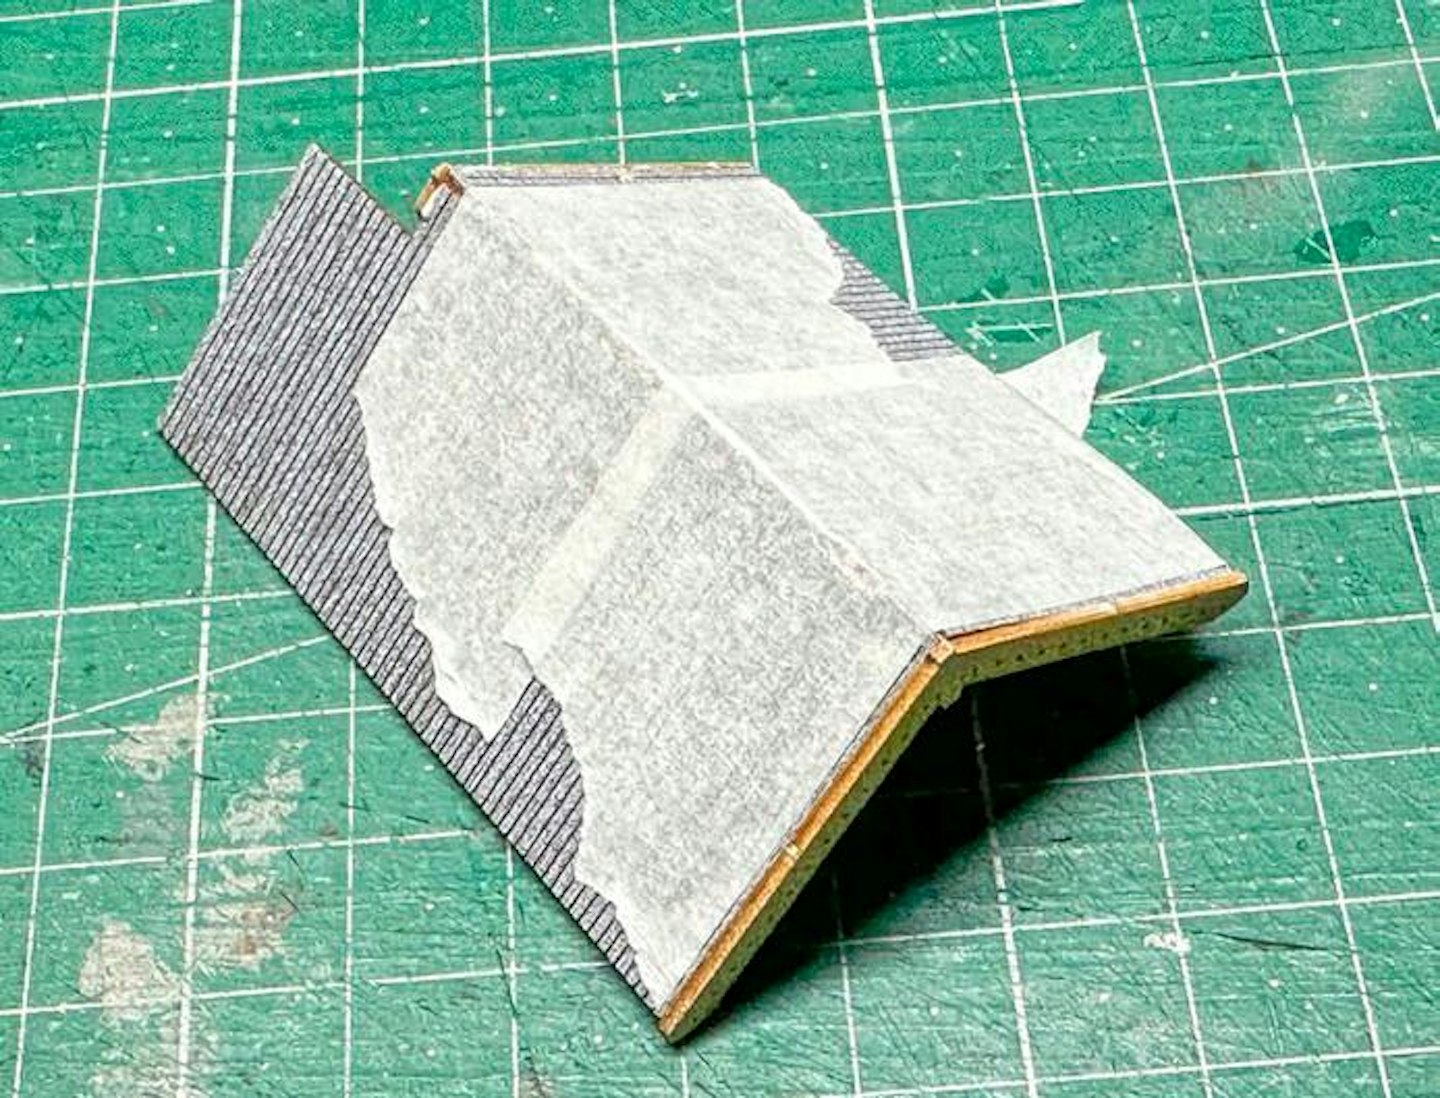
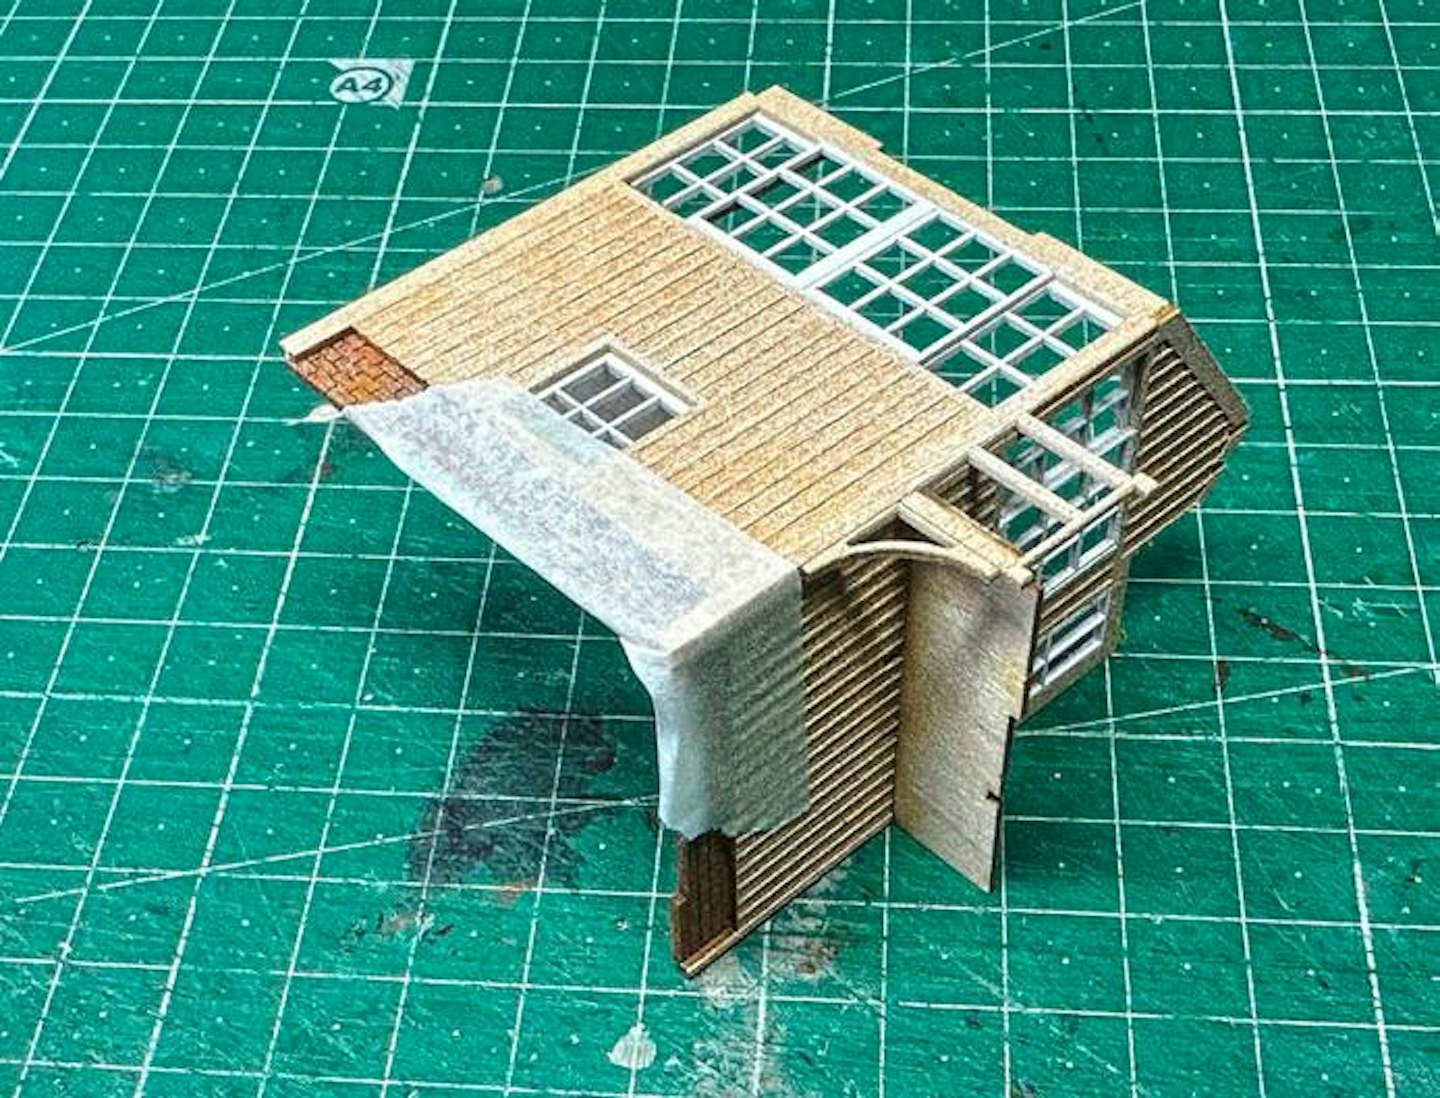
17 I kept the roof removable, so at a later stage I can add a proper interior. I also didn’t want to glaze the model until everything was painted and weathered. Note the masking tape keeping the panels together as the glue set.
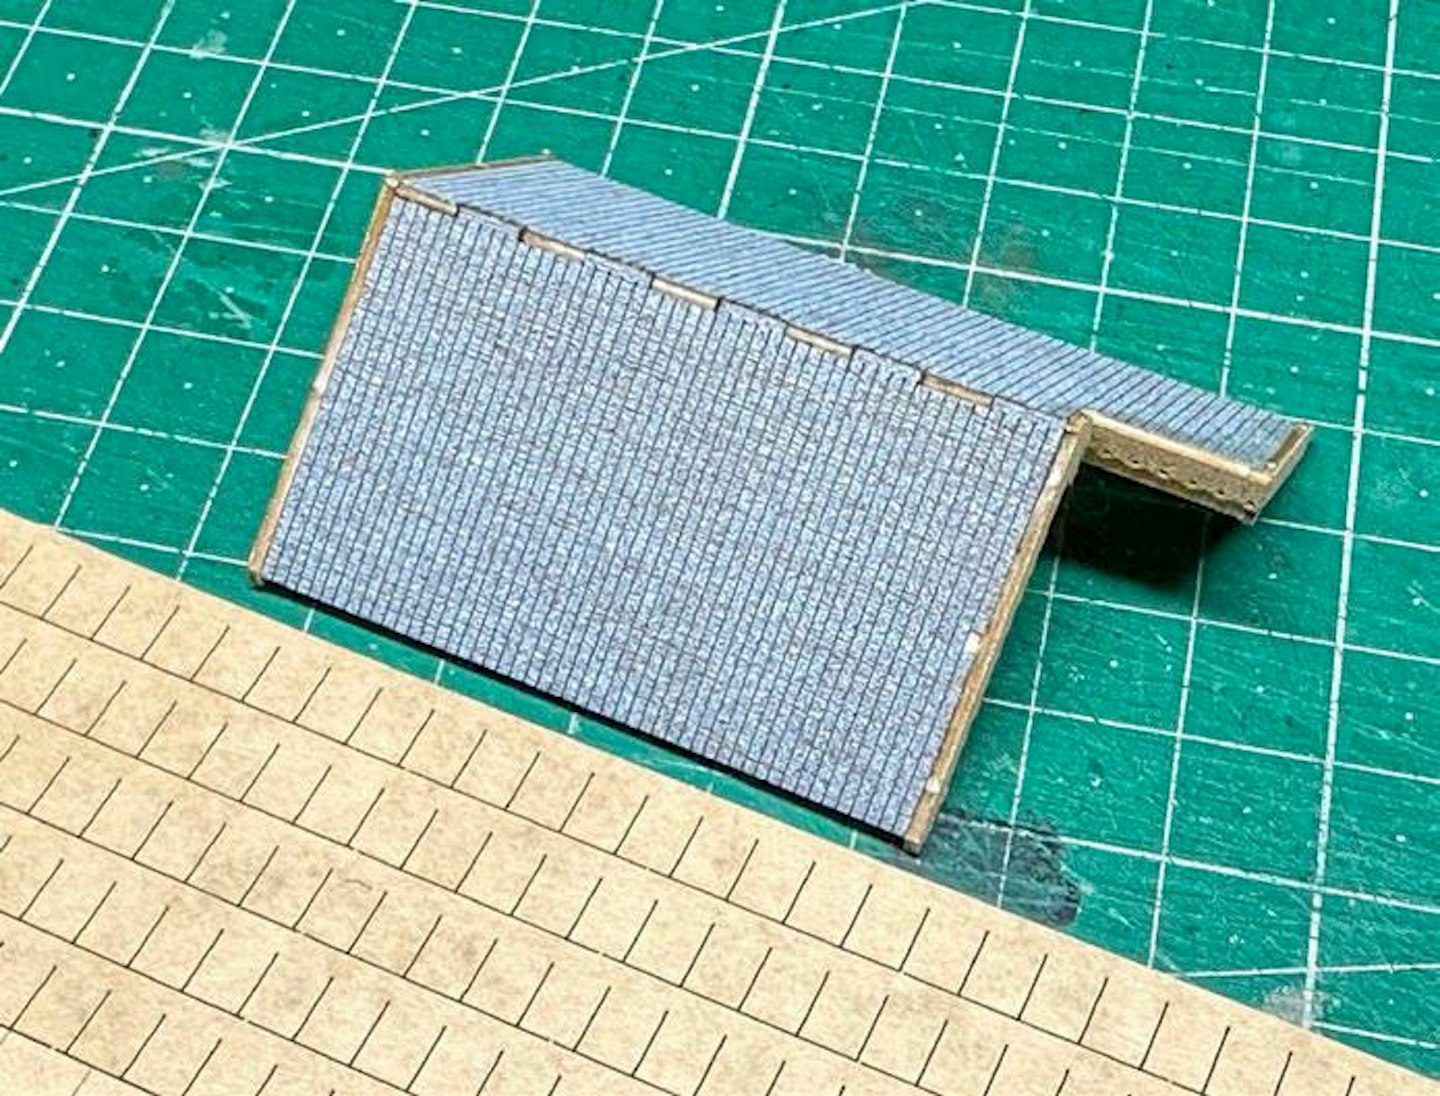
18 The kit parts depict corrugated iron sheets or something similar, while the plastic alternative features moulded slate/tile detail, but it must be cut to size. Instead, I opted for laser-cut roof slates from the Scale Model Scenery range.

19 Applying the Scale Model Scenery roof slates is straightforward, taking around 20 minutes to treat the whole roof, layering the strips from the lower edges upwards to the apex, bonding them with PVA, then adding a ridge tile strip.
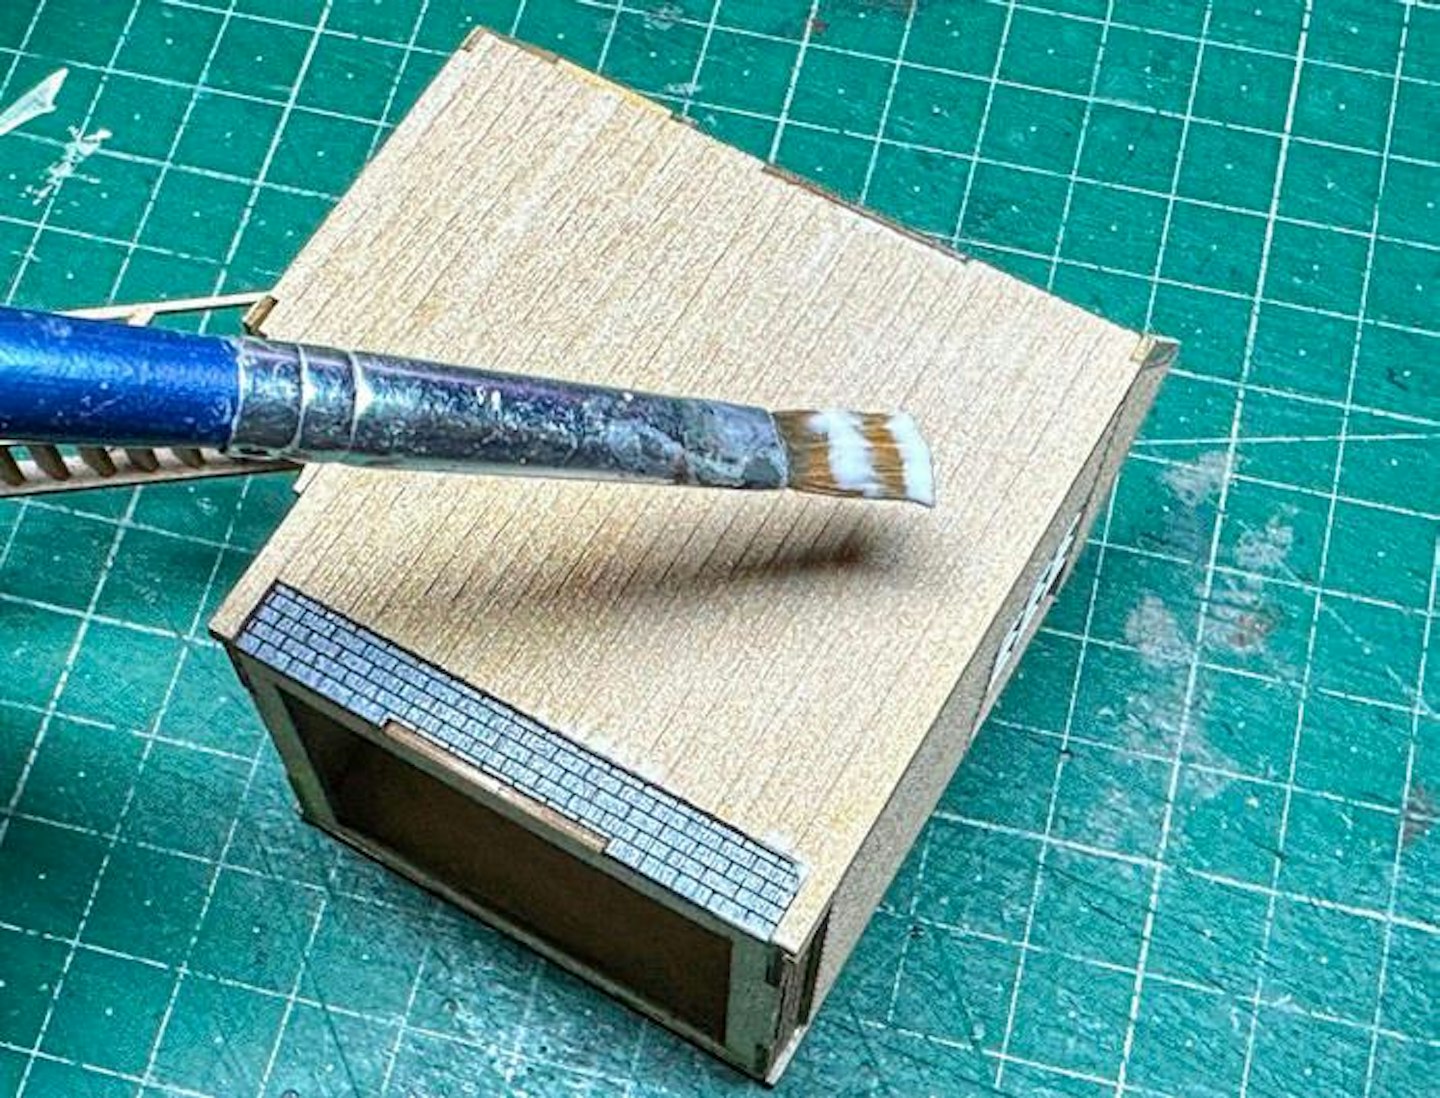
20 Finally, prior to painting, I applied a super-thin layer of PVA wood glue to the unpainted areas of the outer walls. This will partially fill the fine wood grain, while leaving the coarser laser-cut grain texture visible, for a more coherent appearance.
21 When the PVA had set, it felt like it had added strength to the building. I suggest having a little test to see what works best on a bit of the scrap plywood fret, for all PVA glues are different. I used Evo-Stik General Purpose PVA neat, as it’s a little less ‘gluey’ than Gorilla Glue.
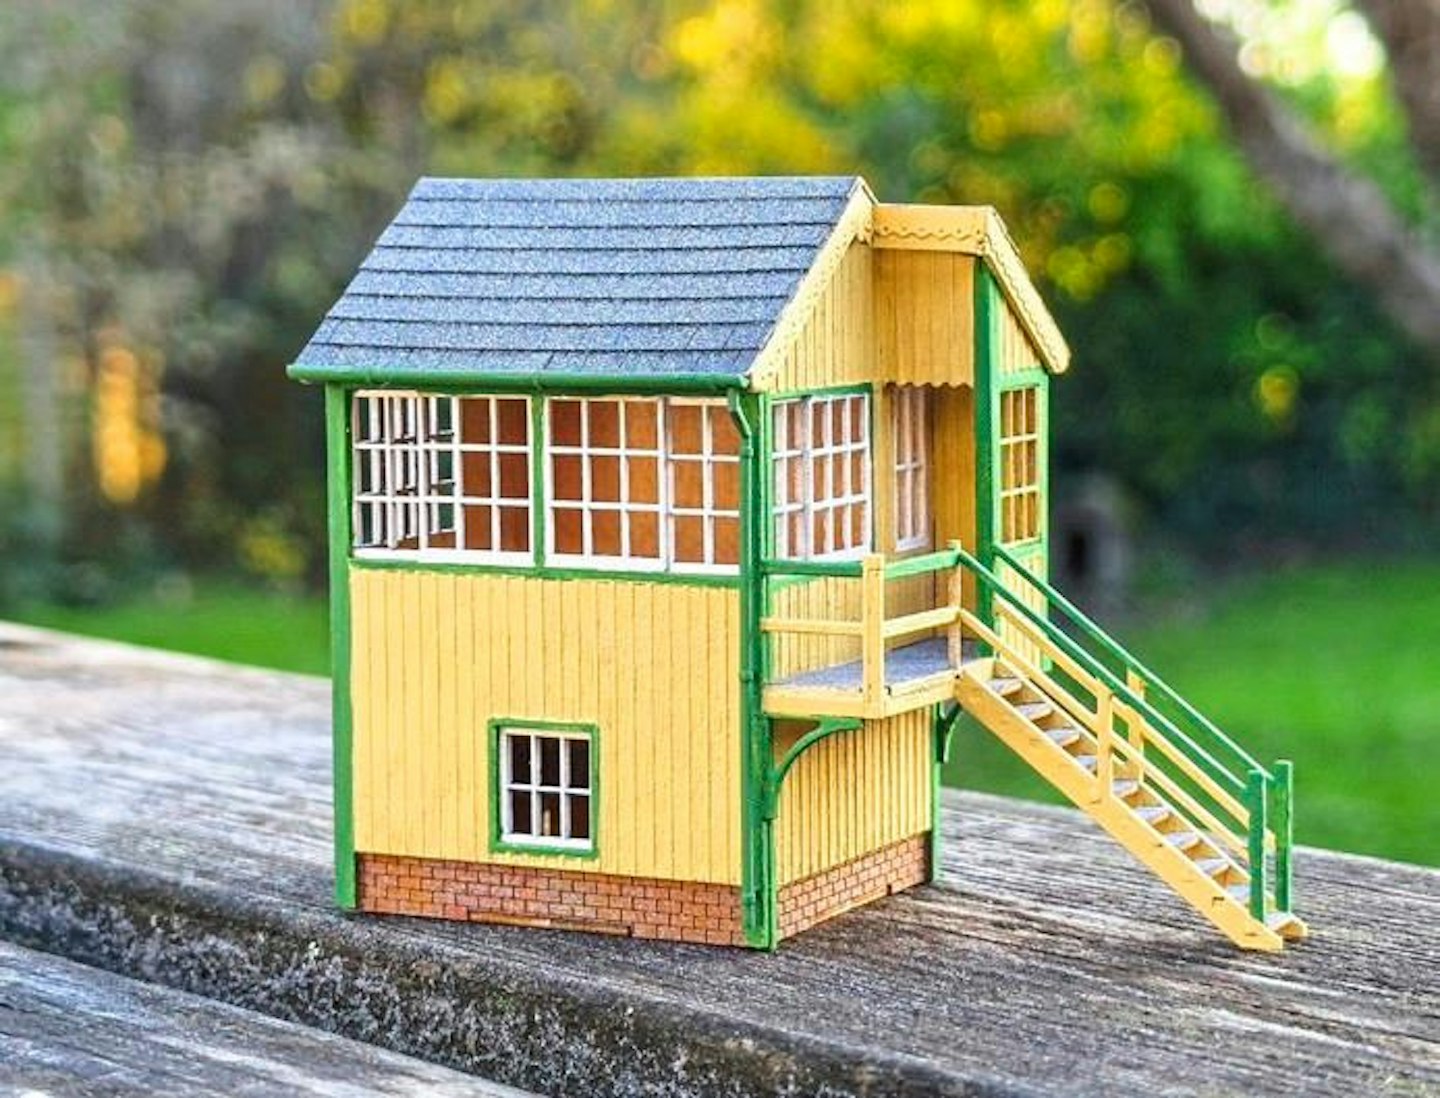
22 To represent BR Southern Region’s pre-1965 colours, I used Humbrol 103 cream and Humbrol 101 mid-green. I’ve used authentic paints in the past but find them too bold for a building that’s not been painted for years.
23 To be honest this probably wasn’t the easiest of buildings to paint, the wood texture making paint application a little trickier than with plastic. However, the wood does represent the real material more effectively.
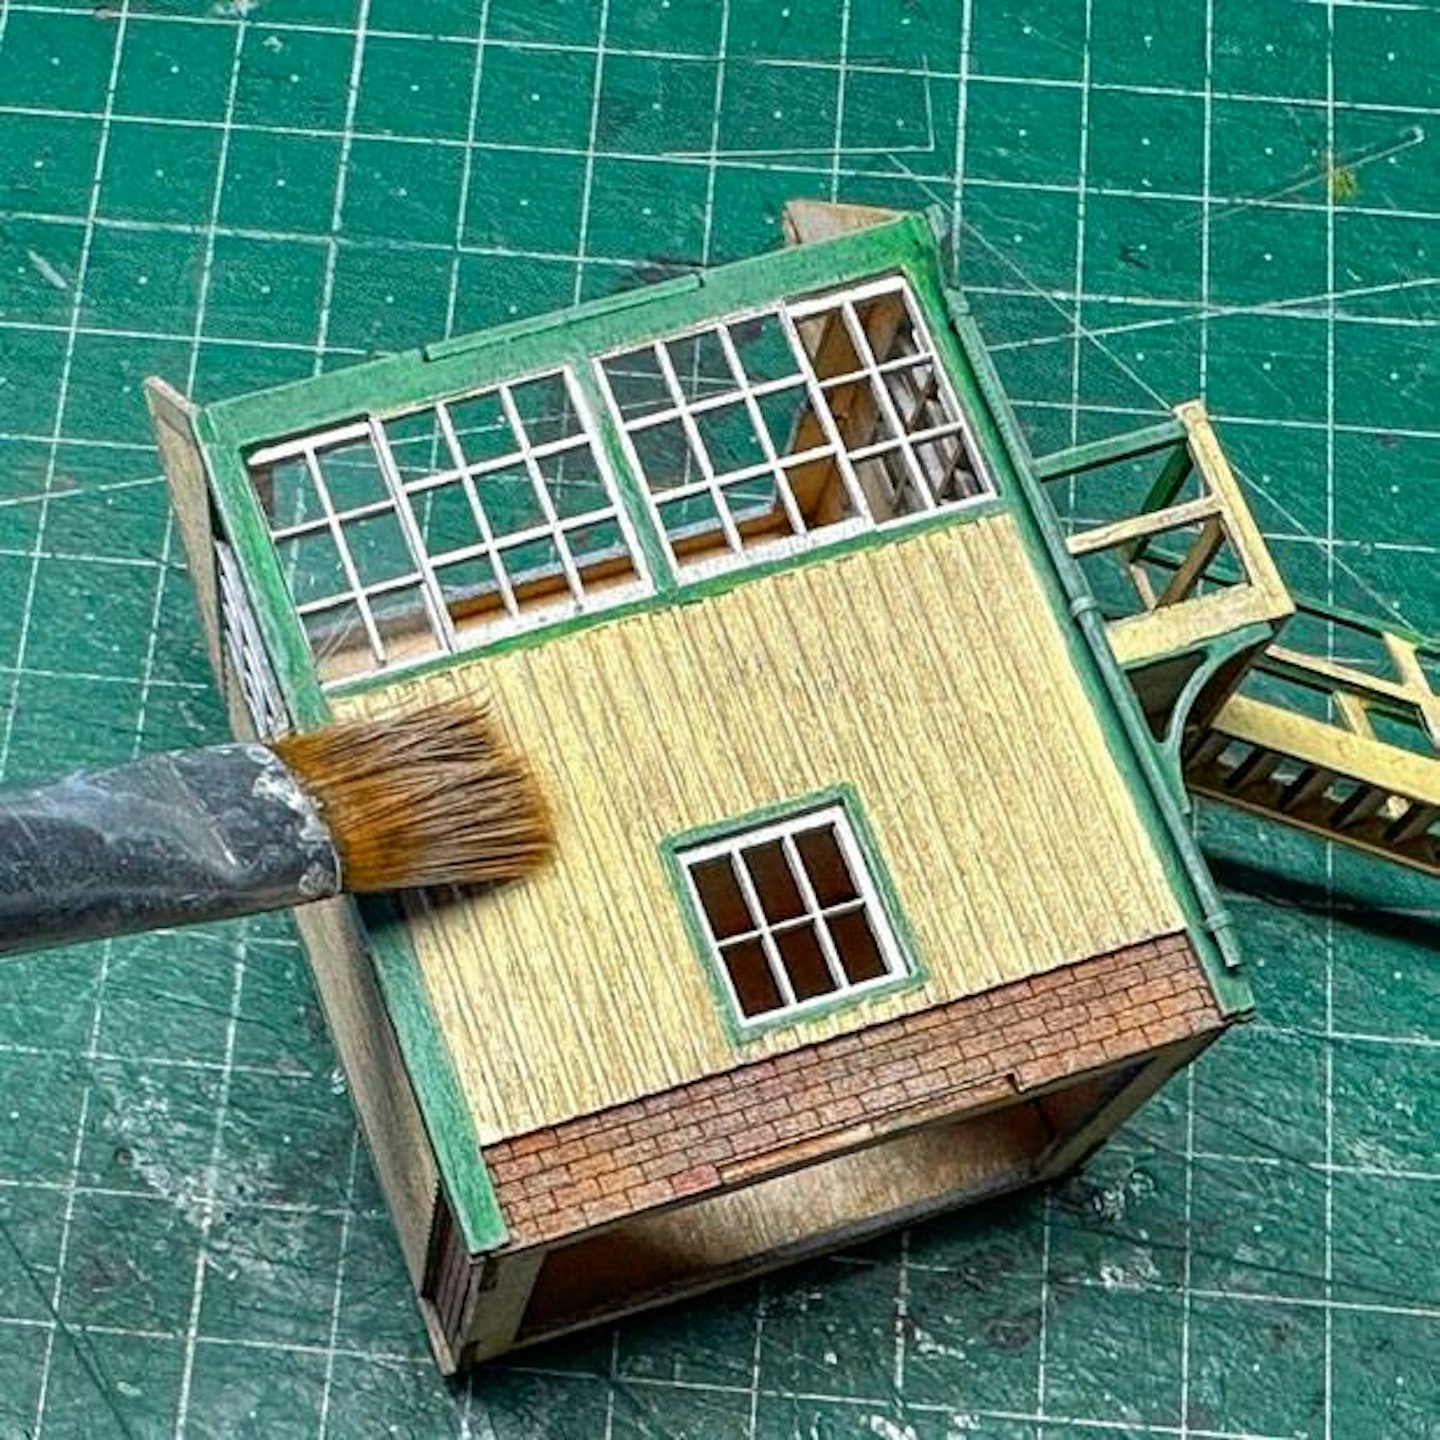
24 Weathering helped to disguise a less than-perfect paint job, and began with a thin wash of highly diluted poster paint, applied by brush. This was then dabbed off, thus leaving the pigment in the recessed areas. There followed a lightly dry-brushed coat of grey/beige interior matt emulsion from a tester pot.
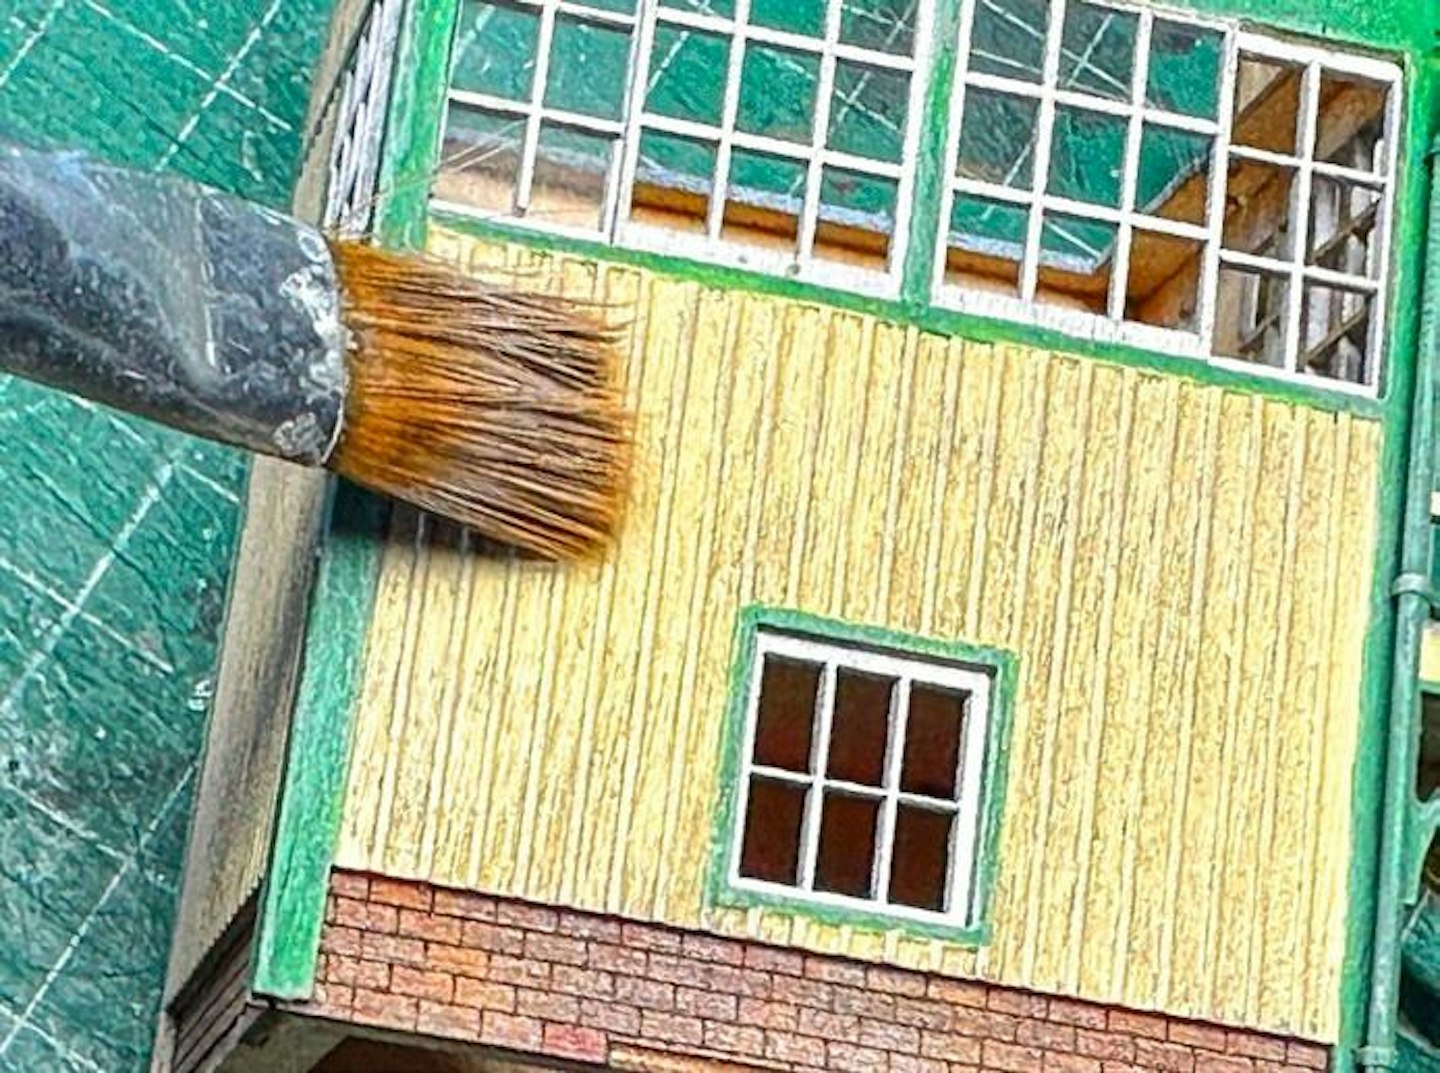
25 Dry-brushing a little grey/beige acts to soften the underlying colours a little, especially the green, with the added bonus that it hides wiggly paint lines effectively.
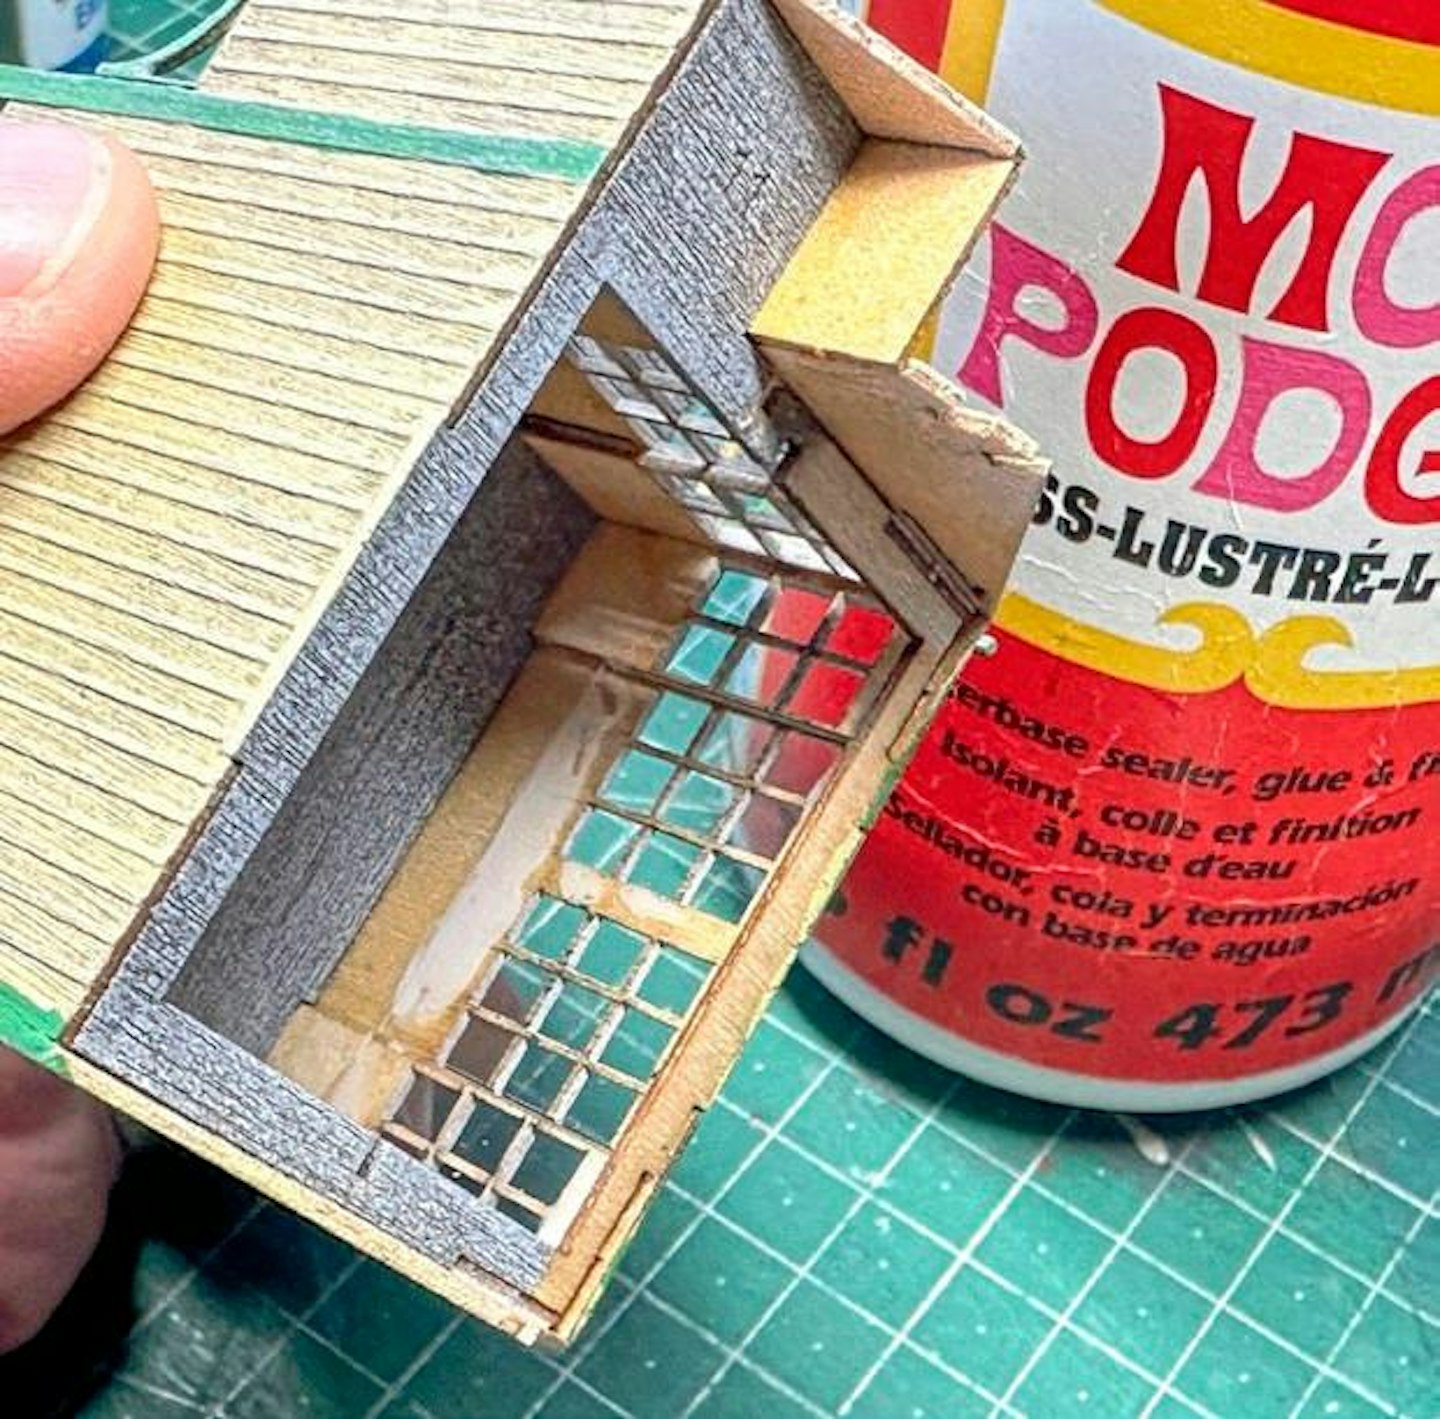
26 Once painting was complete, glazing followed as the final step. I used Modpodge’s Gloss formula – a most useful product which I often use to represent water. It’s like a thick PVA glue, but it dries completely clear and features a high degree of ‘tack’, making it perfect for attaching glazing, and if you do get a little on the glazing where you don’t want it, it hardly shows once set.
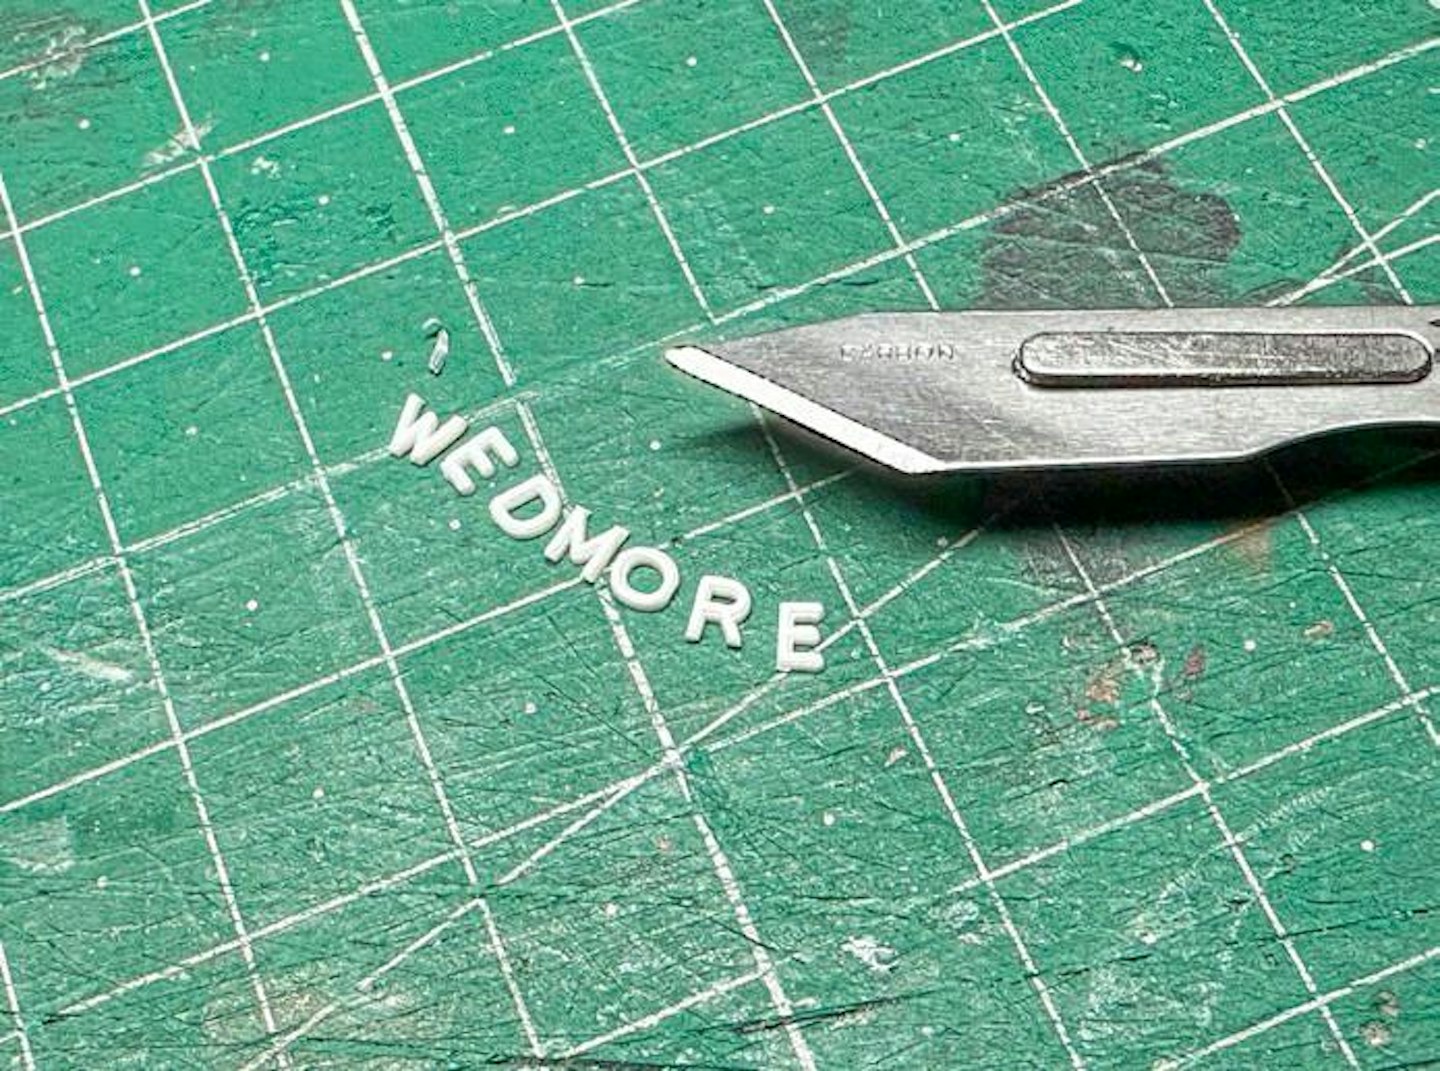
27 I wanted to add a nameboard, featuring the cut-out letters seen on the LSWR and many other signal boxes and station boards. Slater’s Plastikard offers packs of plastic alphabets in various sizes and I cut out the required letters.
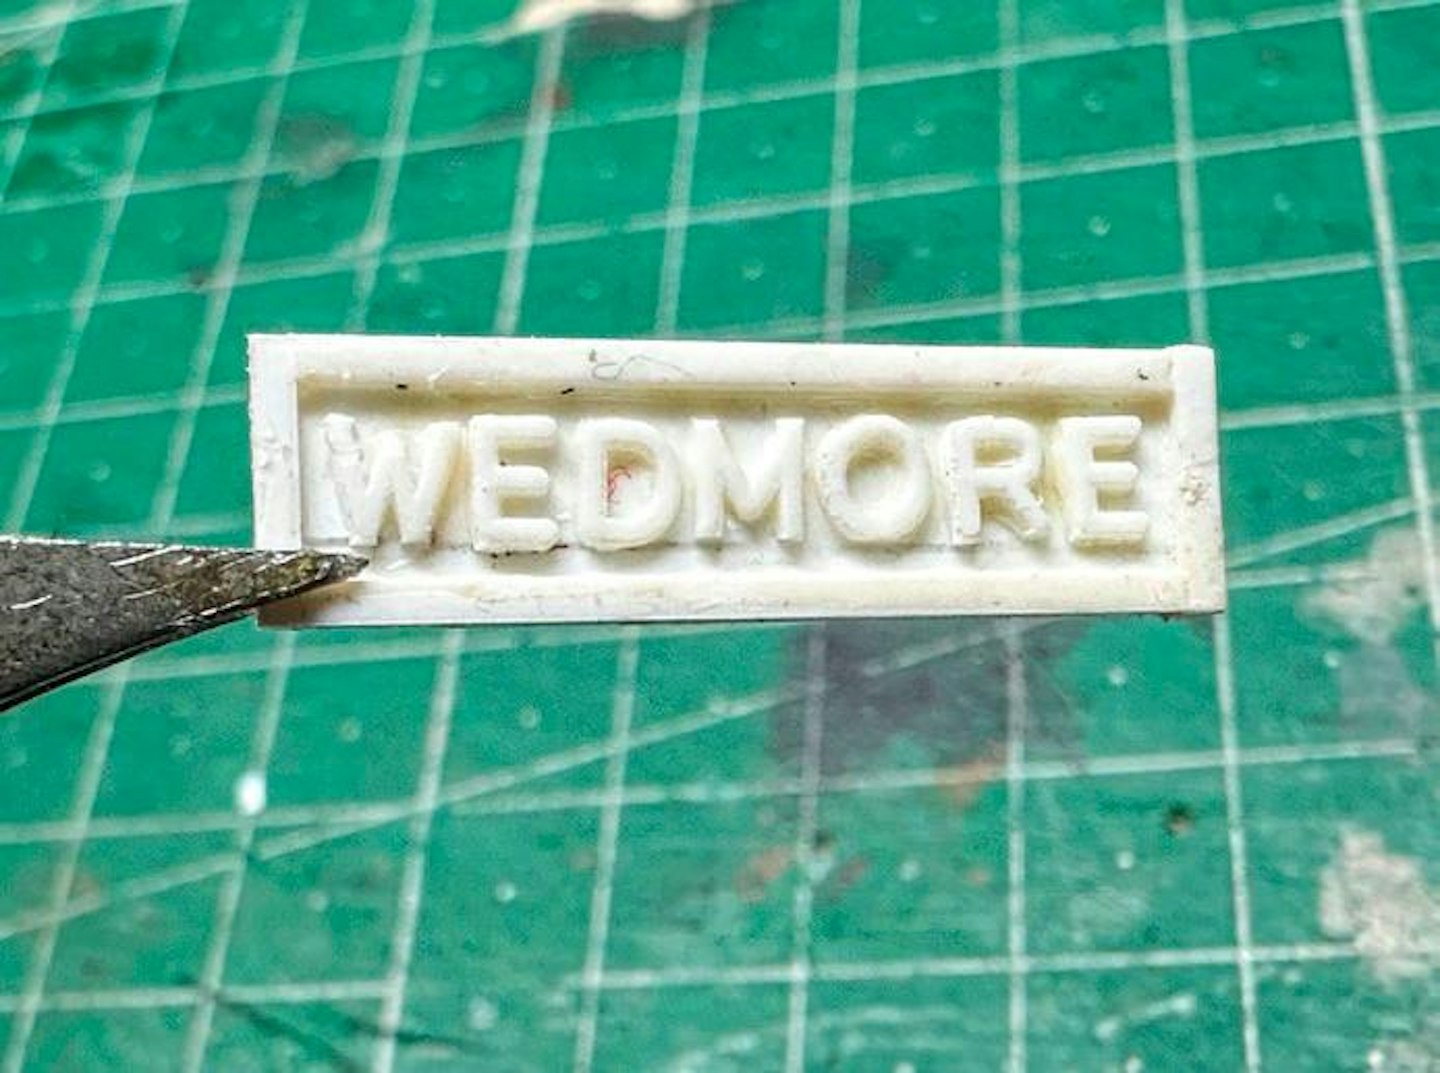
28 It can be a little fiddly to fix the individual characters to a base of thick plastic card, but it’s a very rewarding job. I then added a raised framework from styrene strip, all bonded with a liquid poly cement.
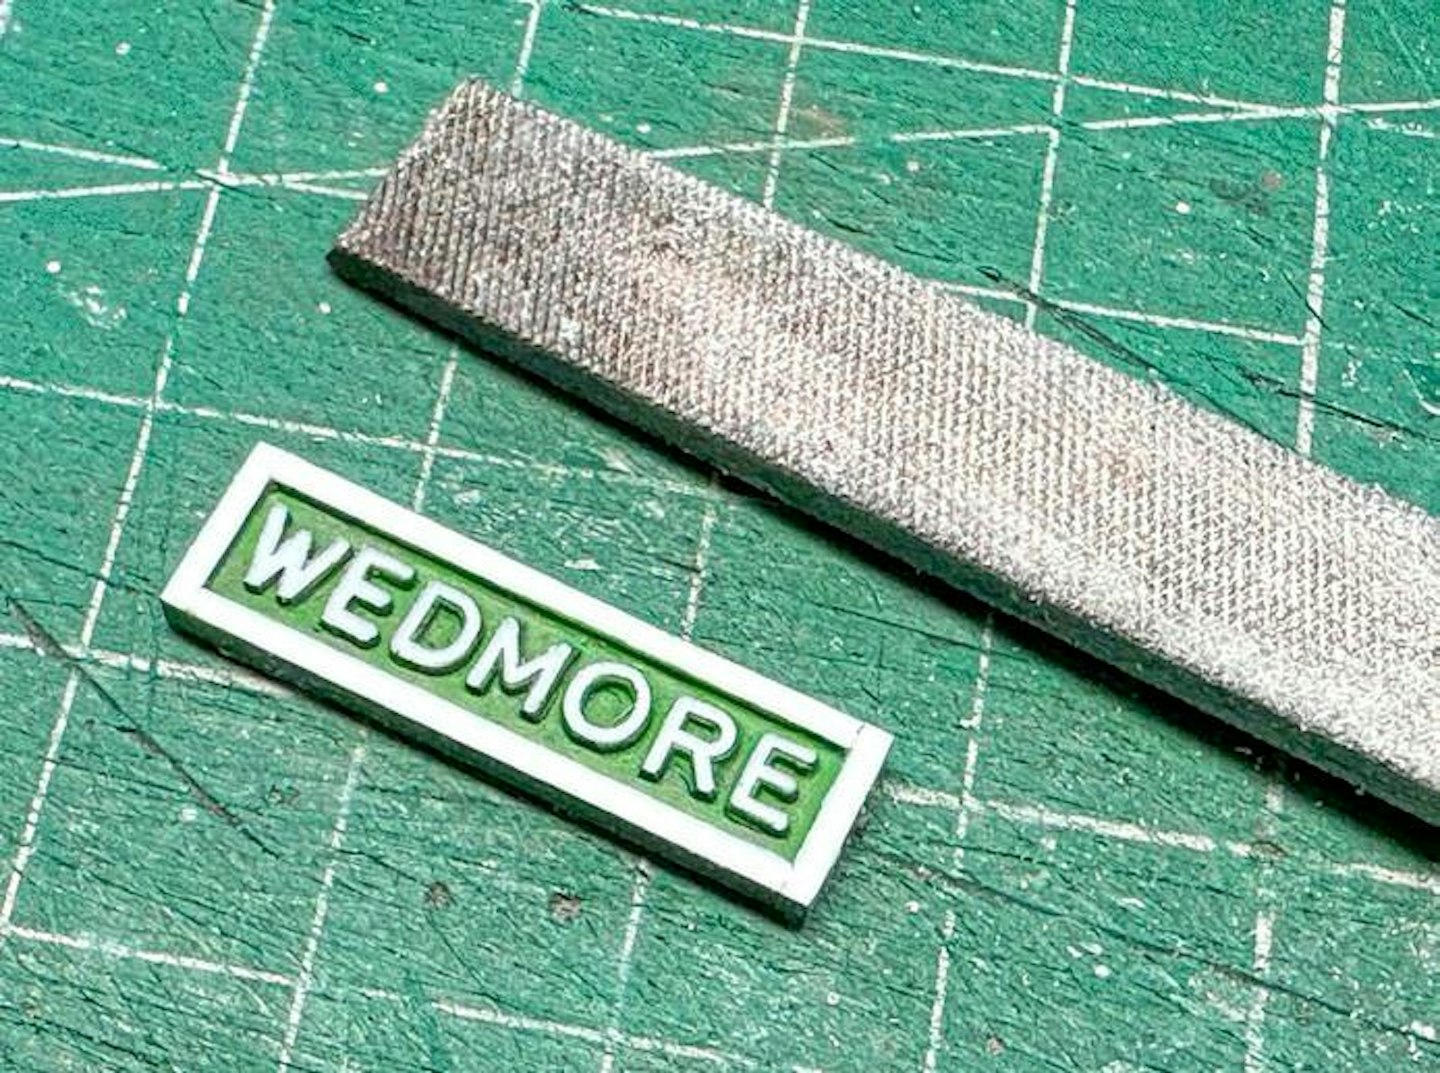
29 After priming and painting in the necessary colour (Humbrol 101 mid-green) – and leaving to dry overnight – I filed the face of the framework and letters to reveal the original white plastic. Simple!