Workbench
Paul Bambrick reveals how he employs made-to-measure sheets of thin alloy sheet to form curved backdrops to his layout projects.

If you’re thinking of starting a new layout project, or re-doing your backscene rear panel, here’s an idea that might be worth a try. Most of the backscenes that I produce now, even on permanently installed layouts, use 0.9mm thick, soft alloy sheet to do the job. This material has a great many advantages over inflexible wooden panels, as it’s lightweight and strong, but also very easy to curve into shape. The material can be mail ordered, already pre-cut to your chosen size (see panel).
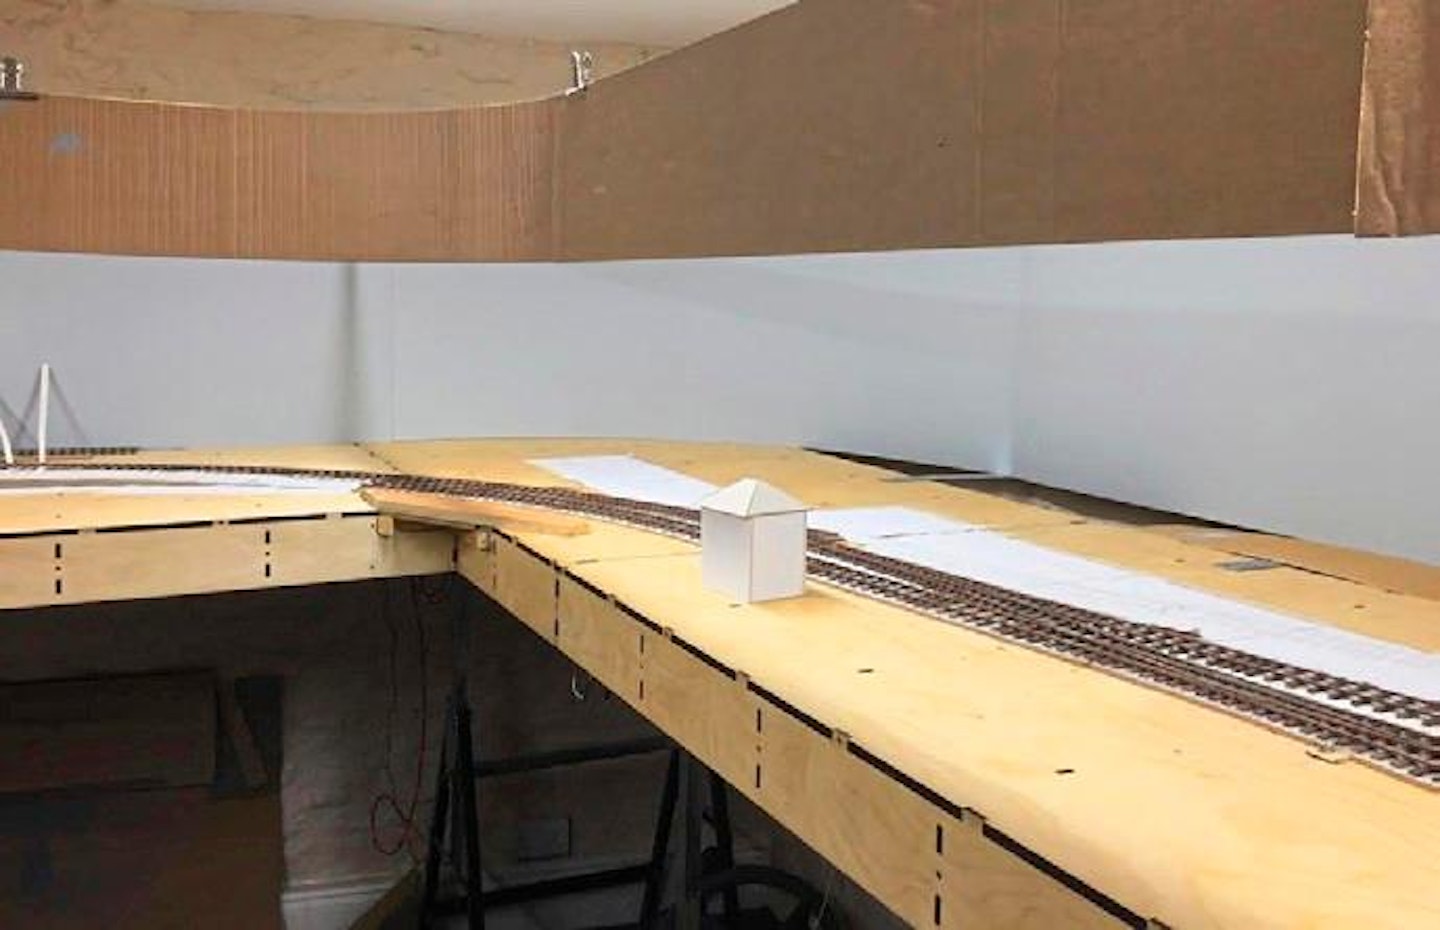
In order to establish the dimensions, it’s best to set up the rear panel as a temporary mock-up using mounting card. or even regular corrugated cardboard with white paper spray-mounted onto the surface. Follow the line of your new rear panel around the back of the layout keeping it as far away from the model as you can allow, while also keeping the curvature as gentle as possible.
Once you have a temporary rear panel mocked up into place, you can determine where any joins might occur, factoring in the maximum panel length available, which is generally 2.5m. With smaller layouts and dioramas, this maximum length will sometimes allow the entire rear panel to be free of joints.
Always keep any panel joins as far away from curves as possible, as it’s much easier to locate a joint along a straight section. As usual, set up the baseboard viewing height to your optimum, usually dictated by an average sitting or standing position; 1.3m is an ideal standing height for an exhibition type presentation.
Pencil your distant horizon line onto the white surface of the mock-up, as well as any cut-outs required to cope with structural elements of the layout or for scenic breaks, where the trains need to pass through the backscene to hidden sidings or fiddleyards. Also mark out the locations of any joints between backscene panels, then remove the card panels for measurement. Once you have a series of rear panels correctly dimensioned, you can place your order for aluminium sheet to be cut and delivered to your door.
In the meantime, you may wish to use your mock-up panels to begin planning any colours, self-adhesive, photographic backscene images that you’ve chosen to use, remembering to always register the photographic image to the horizon datum rather than either the top or bottom panel borders.
Once your alloy sheet is delivered, ensure there is no damage to the consignment, peel off the protective film from both sides, which you won’t be needing, and transfer any markings from the card mock-ups for apertures that require cutting.
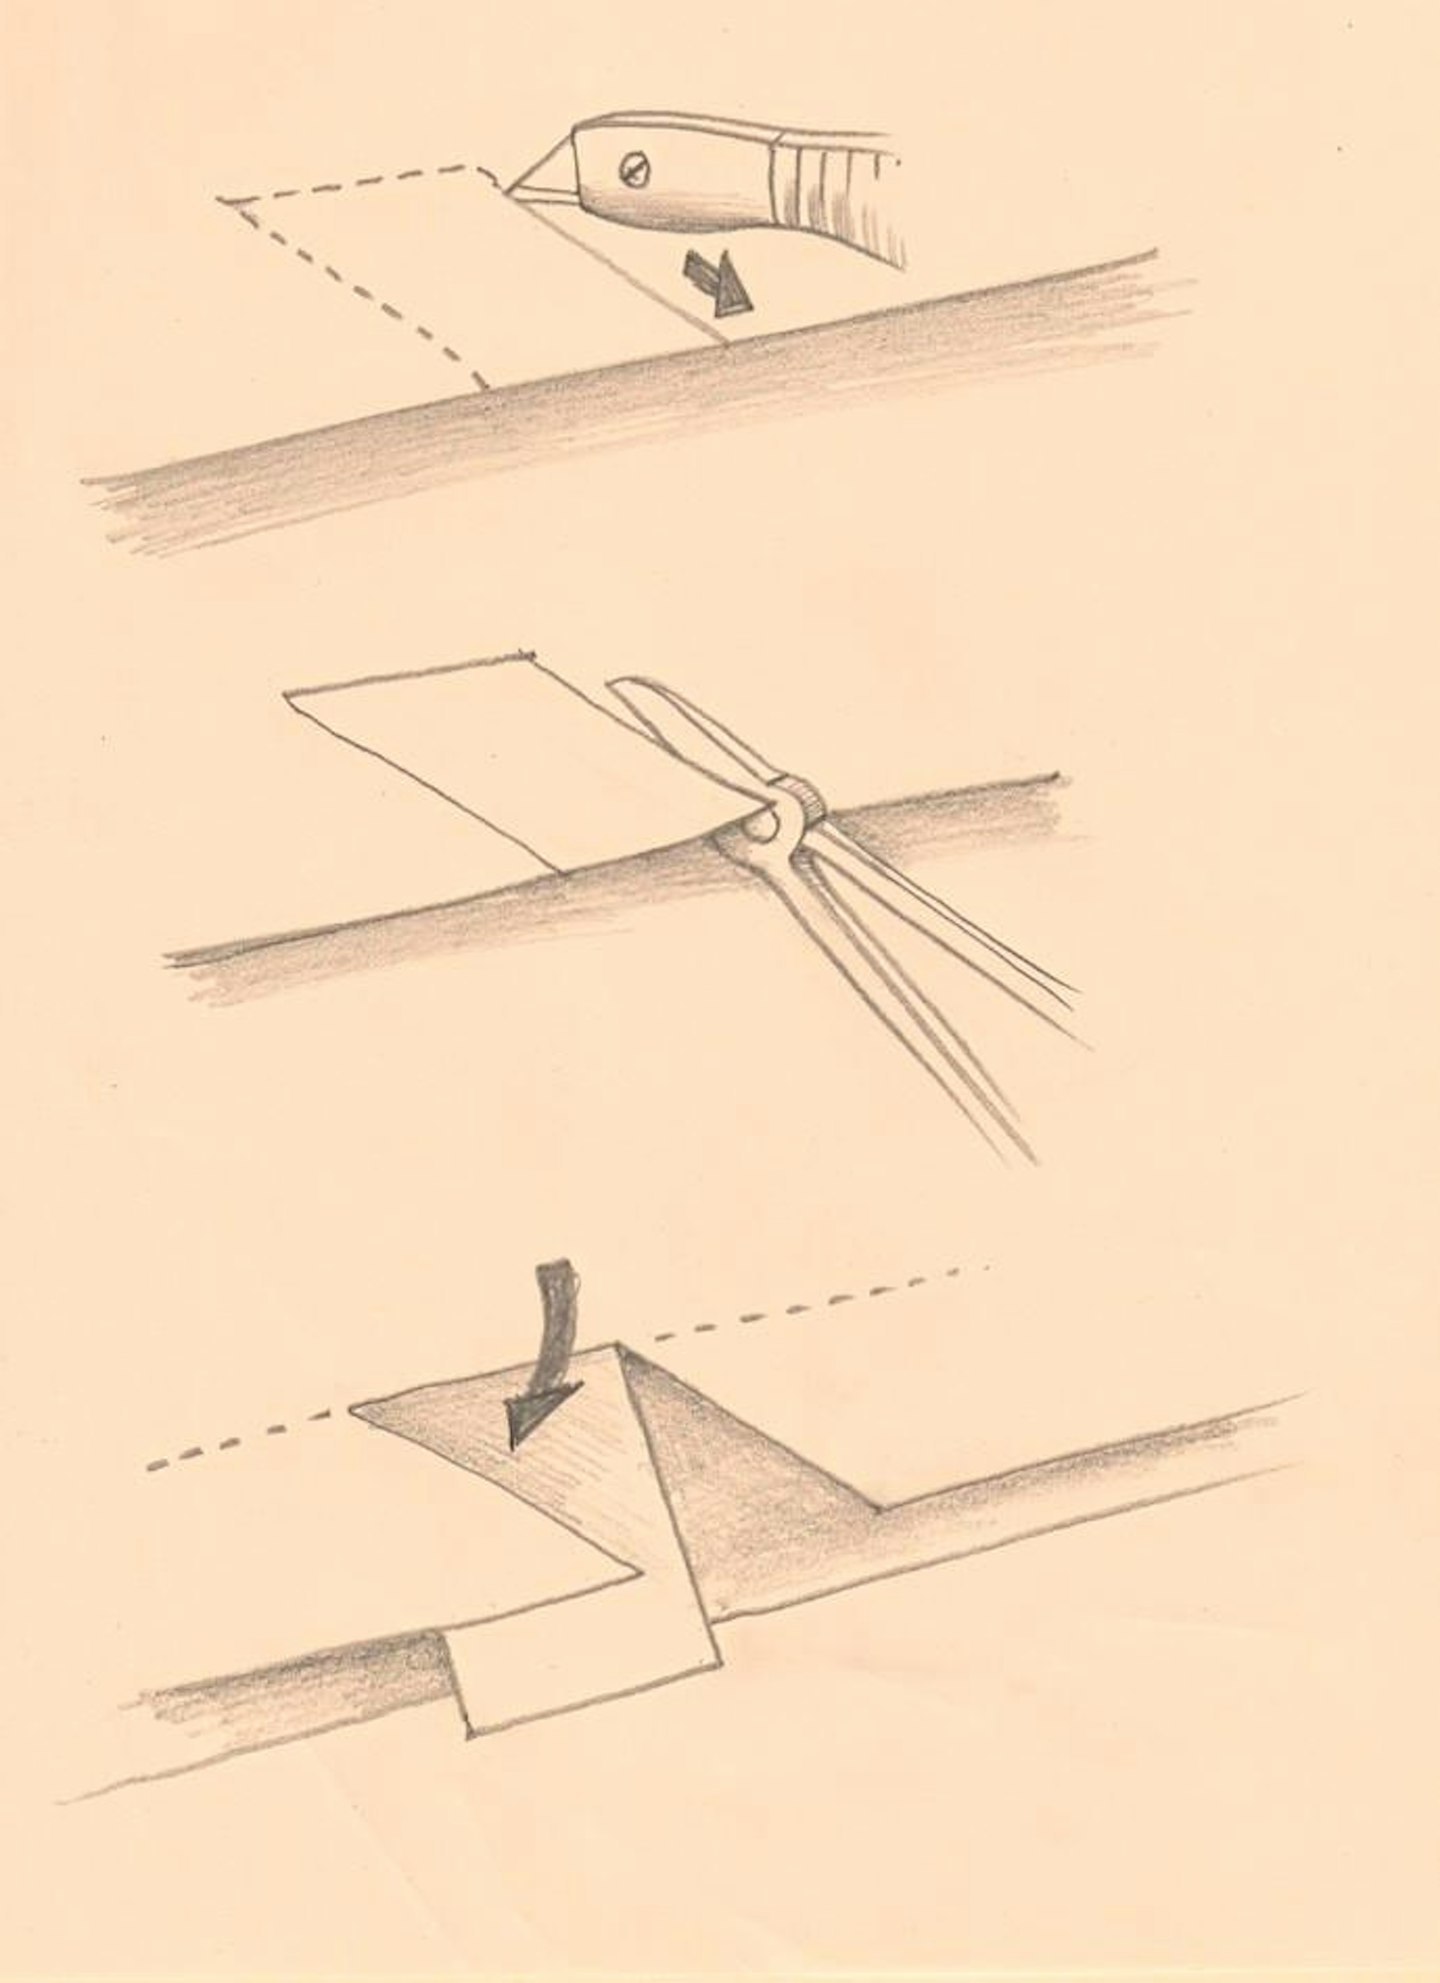
The aluminium sheet can be neatly cut using a steel rule and a good quality trimming knife (such as a Stanley knife) loaded with a fresh blade. Although you won’t be able to cut straight though in one pass, you’ll find that after a few deep scores the panel can be rested over the edge of a hard-edged table and the excess material folded repeatedly until it snaps away. To cut apertures for scenic breaks, trace the outlines from the mock-up card and follow the vertical scored lines up from the base with heavy scissors or tinsnips.
Whichever way you cut the material, always run around the cut edges with a medium grade abrasive paper, removing sharp edges, and rounding the corners as well.
The treated panel can be laid flat, outer face up and scuffed with a 120grit flat disc in an angle grinder and gently roughed up in long sweeping strokes, making sure not to dwell too long in any place, creating hotspots. Note that this process is extremely noisy, so you will need some ear defenders. Naturally, you can also abrade the surface by hand, rubbing with abrasive sheets wrapped around a cork block, if you fancy a vigorous workout.
The objective is to eliminate any remaining shiny surface, so make sure that everywhere on the front surface of the panel shows abrasive marks and feels slightly rough to the touch. The panel can be dusted over with a cotton cloth (not kitchen tissue) dampened to pick up dust, then allowed to dry before spraying a light coat of white aerosol primer.
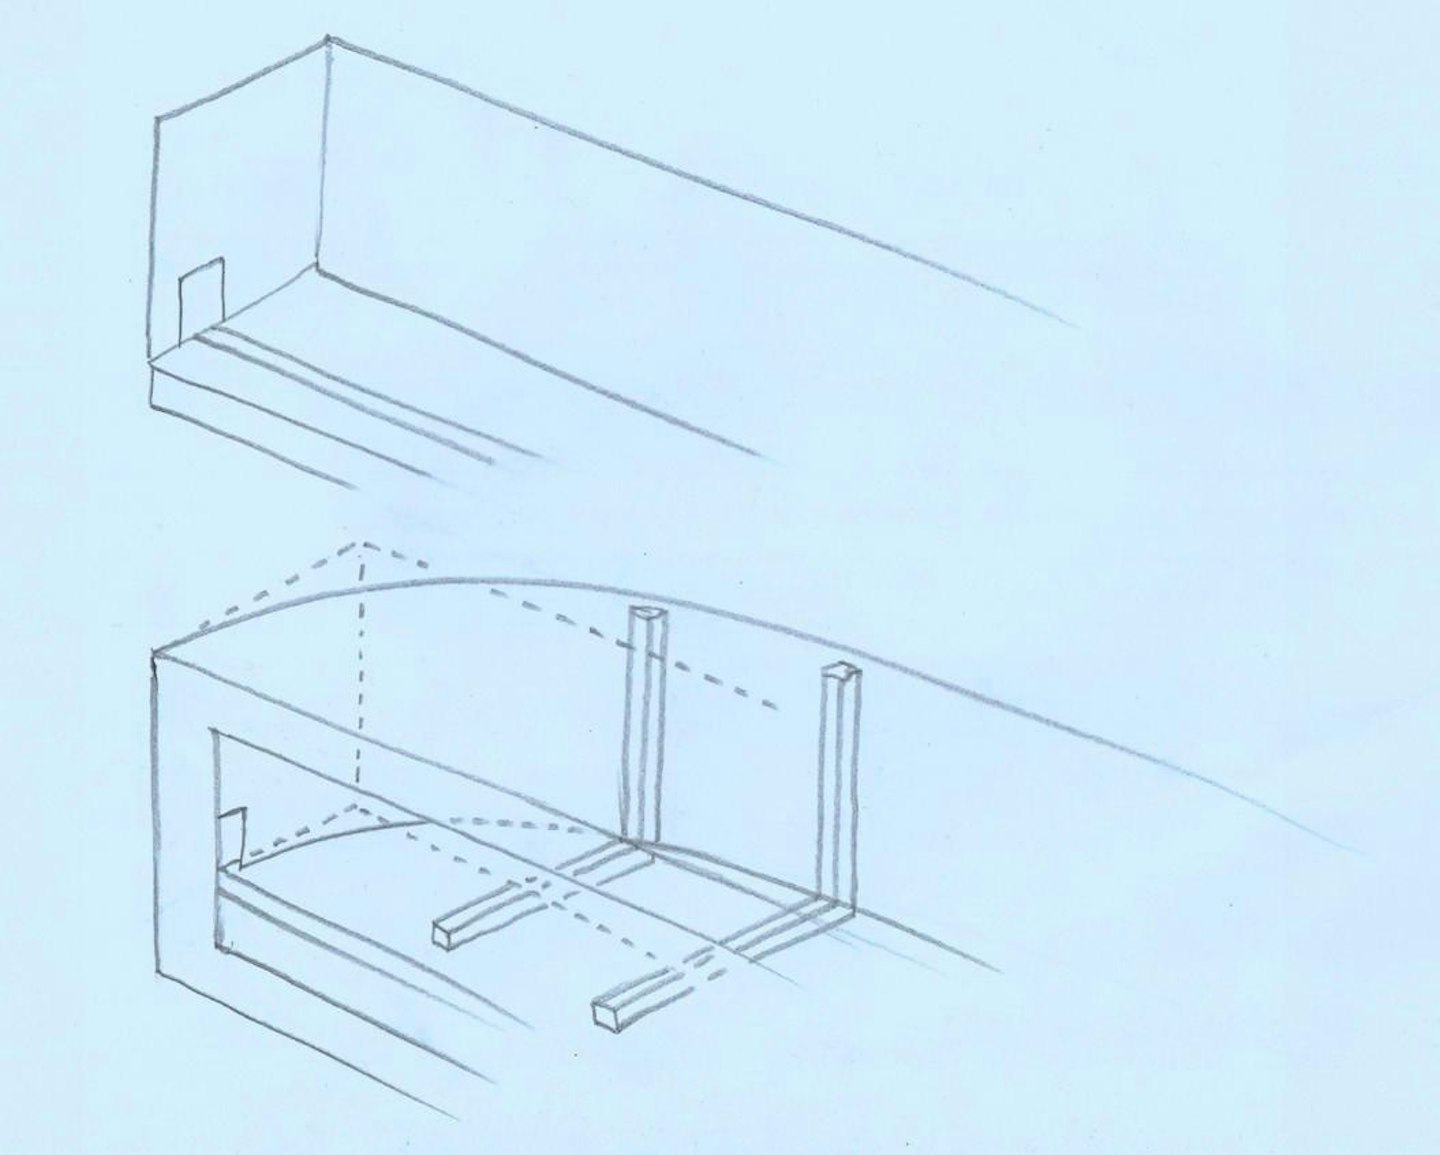
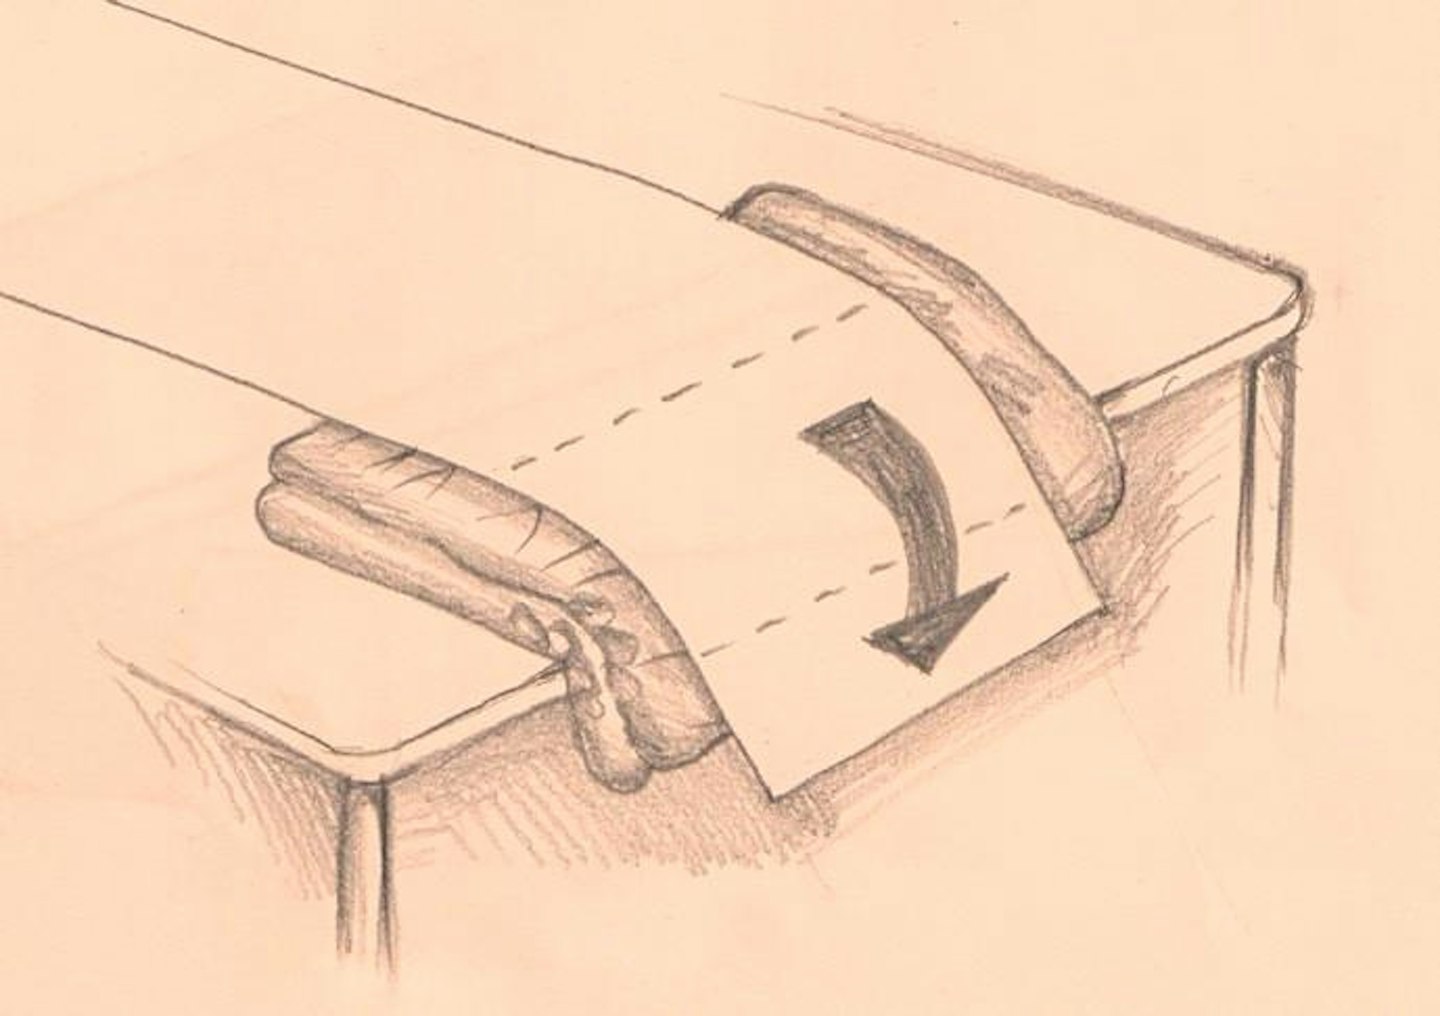
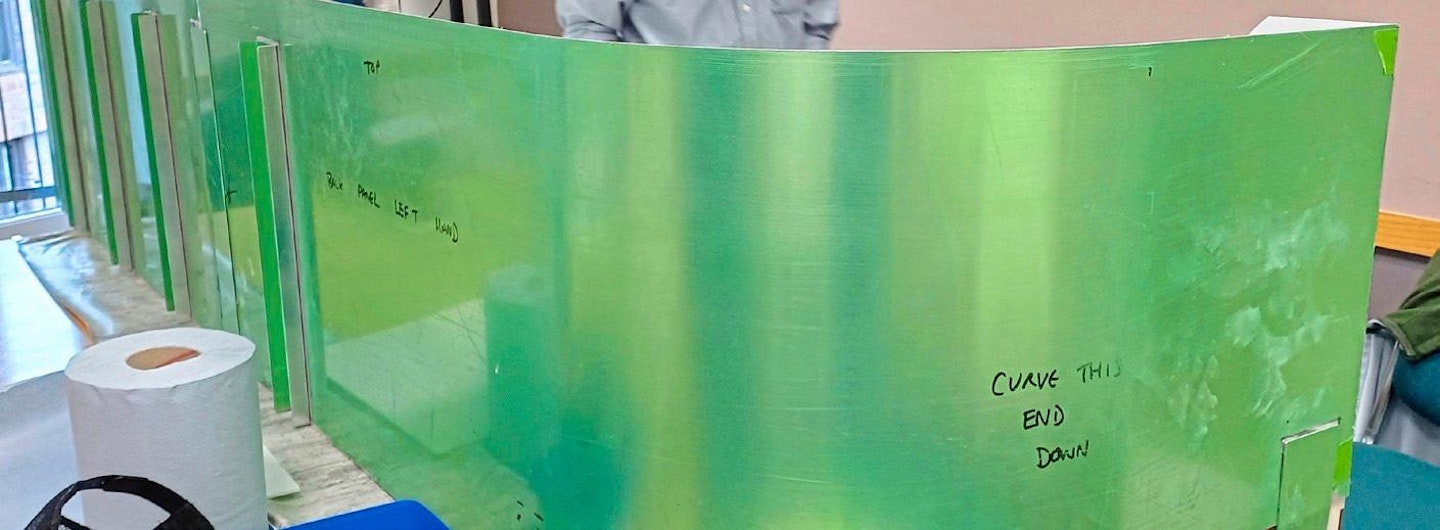
If there are any curved sections that need to be formed to follow a pathway around the rear of the scene, these can be done by transferring the curve’s start and finish points from the card mock-up onto the alloy sheet. Next, the sheet is placed over the edge of the workbench, over some thick padding (such as cushions or pillows)
Ensure the panel is at a right-angle to the bench and gently bend the panel down until the required contour is achieved. It takes a few attempts to get right and always move the position of the panel relative to the bench’s edge when bending, so you don’t get a ‘threepenny bit’ effect. The idea is to get the smoothest possible curve, by doing it in stages.
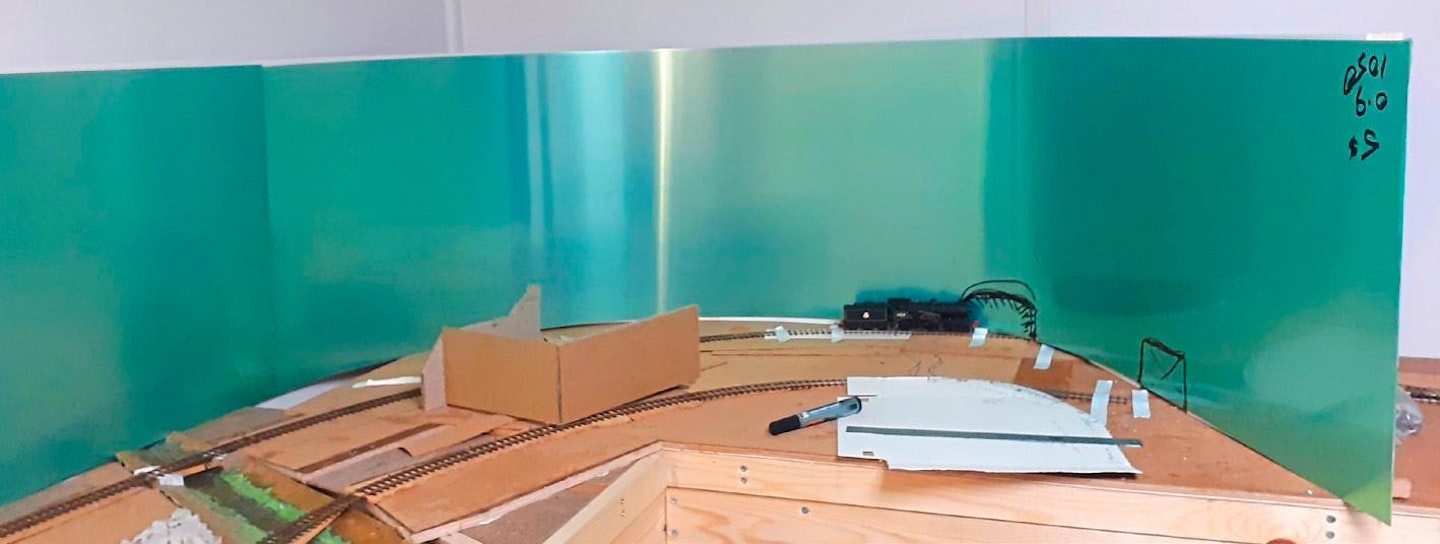
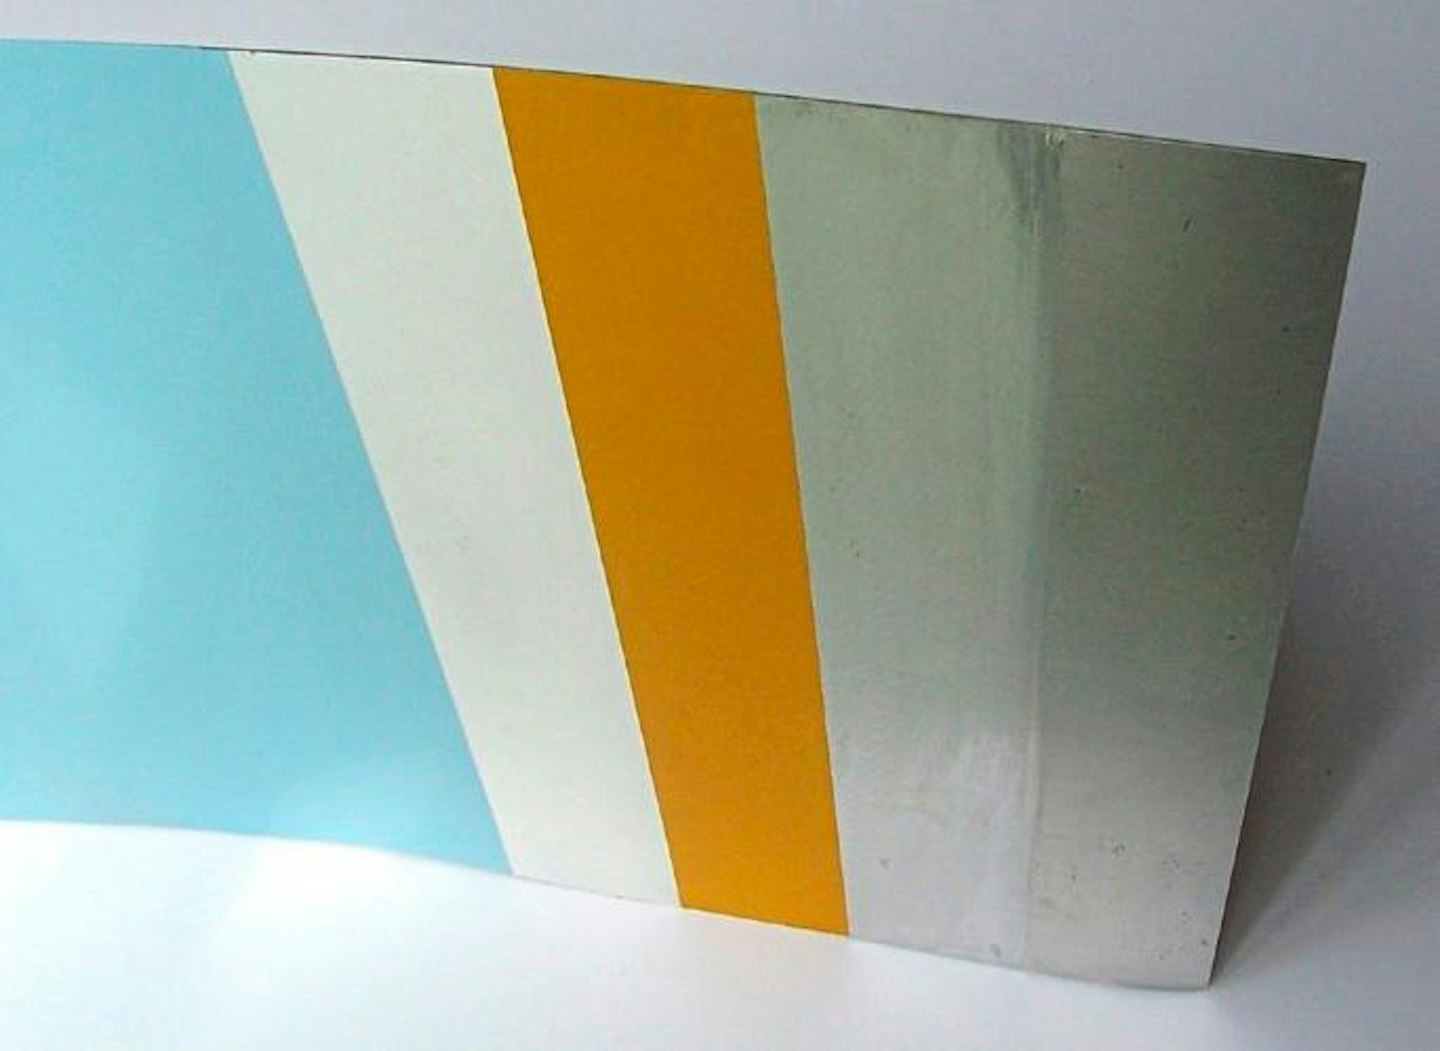
The panel is now ready for its sky base coat which can be applied to just below the horizon line, with a mini gloss roller for an even colour, or two mini gloss rollers for a graduated sky blue, obviously with the darker more saturated colour above and the lighter desaturated, and atmospherically diffused base colour down to the horizon datum.
Joining the panels neatly on exhibition layouts can be done by adding an overlapping strip behind one of the panels, mounting it vertically with the joint line halfway between. This can be fitted and located into position using a series of small 2mm size countersunk pop rivets drilled and countersunk from the panel front
The panels stand up pretty well if you have already gently curved them to follow the pathway of the card mock-up, but along any straight sections you will probably find there’s a need to vertically support the panel every so often to keep it at 90º to the rails. It helps to provide uprights at intervals along the rear, formed from wood battens or 20mm by 10mm rectangular aluminium tubing.
There are many combinations of joining methods for aluminium panels, such as small diameter nuts and bolts, countersunk self-tapping screws, and countersunk pop rivets. The material can also be glued to a rear support framework with MitreBond or similar fast-acting trade adhesives (see your local hardware store) for additional strength, but the metal needs to be scuffed with a coarse abrasive (such as 60grit) to ensure adequate adhesion.
The upper blind of a window-type layout presentation case can also be done very successfully in soft aluminium panels, pre-cut to size, and ordered along with the rear panels to save delivery costs.
The same recommendations apply for this job, with the jointing of multiple sheets only along straight sections. Furthermore, for exhibition layouts in particular, it will need a lightweight framework to support the weight and keep everything supported. The fixing and preparation methods are the same, with a scouring with 120grit abrasive before priming and subsequent painting or addition of a printed photographic backscene. Adhesive and rows of small countersunk fasteners, duly concealed and smoothed over with auto filler, is fine, and this also applies to any brackets for nameboards, support posts, or attachment points for lighting fixtures and clips.

What you will need
◆ Made-to-measure alloy sheet. Aluminium sheet (0.9mm thick) can be cut to size and delivered to your door. I obtain my stock from Orion Alloys in Harlow, which offers nationwide delivery, and orders can be placed over the phone or online, specifying your required dimensions and quantities. A free information brochure can also be downloaded from the company’s website.
Availability: Orion Alloys
Tel: 01279 434422
Web: sales@alloysales.co.uk
TOOLS
◆ Trimming knife and blades
◆ Tinsnips/heavy-duty scissors
◆ Steel rule
◆ Tape measure
◆ Cutting mat
◆ Stable work table/bench
◆ Abrasives
◆ Angle grinder/power sander (optional)
◆ Drill and bits (including countersink bit)
◆ Riveting gun and pop rivets (optional)
STEP BY STEP
SUNRISE TO SUNSET

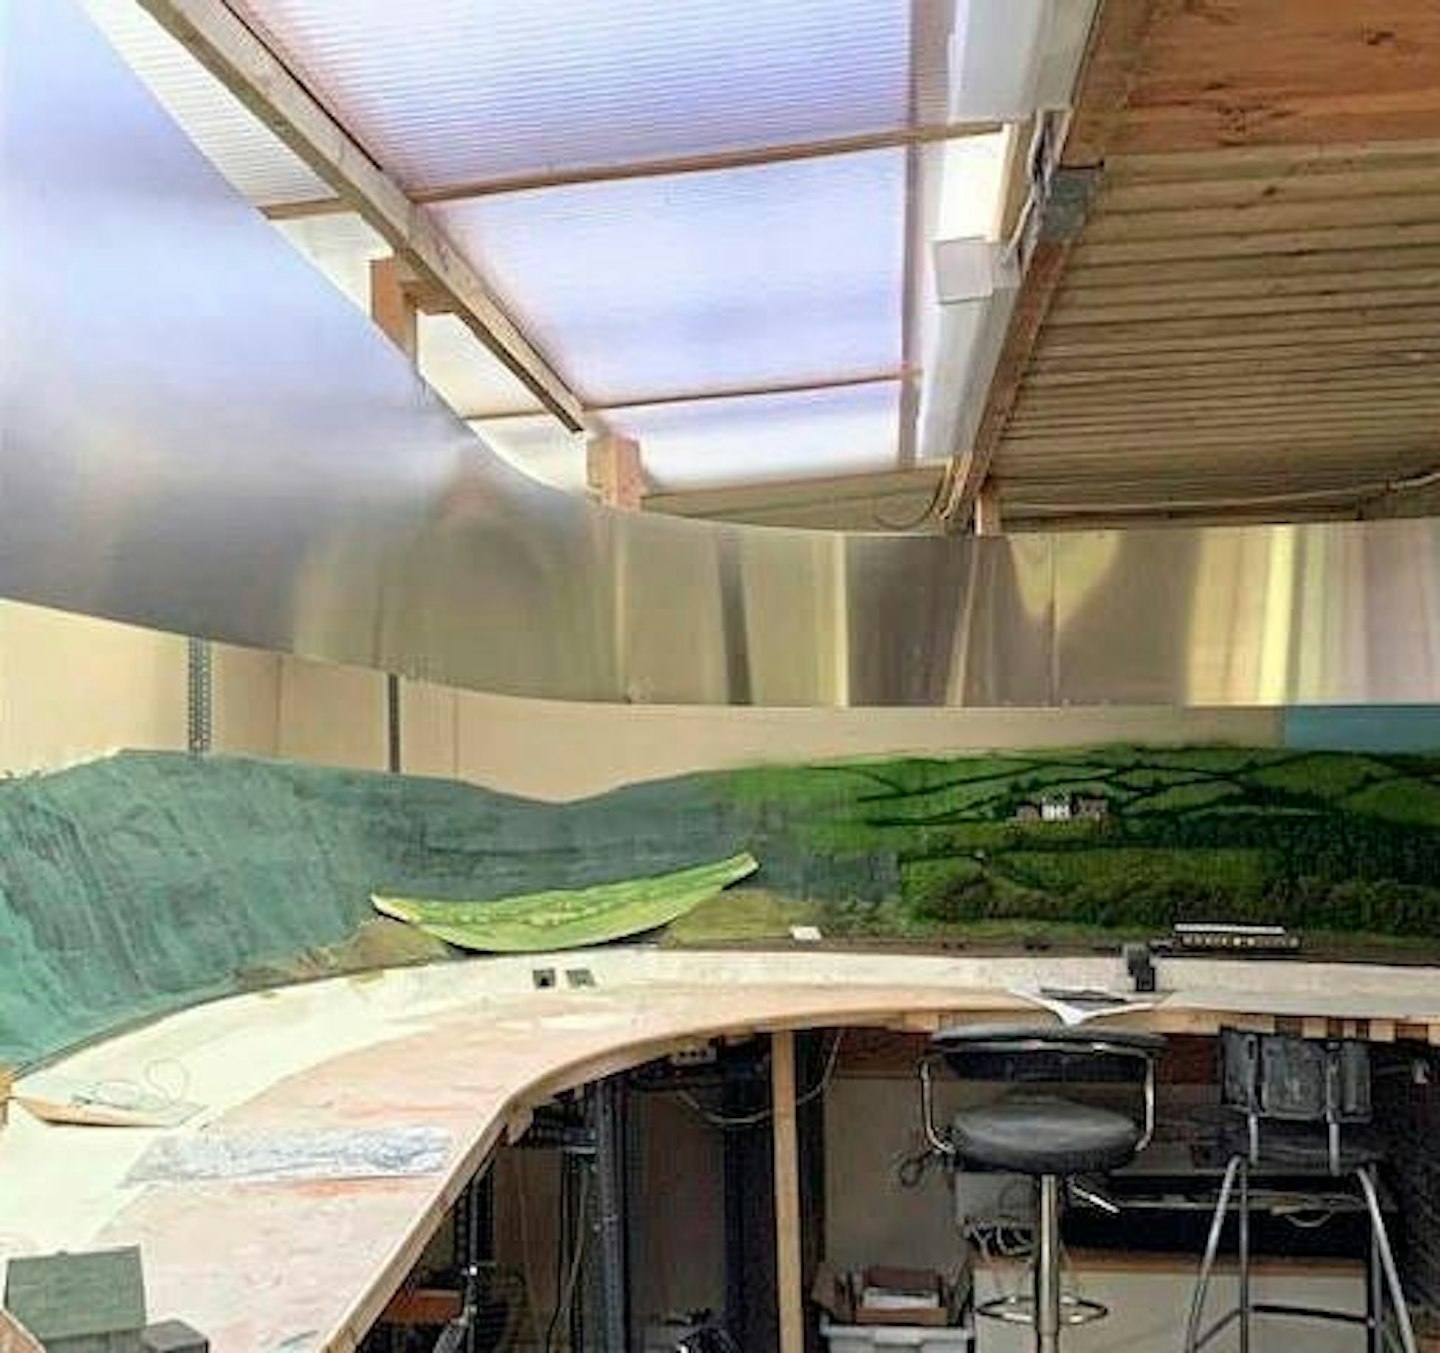
Introducing a warm light source, emitted through a gap between the three-dimensional scenic landform and the painted backscene, creates an authentic sunrise or sunset effect, making for a very dramatic appearance. It helps to graduate the shades of paint on the backscene too, for a more harmonious appearance. If you fancy something a little out of the ordinary, this is certainly something worth experimenting with.
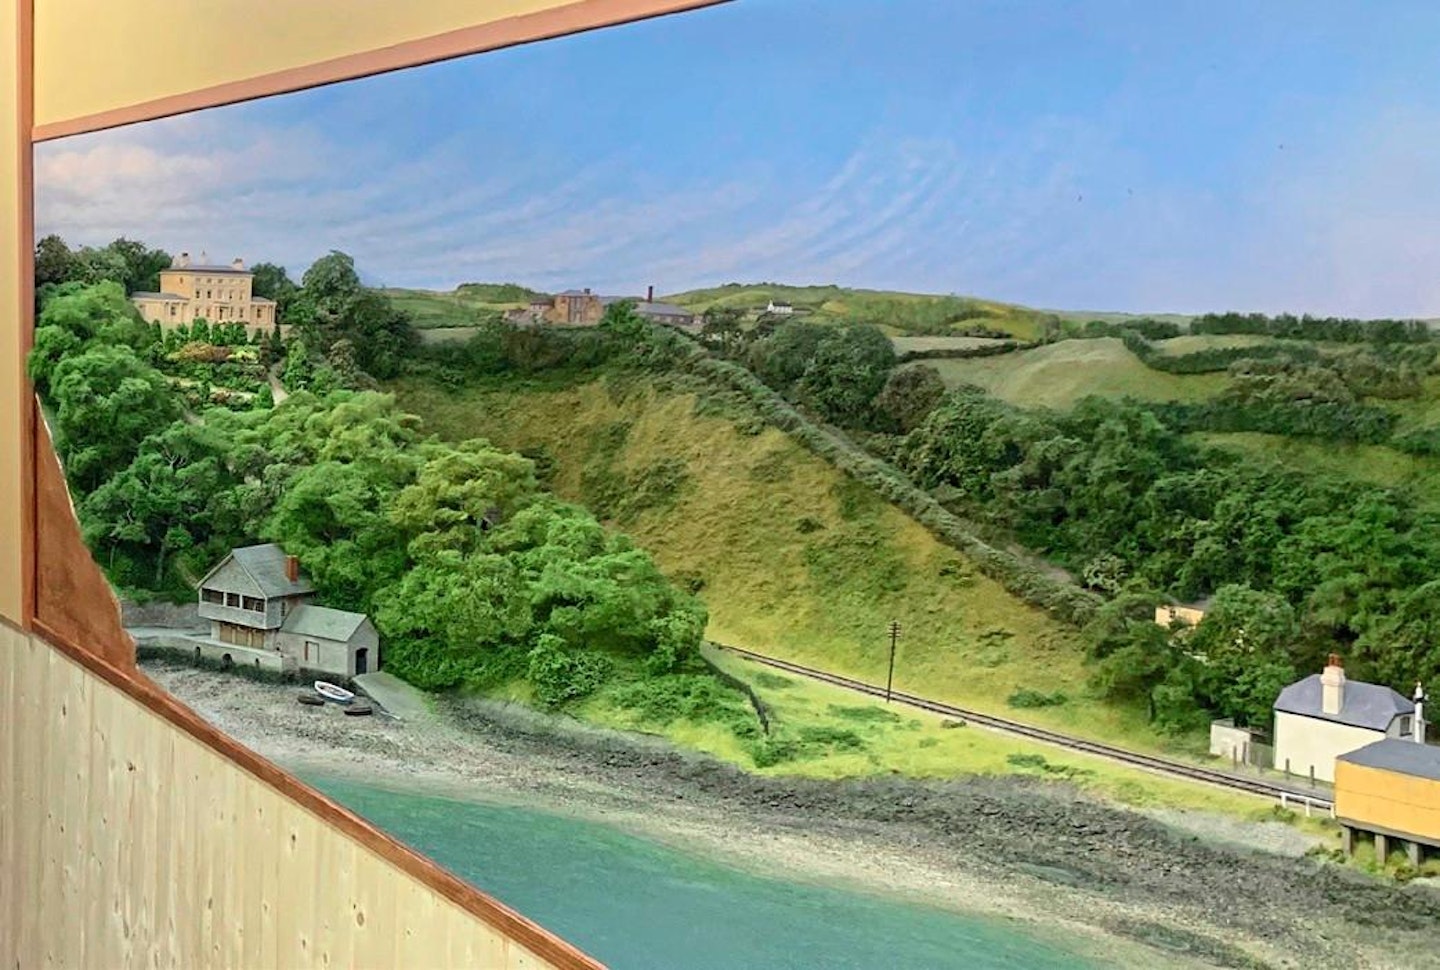
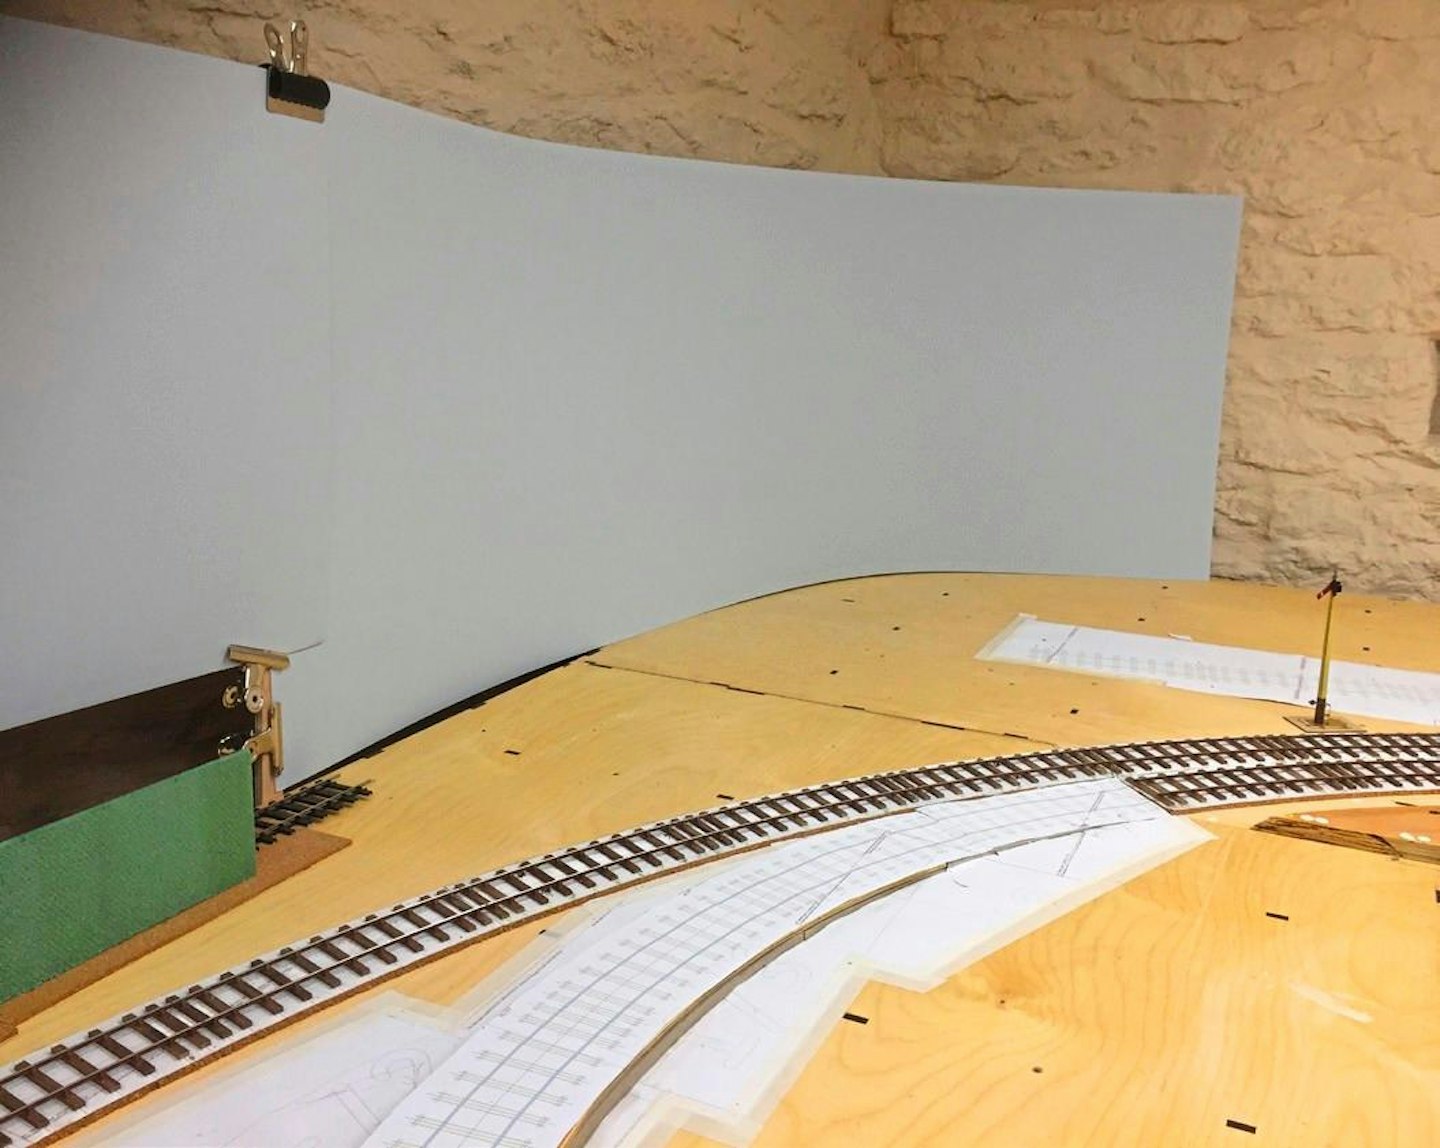
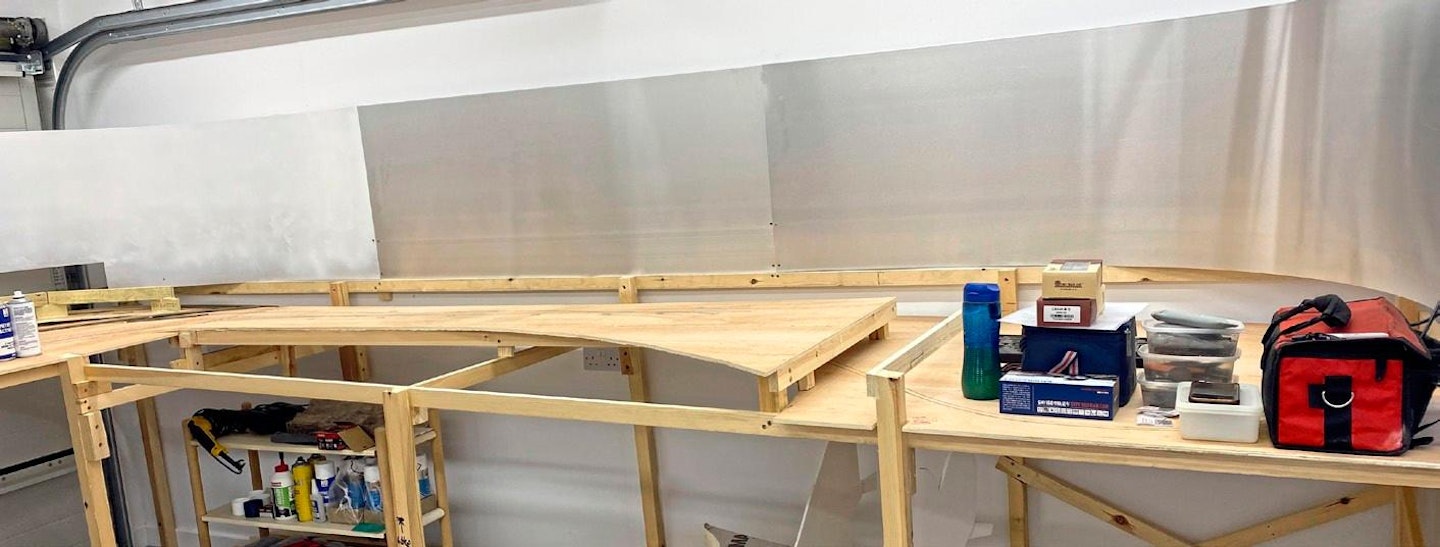
Thin aluminium sheet is lightweight and flexible, making it ideal for curved layout backdrops that follow the contours of a scene.
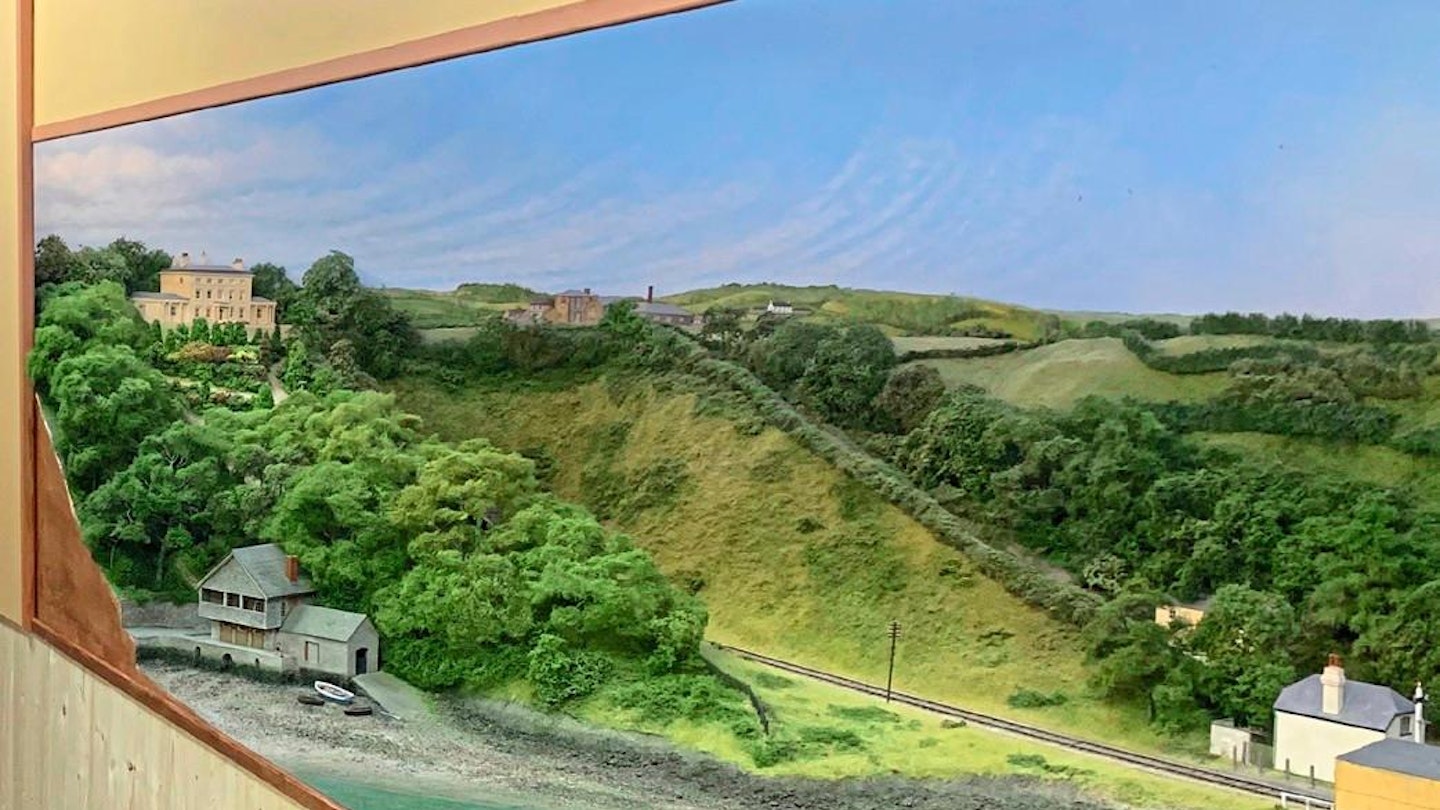
Provided that the aluminium sheet is prepared correctly, it can be painted with an impression of a landscape and sky, as seen on this superb three-dimensional diorama, which Paul described in MR327.

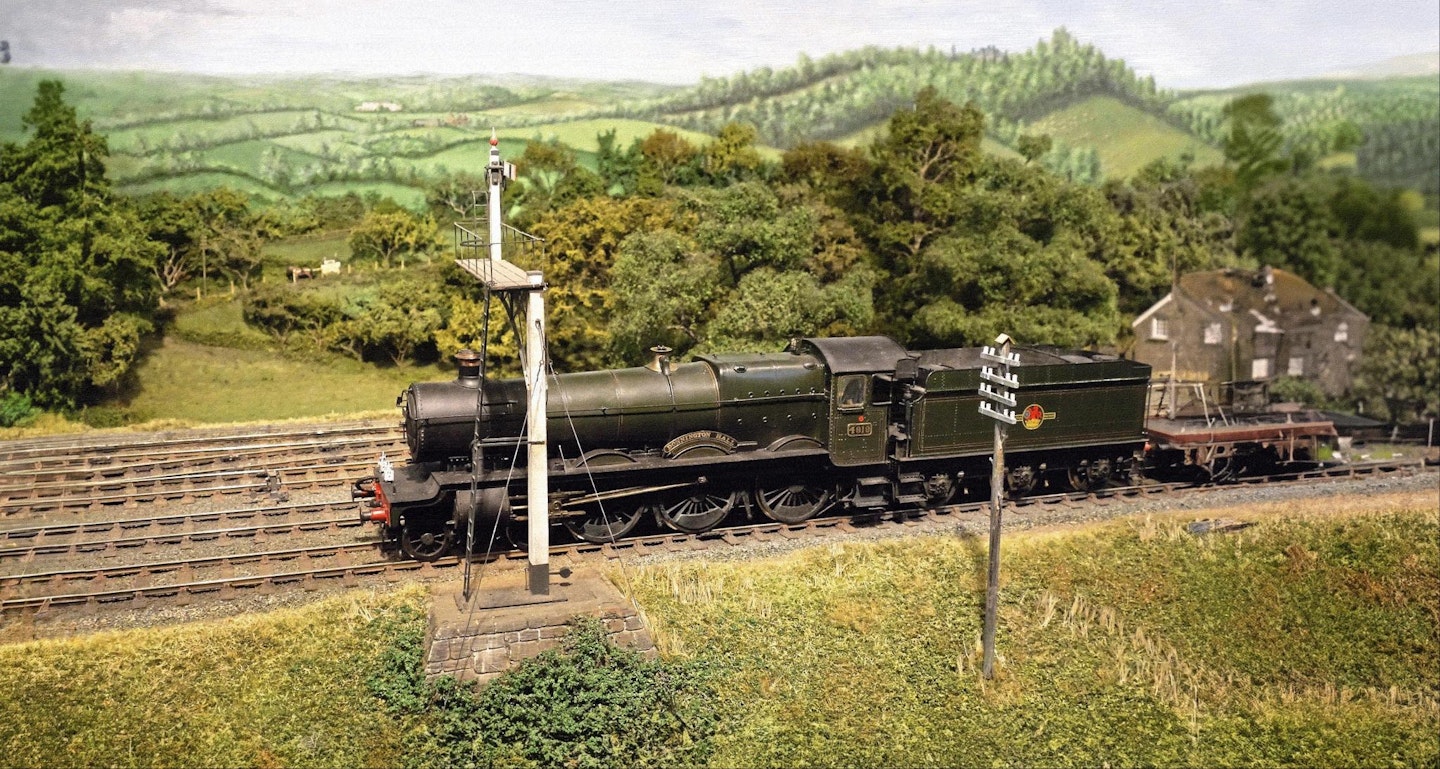
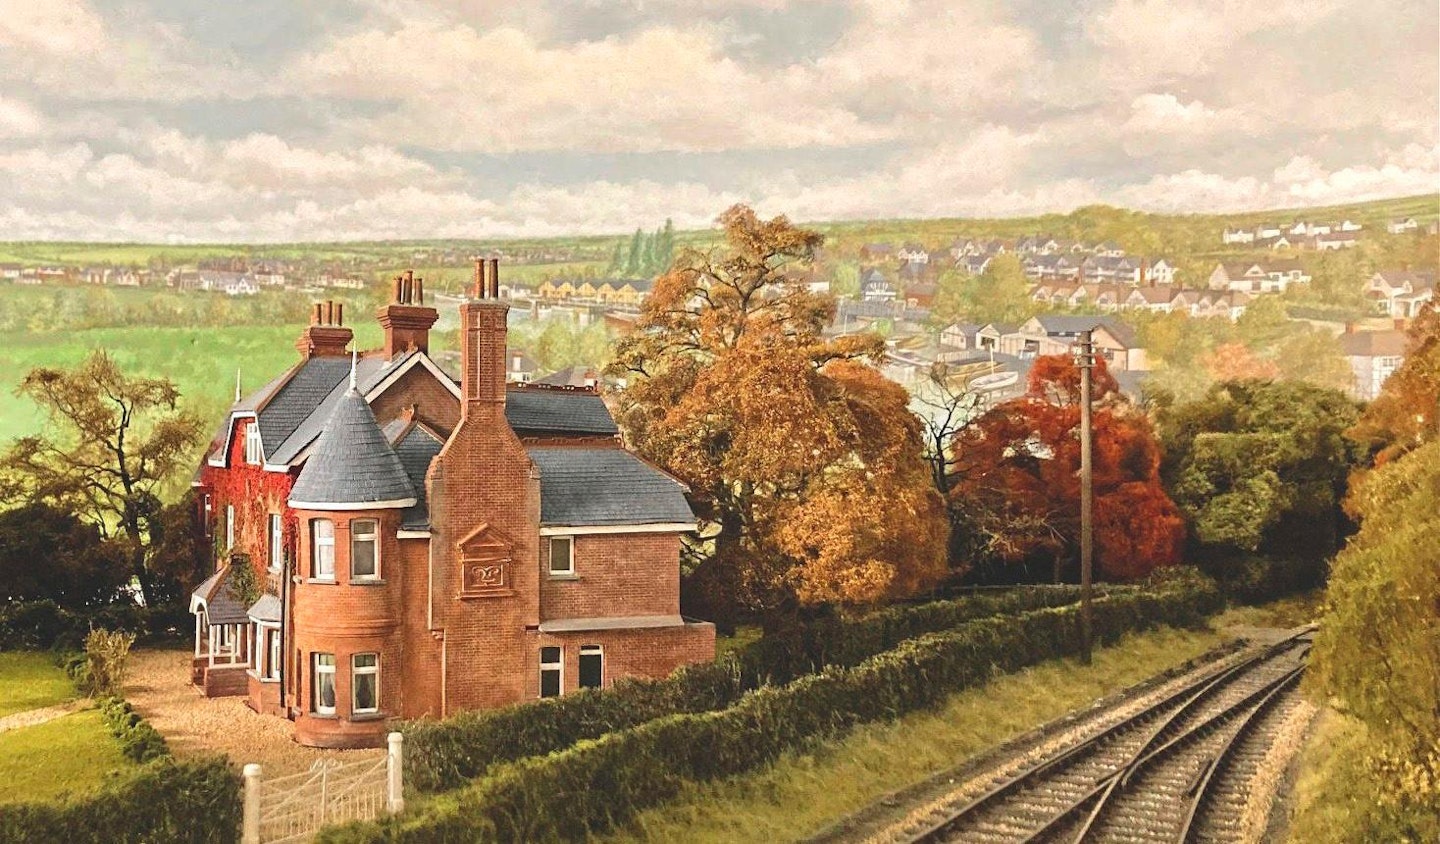
Hand-painting a backscene may not appeal to everyone, but a simple pale sky effect can be achieved with a mini gloss roller, or a printed photographic backscene can be fixed to the aluminium panel.
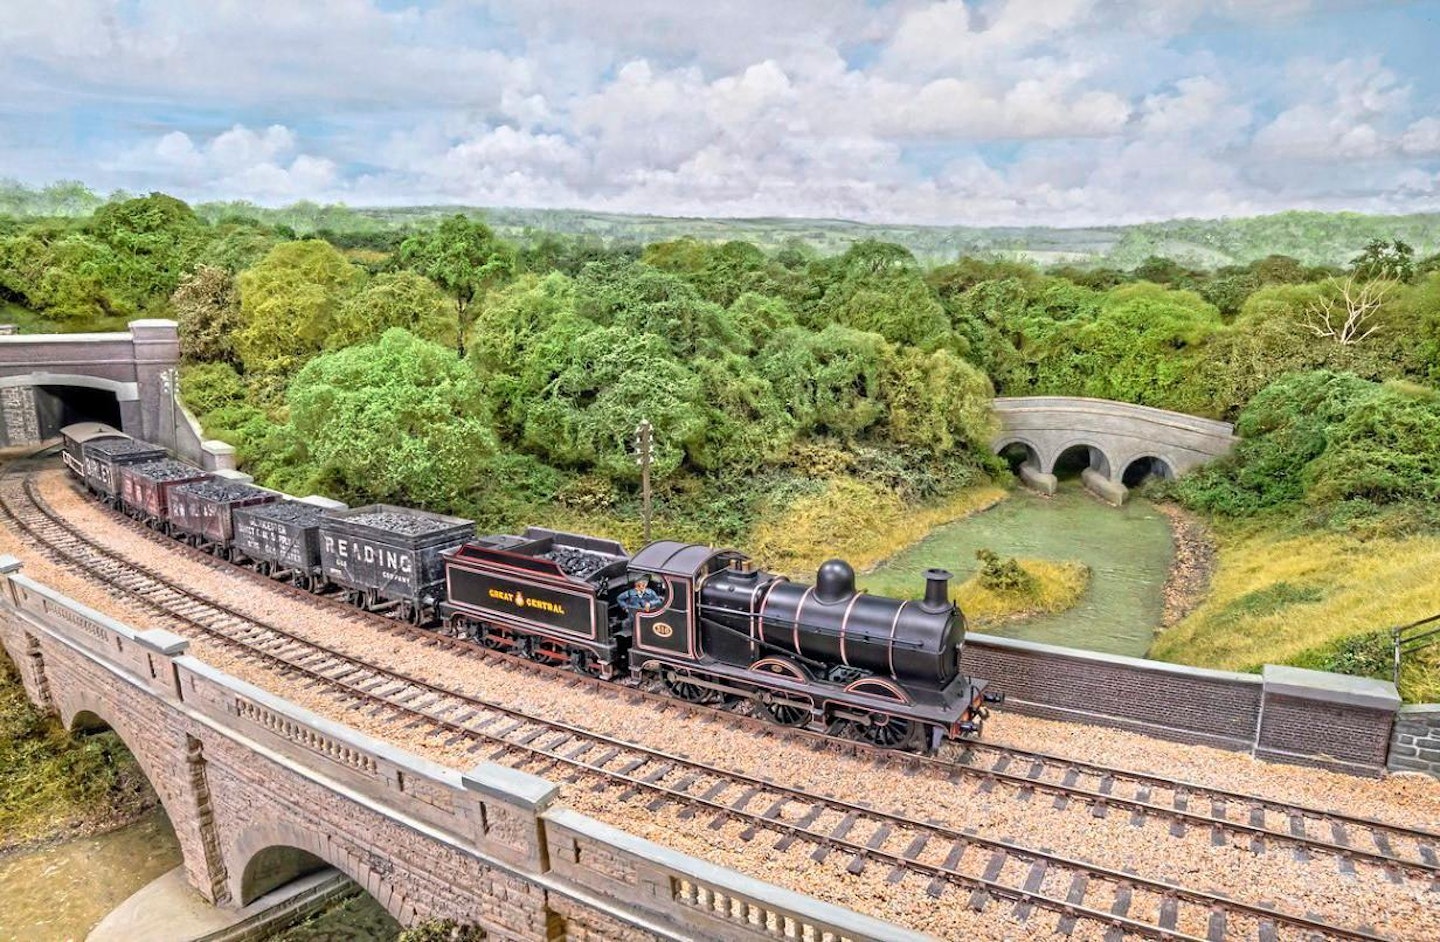
Painting a backscene like this allows the modeller to create a hazy, distant appearance to the background detail, as well as playing with perspective to exaggerate the sense of depth.

Each issue of Model Rail covers every stage of modelling, from buying your first model train set right through to museum standard fine-scale modelling. Find inspiration for your next project with our helpful tips, advice and in-depth detail on model trains and layouts.
Choose the right subscription for you and get instant digital access to the latest issue.