
Peter Marriott sets out on a mission to see if he can create his own decals – and learns a few things in the process.
PHOTOGRAPHY: PETER MARRIOTT

Peter’s TOP TIPS
• Take photographs of graffiti while you’re out and about, on rolling stock or buildings. Take the photographs square-on to the subject where possible.
• Choose white waterslide transfer paper when working on wagons painted in darker colours.
• Clear waterside paper is good for recreating black ‘tags’, or coloured graffiti if it’s to be applied over lighter livery colours such as pale grey or white.
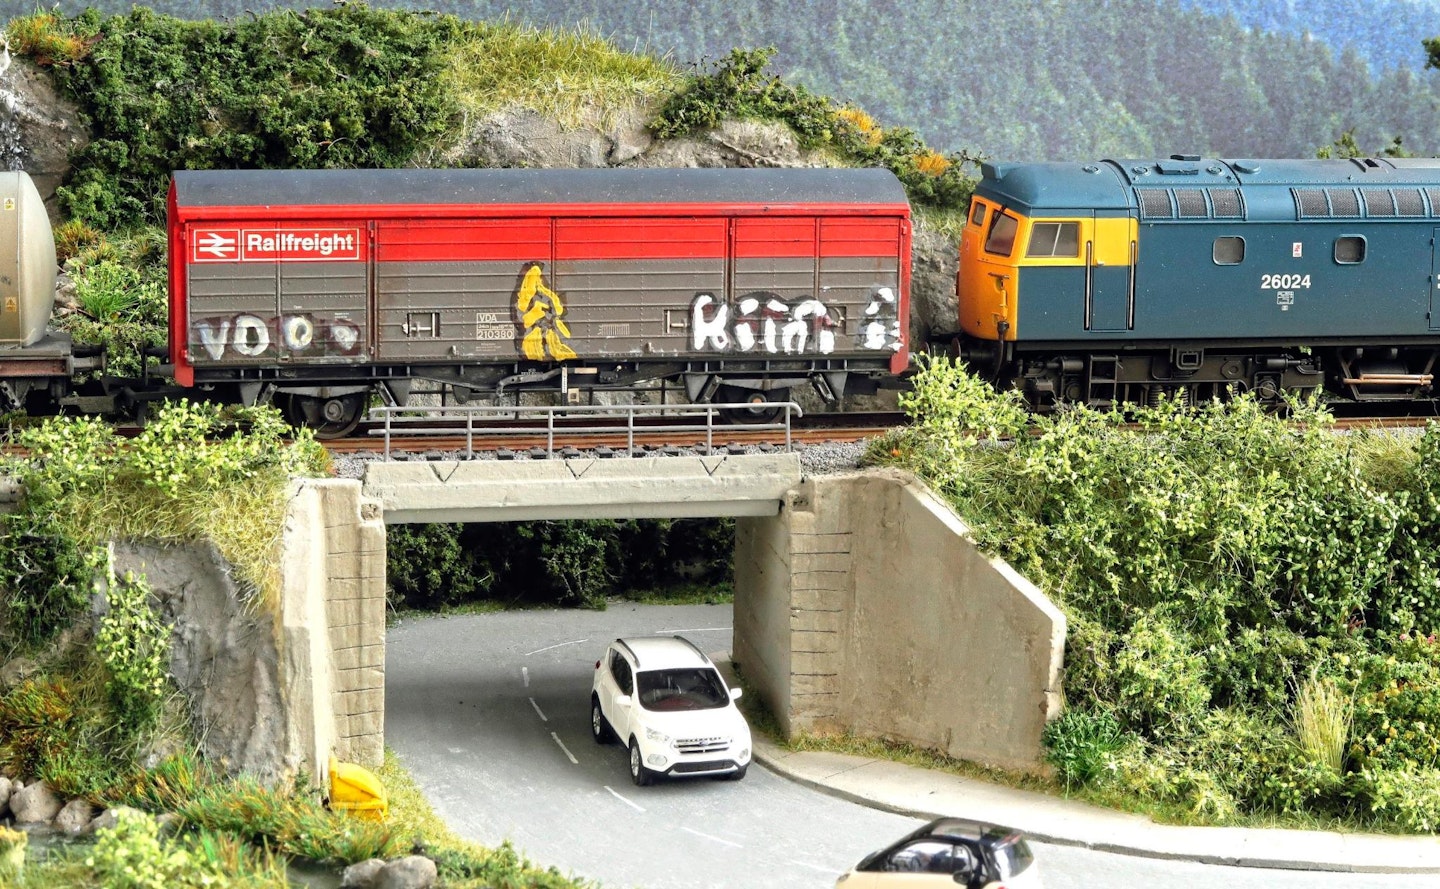
For some years I have bought ready-made sheets of waterslide transfers of graffiti for use on rolling stock, buildings and retaining walls. I happened to have a BR VDA wagon knocking around and its vibrant Railfreight livery looked a little plain and pristine for my liking. It needed a bit of graffiti and weathering to bring it to life.
Instead of using off-the-shelf graffiti decals, however, this time I thought I’d try my hand at making my own transfers. I ordered a pack of five A4-sized clear waterslide transfer sheets from Amazon and, although larger packs offer better value for money, I wanted to have a trial run first with a smaller pack, before committing. Accordingly, the cost of the sheets worked out at around £1.50 each, which is not bad compared to purchasing ready-made decals.
I already had plenty of photographs on file featuring numerous graffiti-covered wagons from all over Europe, which I whittled down to a handful of examples, prioritising images that had been captured square-on to the subject, rather than from an angle.
I then set about experimenting with my printer, using sheets of plain paper initially until I had scaled the images to the desired size. Next, it was a case of choosing the ‘Best Quality Print’ in the printer’s dialogue window, plus setting the paper type to ‘Photo Paper’. The transfer sheet was then loaded into the paper tray, ensuring that it was set the right way up (models of printer differ, but I had to have the backing sheet facing upwards).
I clicked PRINT on my PC, then waited while the first sheet was printed. The results were good, and I left the sheet aside, allowing the ink to dry for a few hours.
The next step was to seal the printed images with a clear acrylic varnish. Here was my first mistake – I brushed on a little neat matt acrylic varnish which proved too strong, removing and smudging some of the printed detail. I then tried diluting some MIG acrylic matt varnish in a ratio of 1:1 with cool water, applying it over the sheet with a wide soft brush. This worked well and I left it to dry overnight. The next day I recoated it with another layer of the MIG varnish and left it to dry again. An aerosol-based clear coat may be suitable, but I’d suggest testing it first to see if the paint formula reacted with the ink or transfer film.
Having cut out the graffiti motifs from the sheet, they were soaked one by one in lukewarm water and gently transferred onto the wagon, dabbing away excess water with a small piece of kitchen towel. As the transfers dried, I began to feel disappointed, due to the translucent nature of parts of the graffiti. In hindsight I realised I should have used white transfer paper instead of clear, although these would have needed extra care when cutting from the sheet to avoid a stark white outline to each motif.
Anyway, once the transfers had dried, I gave the wagon a weathered finish which actually improved matters. However, to take things a little further, I used paint to redraw sections of graffiti and give areas a more vibrant appearance. It took time but ultimately proved worthwhile.
What you will need
SHOPPING LIST
✦ A4 waterslide white transfer paper Price: About £8.99 for 10 sheets Availability: Craft stores or www.amazon.co.uk{href='https://www.amazon.co.uk/'%20%7D%20%7B?tag=qbauermedia-21#block-06b89a24-ef55-46ef-8e9c-b071111deb6c}
✦ Micro Sol decal softening solution Price: £5.00
Availability: Model shops or www.scalemodelshop.co.uk
TOOLS
✦ Scissors
✦ Tweezers
✦ Wide soft paintbrushes
✦A small dish for water
✦ Kitchen towel
STEP BY STEP
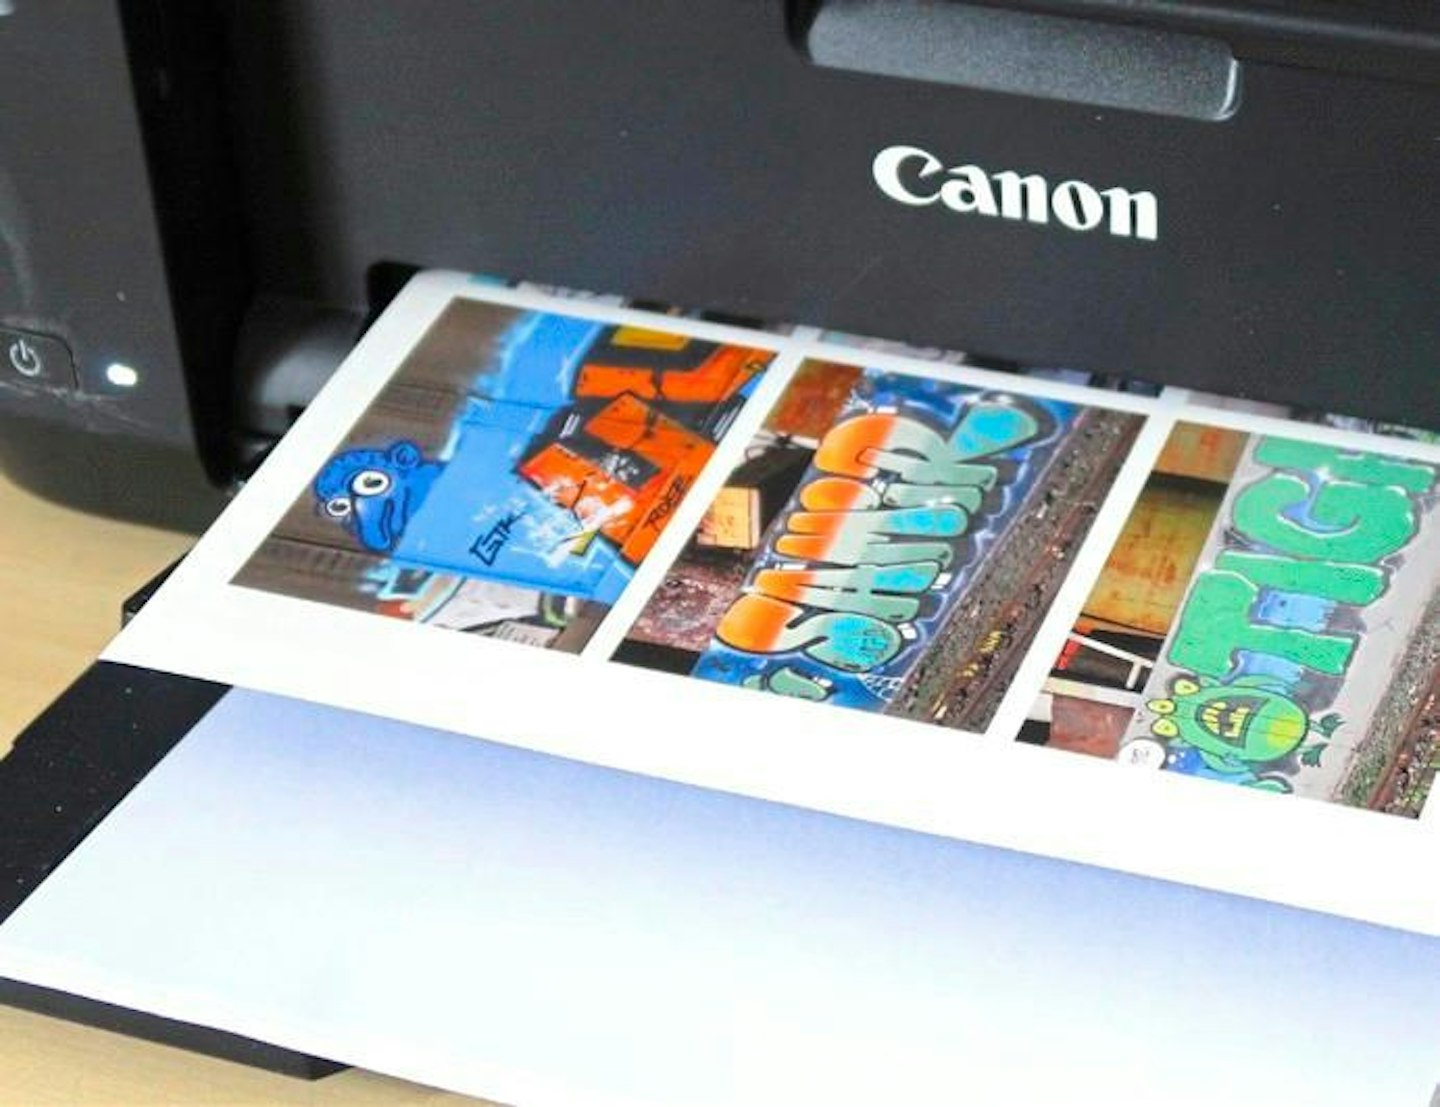
1 I set my Canon Inkjet printer to High Quality and Photo Paper settings, undertook a test print onto regular paper and, when satisfied, fed the transfer paper into the printer, ensuring it was the correct side up.
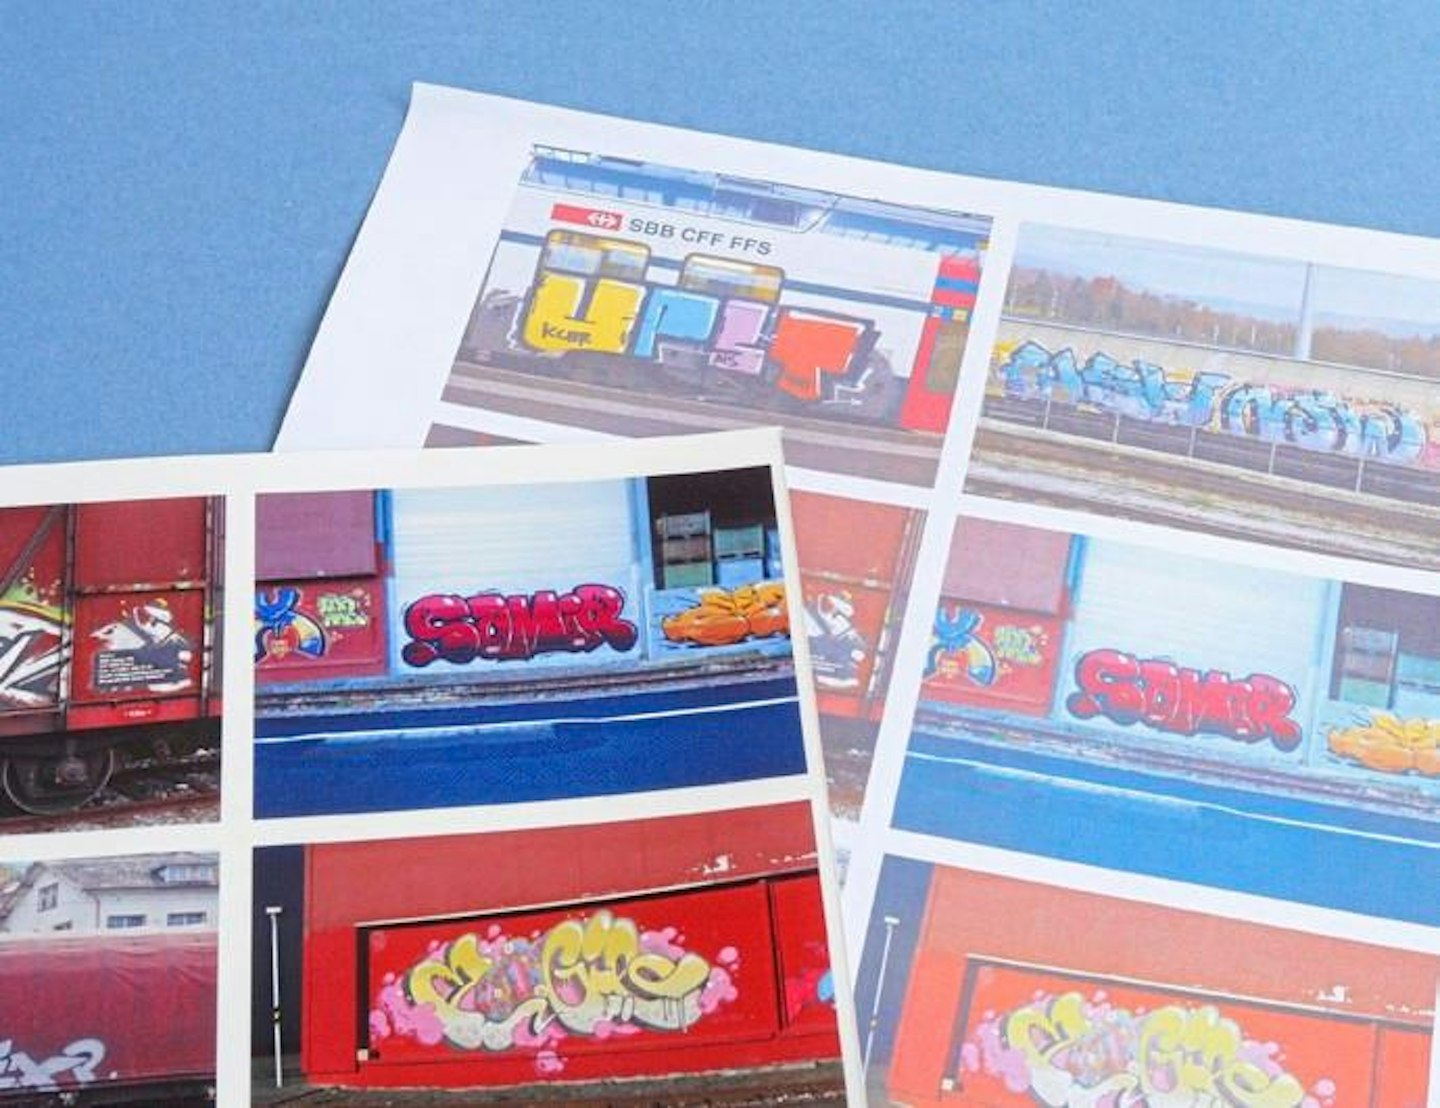
2 To show the difference between the results from the printer on different settings, here’s a test I created using plain paper (right) contrasting with the final sheet of waterslide transfer paper (left), which is far better defined.
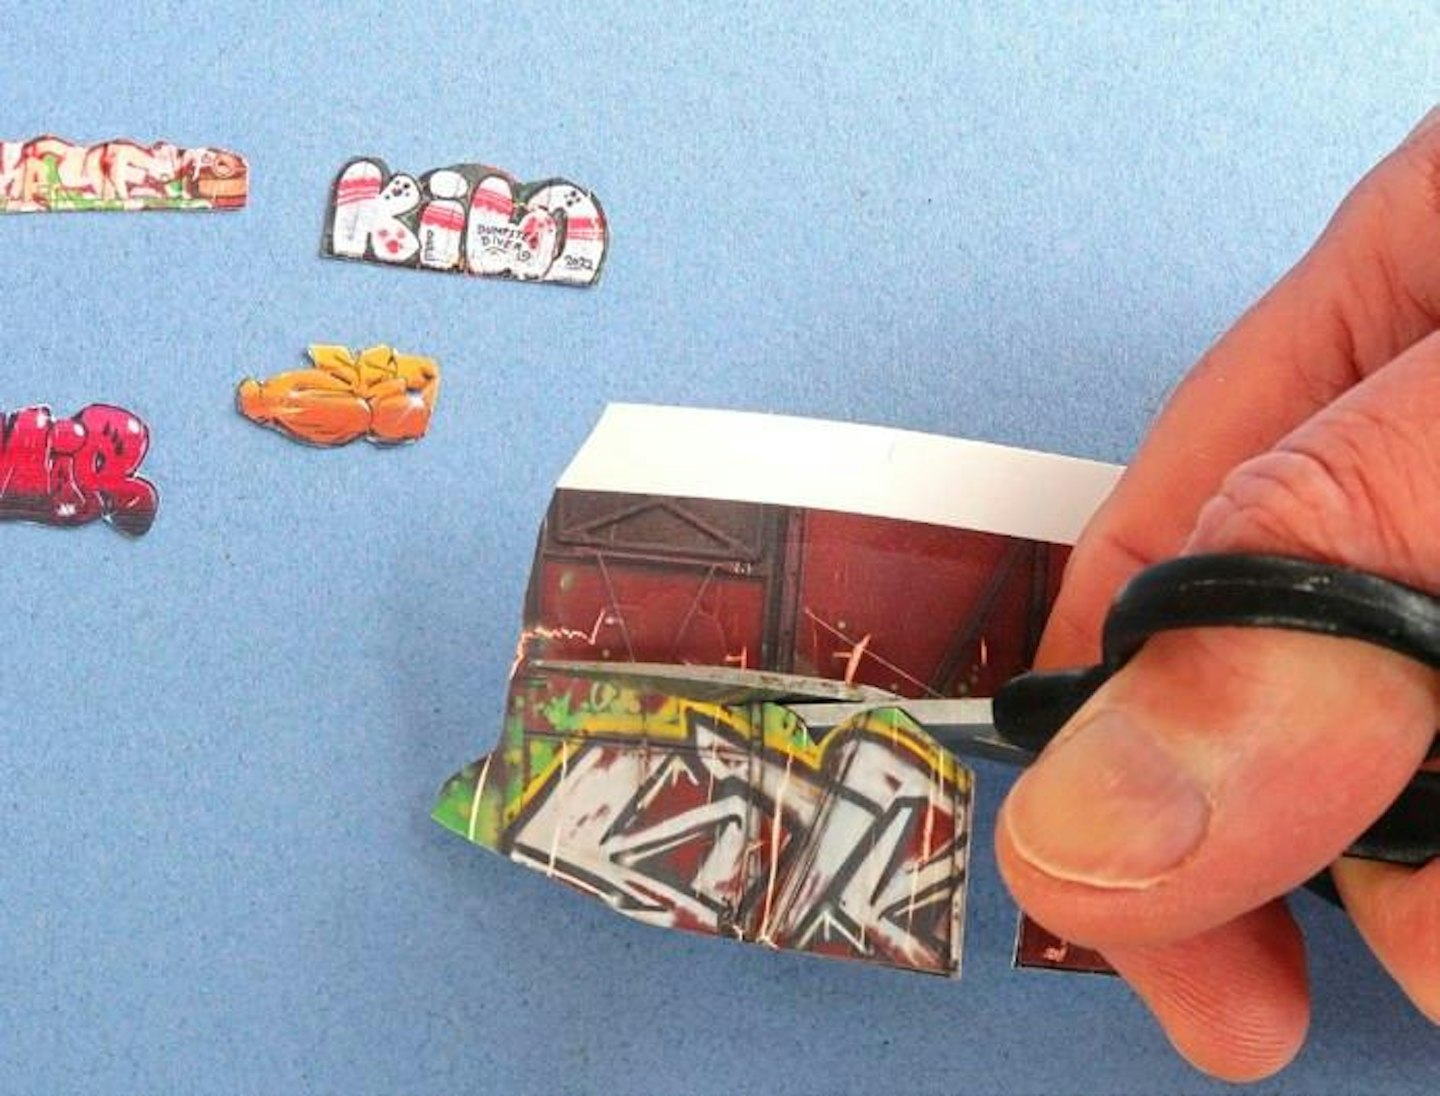
3 After sealing the printed sheet with clear varnish, I used a set of small, sharp scissors to cut carefully around each of the pieces of graffiti ‘art’, being careful to leave a small margin around the edges to avoid too harsh an edge.
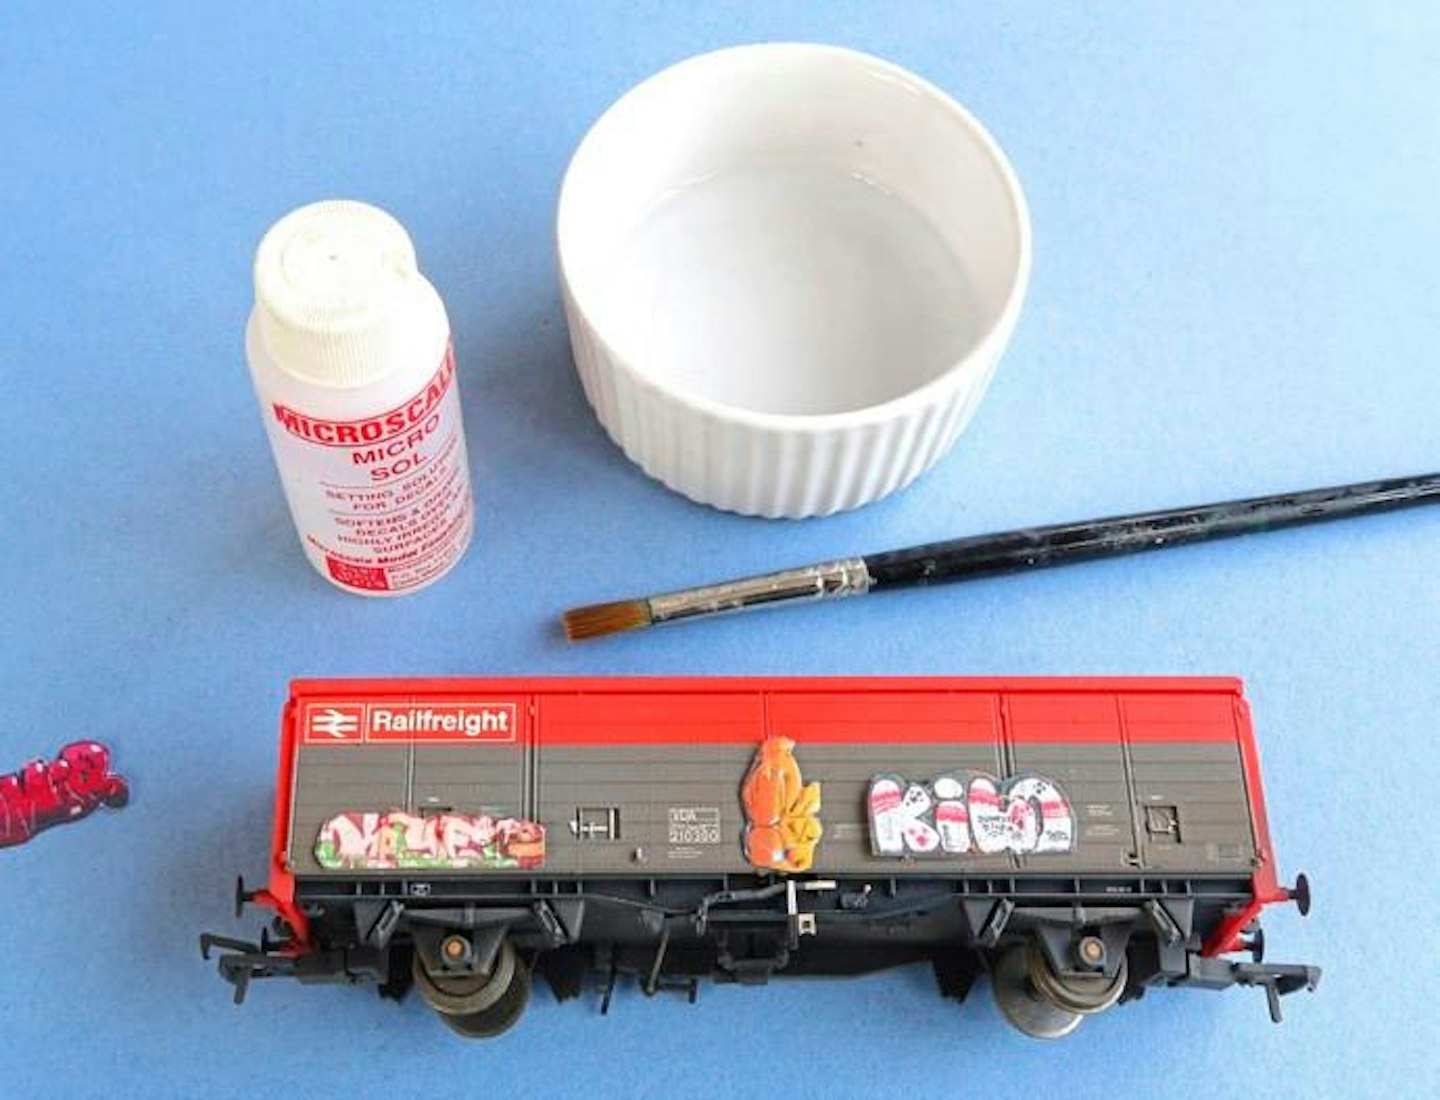
4 I placed the various bits of graffiti on the sides of the wagons to see which motifs worked best. Once the composition was decided, a small dish was filled with clean, lukewarm water and the first decal was submerged, as I waited for the film to loosen from the backing paper.
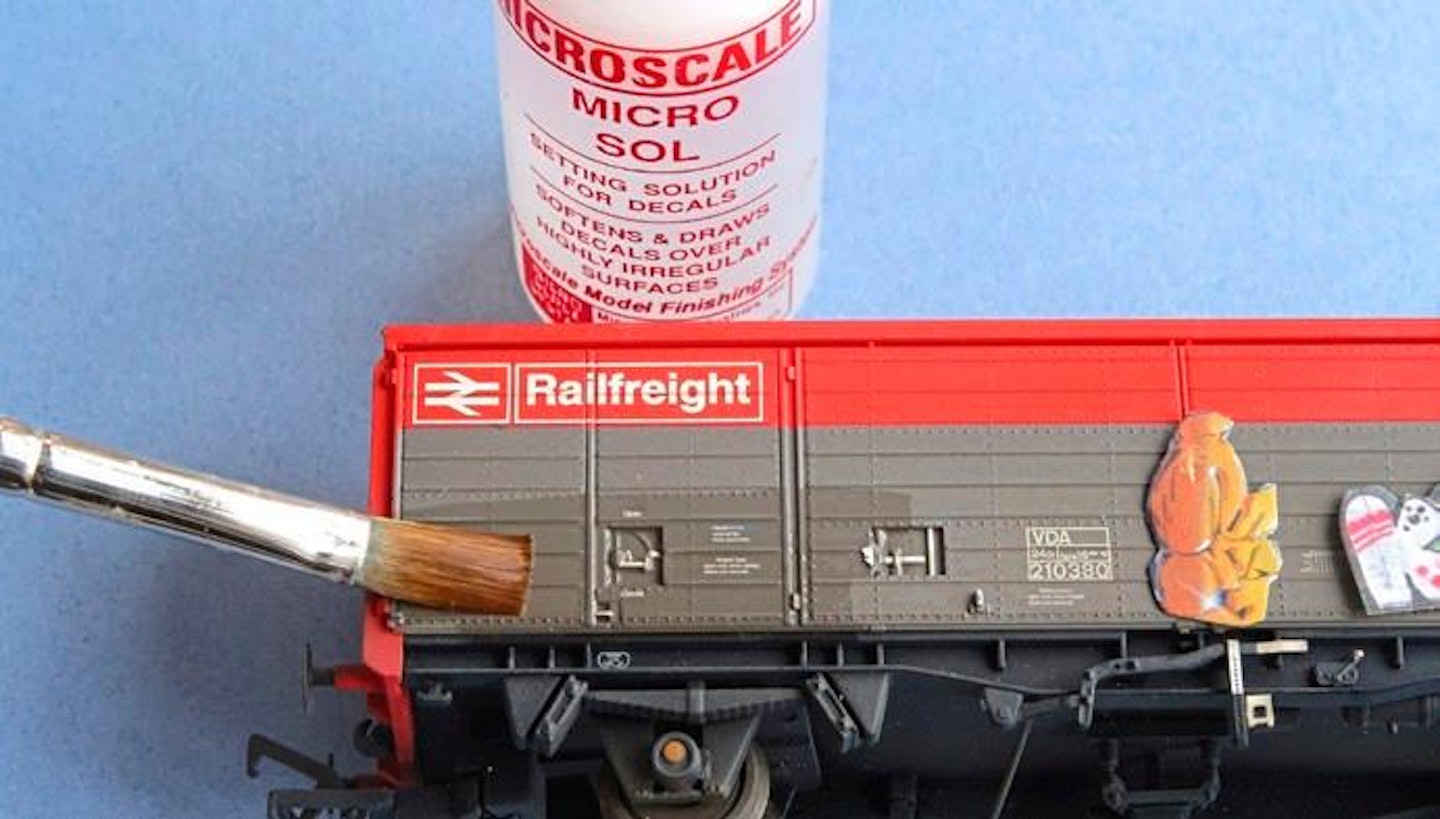
5 I brushed the model’s surface with Microscale Micro Sol decal setting solution immediately before sliding the decal into position. This liquid improves adhesion while also softening the film slightly to help it conform to uneven surfaces.

6 More Micro Sol can be applied over the decal if needed. When dry, this was the disappointing result, with the graffiti ‘art’ appearing translucent. In hindsight, I should have used white transfer paper. But at least my home-made decals adhered well to the model.
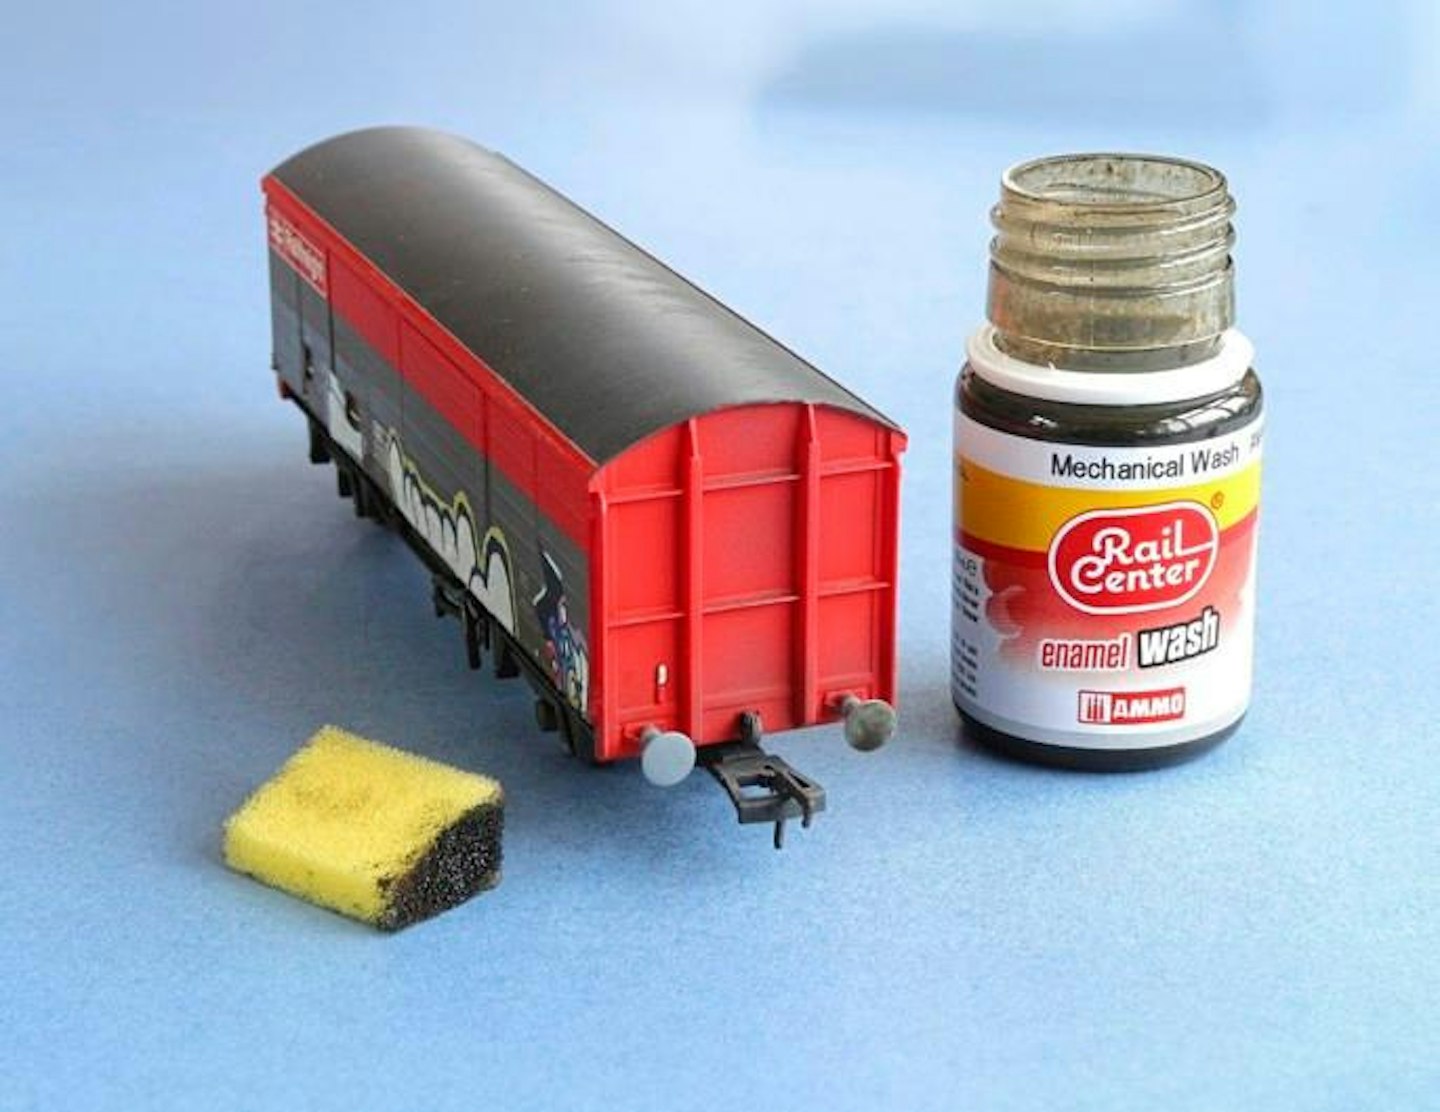
7 While I pondered what to do about the ‘bleached-out’ graffiti, I set about weathering the wagon with a dark enamel wash, applied sparingly with a block of sponge, dabbing it here and there. I also dry-brushed the chassis with a grey acrylic paint to pick out the relief.
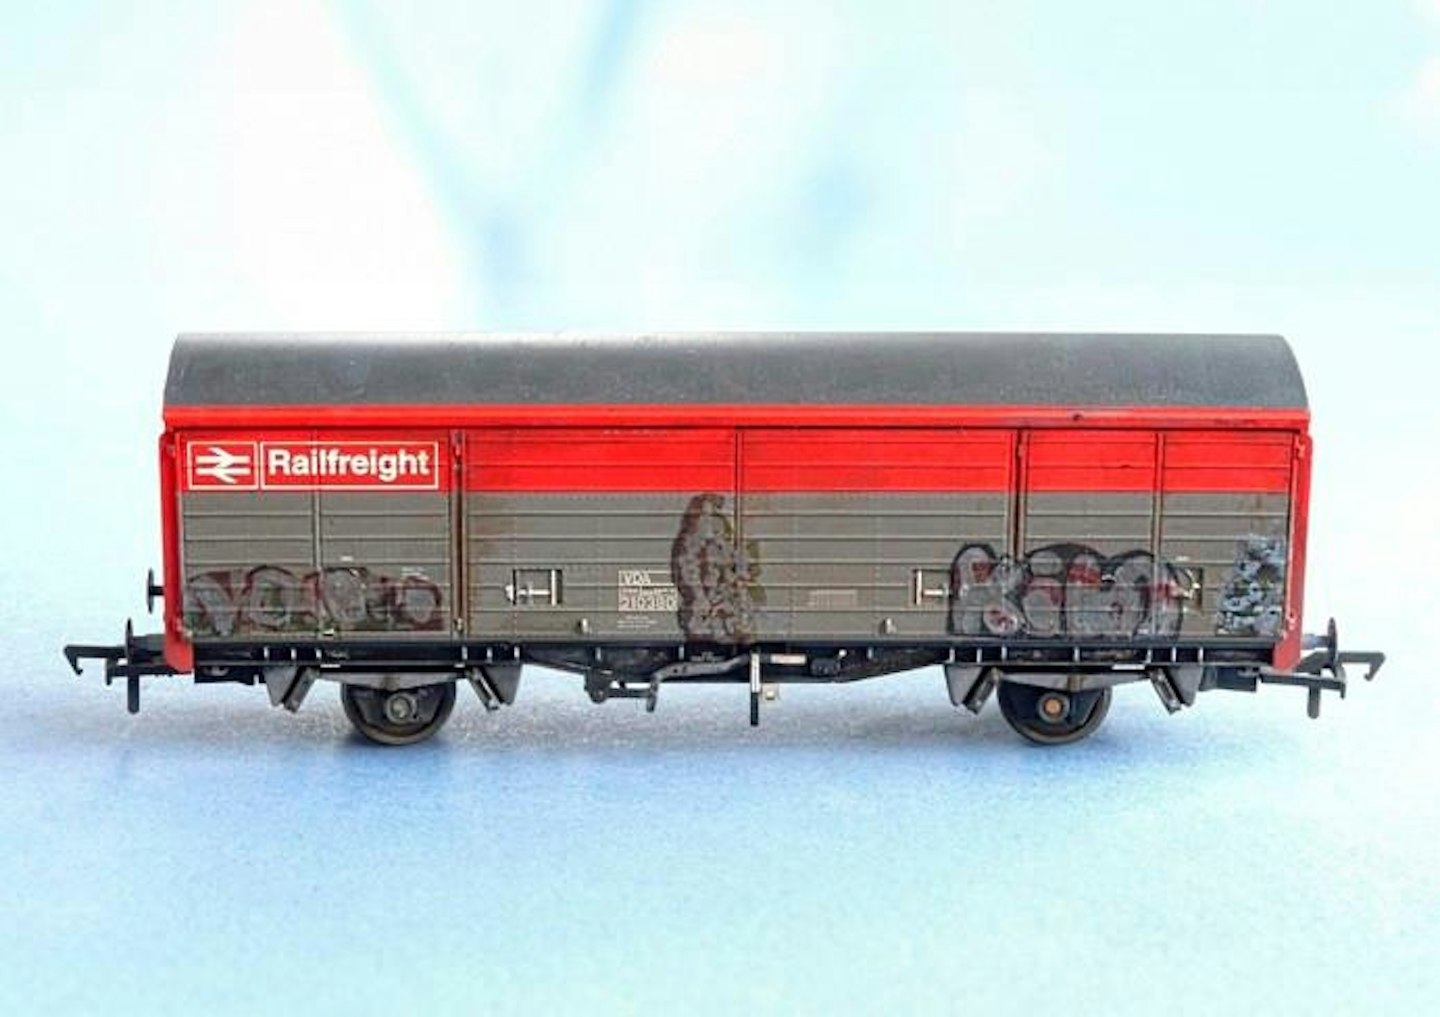
8 The wagon’s overall grubby appearance ameliorated the faded nature of graffiti decals, and I was tempted to stop there. However, I came up with an idea that was worth a try…
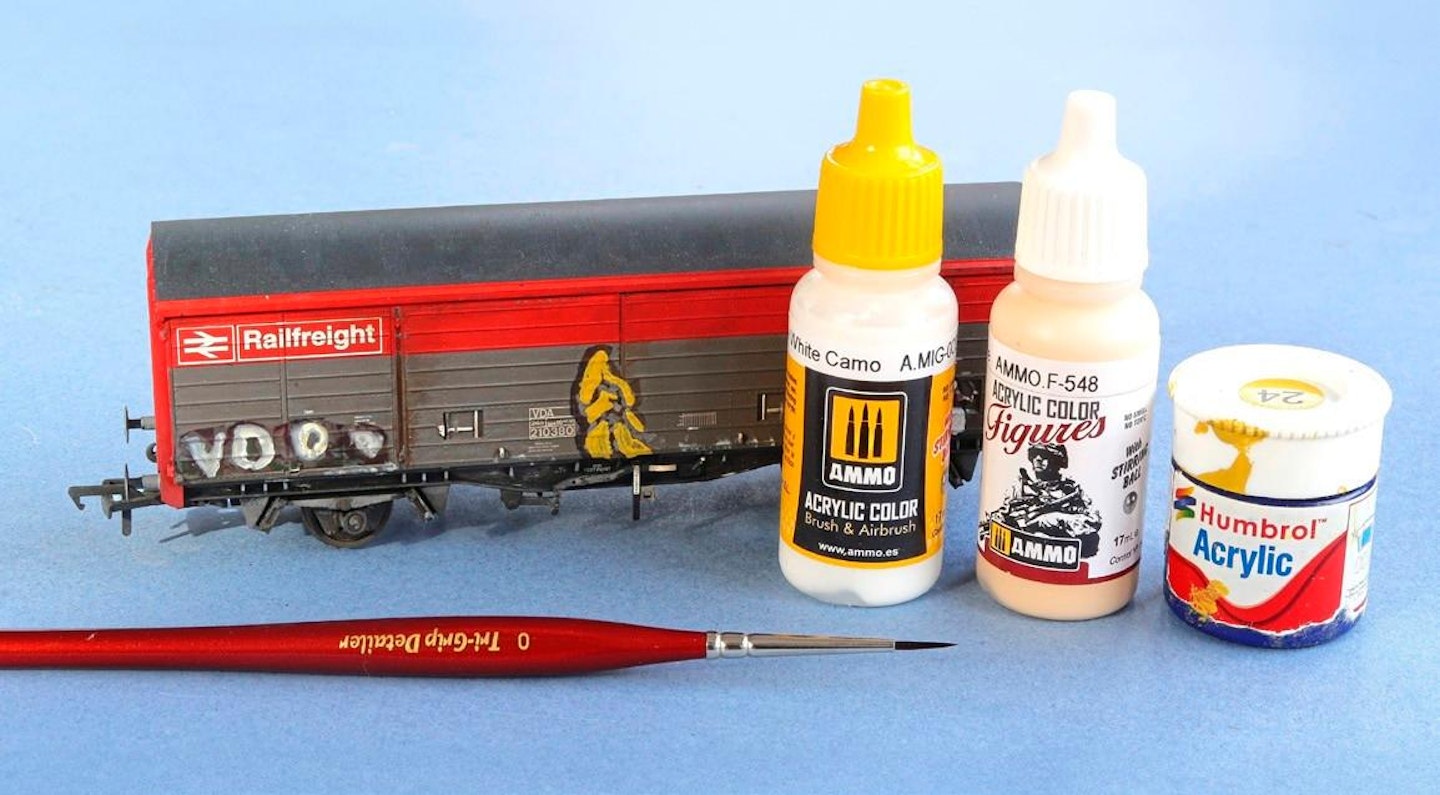
9 I gathered up a few random acrylic shades and brush-painted colour onto the graffiti, using the existing dark borders as a guide. I know this isn’t ideal, but it did create some interesting results. After all, not all graffiti is the same.