
Peter Marriott dons an apron and sets about testing an interesting new modeller-friendly plaster material that hails from Belgium.
PHOTOGRAPHY: PETER MARRIOTT

With plans for a number of new modelling projects this year, most of which will feature large areas of exposed rockfaces, I thought it prudent to try out some new products and techniques. This would help me to decide whether to employ them on these upcoming layouts, or if I should stick to processes that I’ve used before.
What prompted me to experiment was the appearance of Mifoshape, a sculpting powder that has recently become available. Formulated in Belgium, it was created out of dissatisfaction with established plaster materials, with an aim of creating a medium that can be worked easily for up to 30minutes before it begins to set. With traditional plasters, we’re lucky if we get 10 minutes to work the material before it begins to harden and becomes unworkable.
Another feature of Mifoshape is the ability to still work on the landscape while it’s curing. The nature of the material allows fine detailing to be imparted into the rockfaces, especially if a little PVA glue is added to the water/powder mix, and drying time is dependent upon the amount of water added to the mix, and the thickness of the material. Initial curing takes place within the first two hours, but full curing may take a couple of days, depending on ambient temperature and humidity. Drying can be speeded up by positioning a fan to ventilate the area, encouraging the water to evaporate.
Various mixing ratios can be employed, the most common ratio is 3 parts powder to 1 part water. The less water used, the quicker the drying time. It is recommended to experiment with the ratios and discover what works best for you. The powder has a maximum shelf life of six months once the sealed bag is opened, but remember to reseal the bag using the strip provided to prevent any moisture from entering the bag.
TESTING MIFOSHAPE
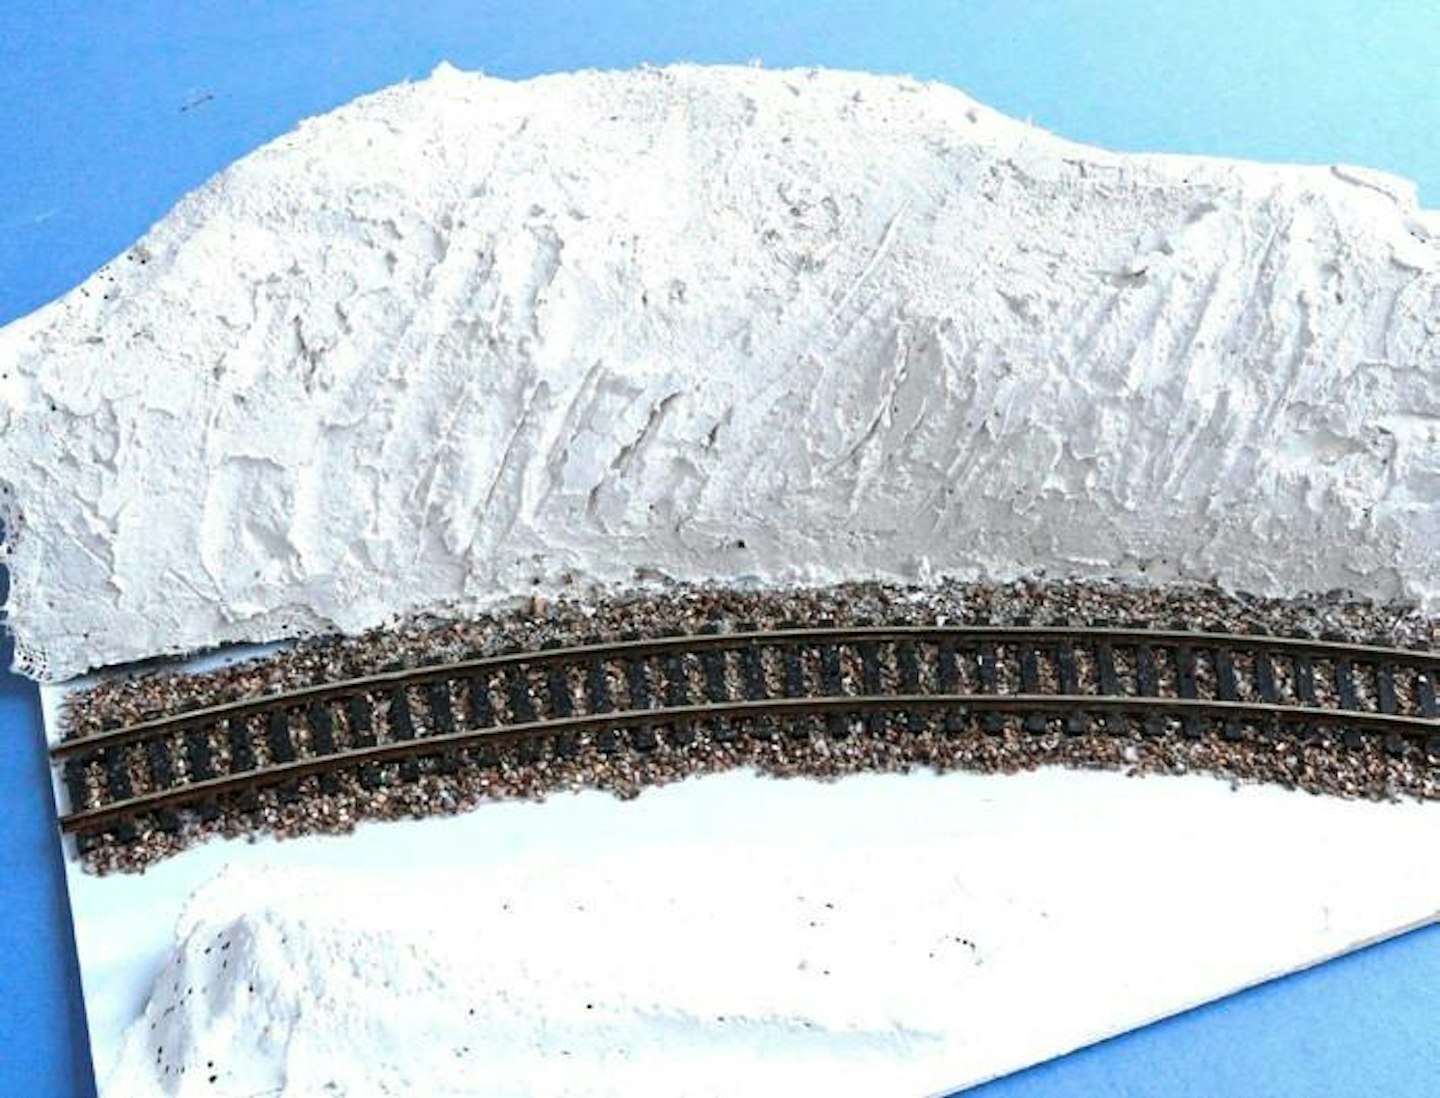
To put this new sculpting material to the test, I opted to build a diorama featuring a railway cutting hewn from rock, which would provide an interesting backdrop. When the parcel arrived, the Mifoshape was packaged within a couple of useful black foam sheets. As I’m always happy to recycle materials wherever possible, the foam was used as the basis for the landscape, which was then covered with a layer of plaster cloth to give the Mifoshape a good surface to adhere to.
Next day, I mixed some of the Mifoshape powder with water in a plastic tub (plastic takeaway food tubs are ideal for this purpose – cleaned of course!). I used a 3:1 ratio of Mifoshape and water, plus a little PVA adhesive, mixing it thoroughly with a wooden stick. Once I was happy with the consistency, it was applied to the scene with a small trowel.
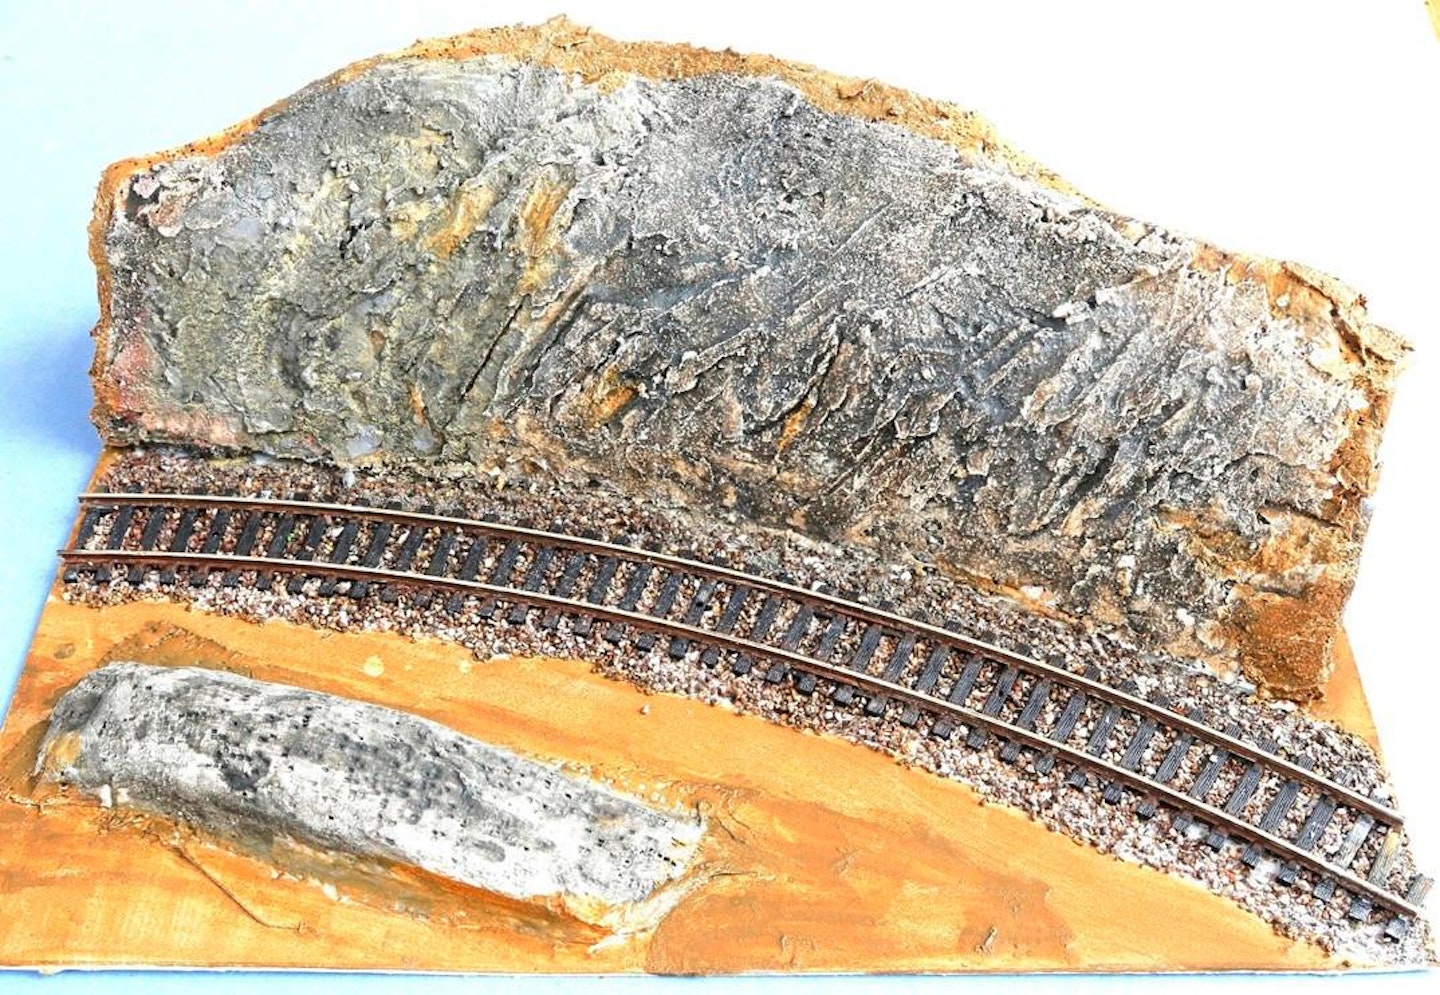
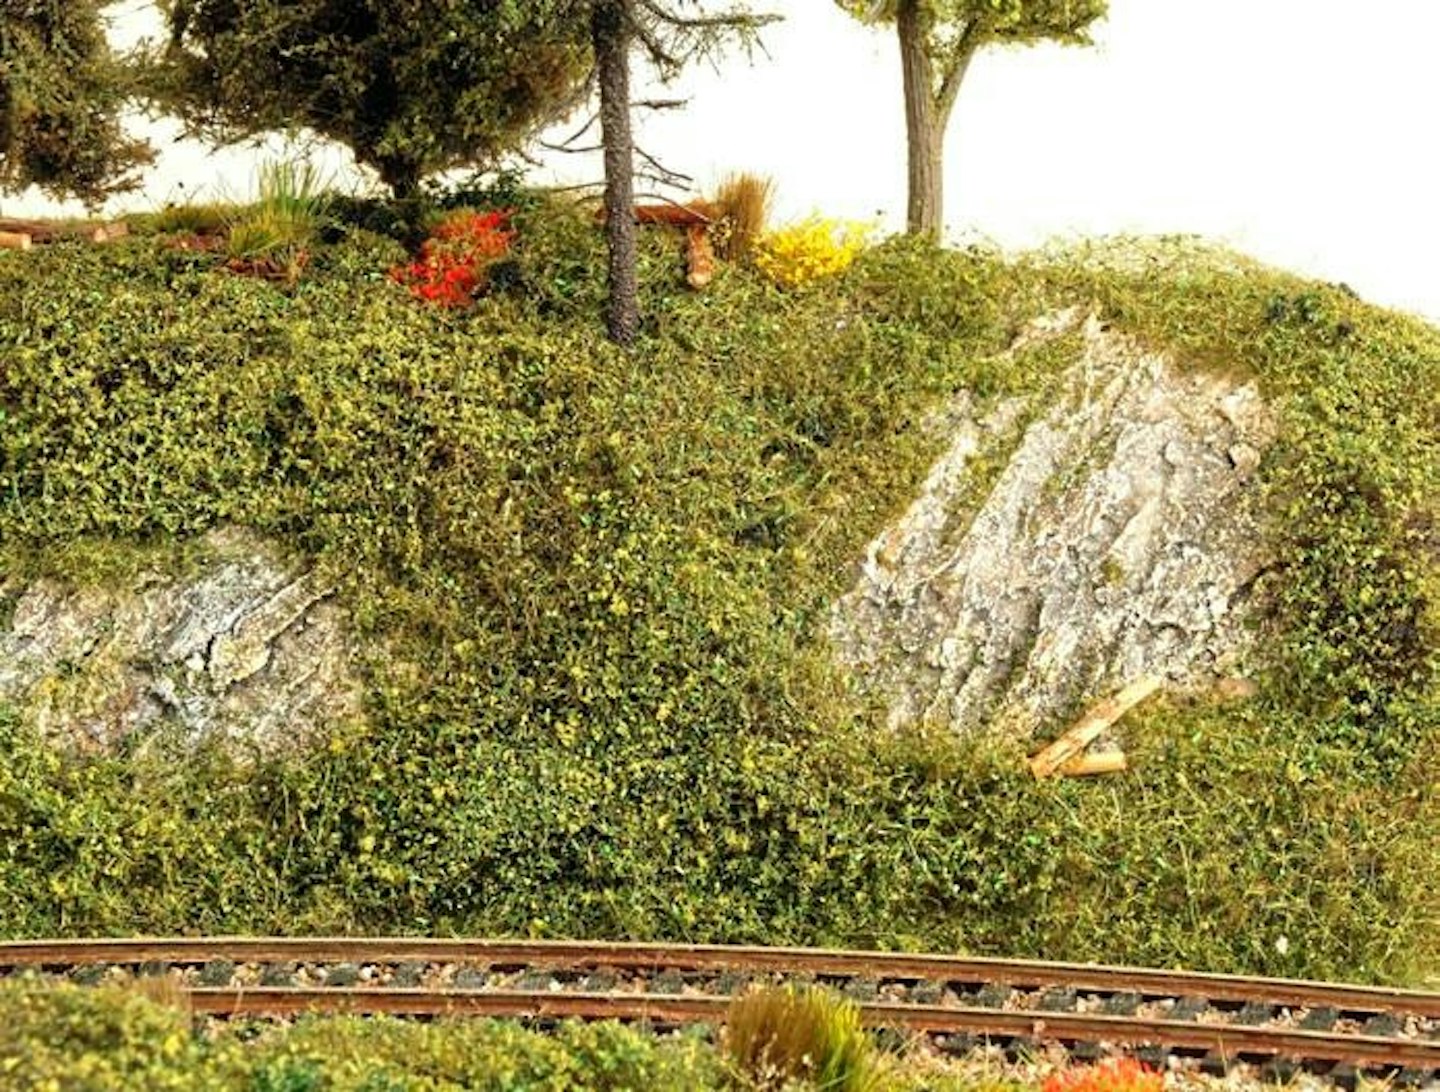
The Mifoshape was applied to an initial depth of 2-3mm and, after leaving it to dry for about 15minutes, I used the cleaned trowel to cut into and shape the damp Mifoshape to represent cracks and texture of a typical rockface.
CONCLUSIONS
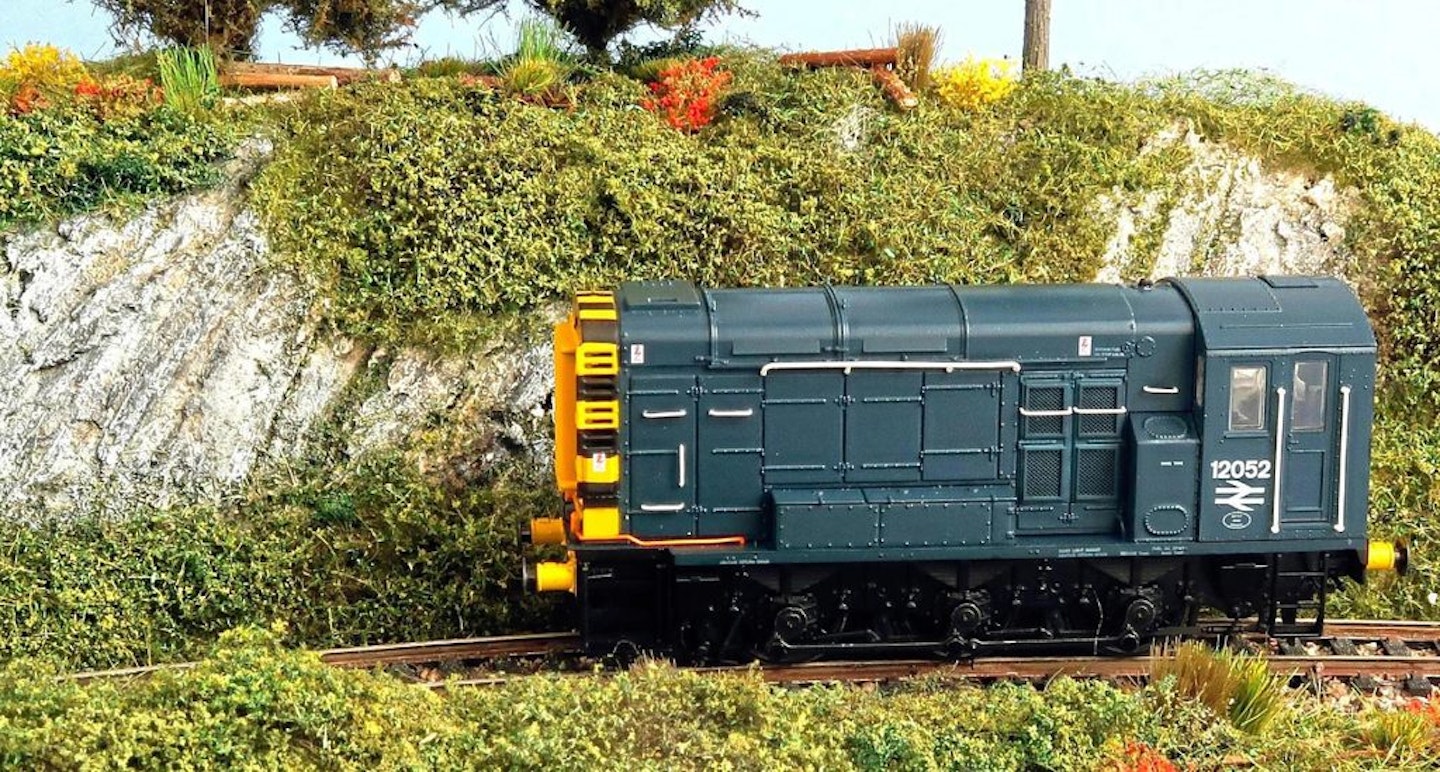
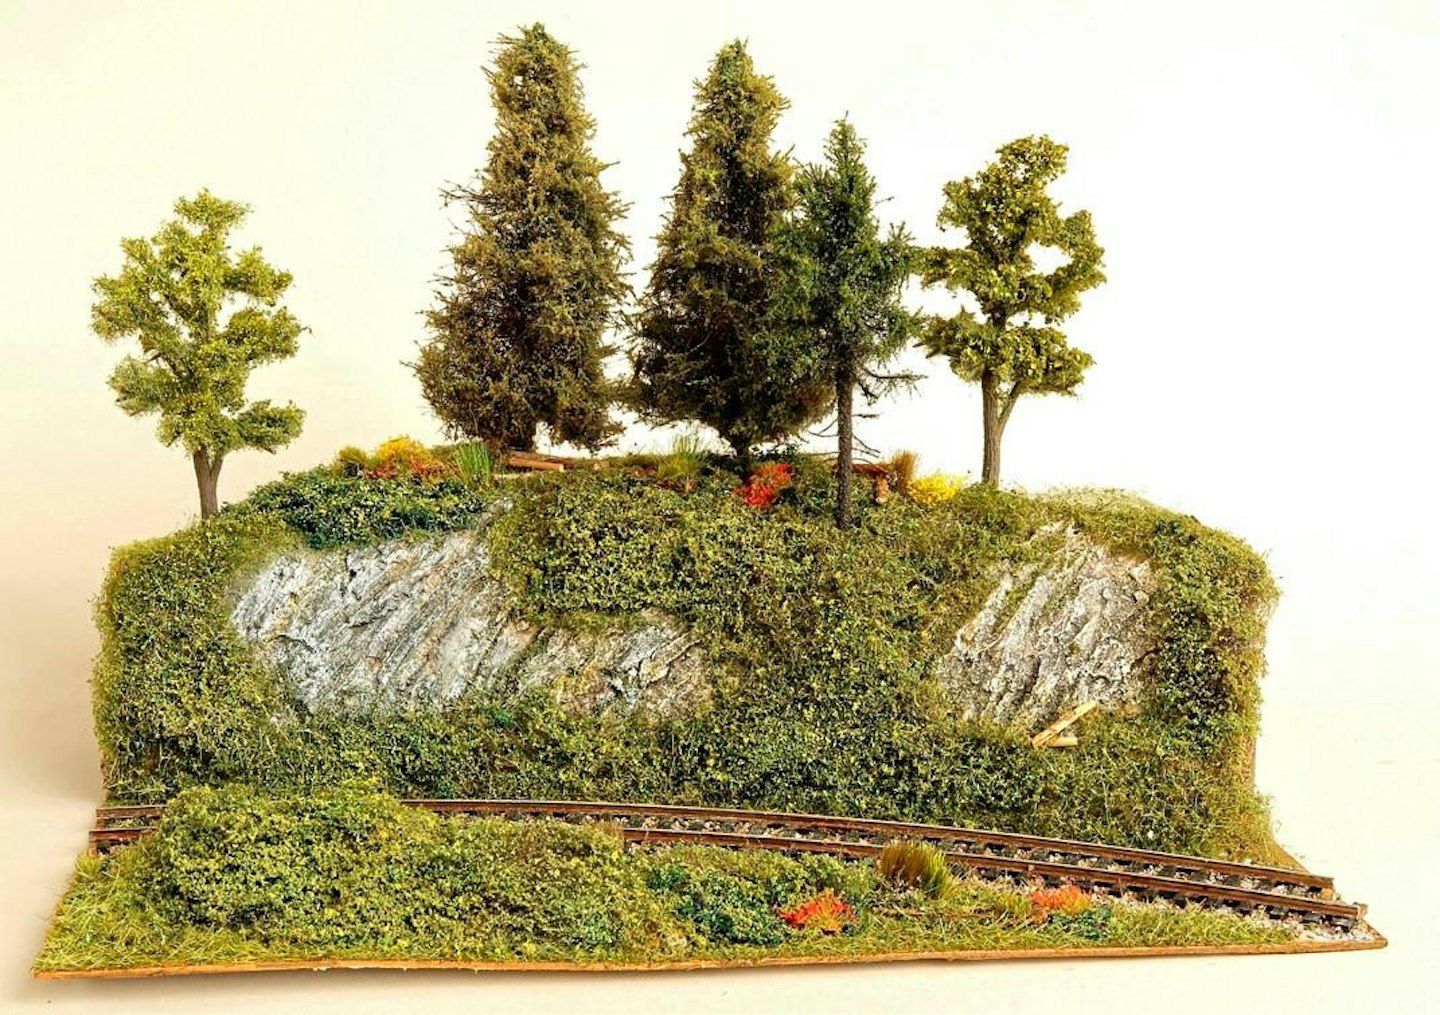
Painting was carried out the following day, followed by the addition of layers of greenery, and I was pleased with the finished results. I found Mifoshape easy to work with and, once it is coloured, it looks very realistic. I didn’t feel like I was working against the clock to achieve the desired results, thanks to the longer working time, while the material was responsive when adding textures and strata patterns to the surface.
Due to its porous nature, only thin washes of paint are necessary to colour the Mifoshape once it has fully cured. Applying too much paint is likely to reduce the realism of the finished rockface. The packaging foam sheets provided a great basis for the landscape, being lightweight – and free! Patience is needed with all modelling projects, but particularly when creating rockfaces, as it’s important to allow each stage to dry-out fully before moving on to the next step. The trial has felt like a success, so I will feel confident using this Mifoshape sculpting powder on my scenic projects in future.
What you will need
SHOPPING LIST
◆ Mifoshape sculpting powder
Price: £25 per 1.5kg bag
Availability: DCC Train Automation
Web: www.dcctrainautomation
◆ Mifoshape website: www.scapesupplies.com
◆ Woodland Scenics Poly Fibers, various scatter materials and grass tufts, plaster cloth, acrylic paints, PVA adhesive
Availability: Model/craft shops
TOOLS
◆ Mixing bowl
◆ Small trowel
◆ Paintbrushes
◆ Electrostatic grass applicator (optional)
STEP BY STEP
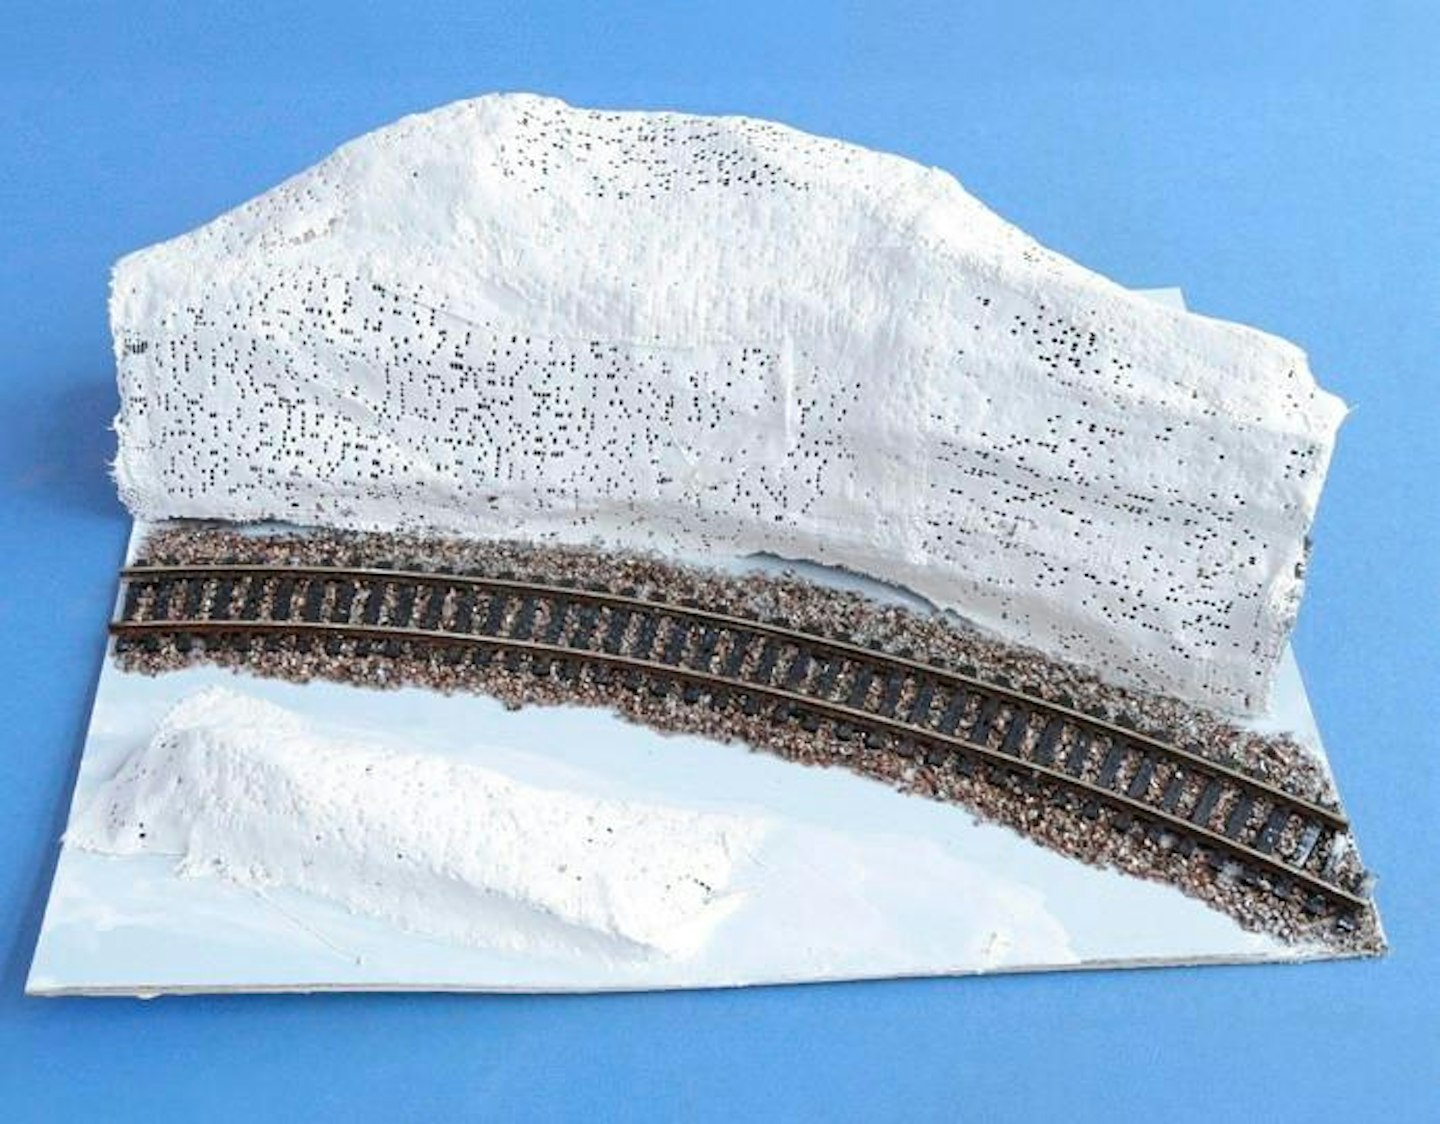
1 I made a small diorama measuring 27cm by 20cm, from a sheet of mounting card, onto which the landscape contours were created using pieces of foam packaging, bonded with PVA glue and covered with plaster cloth.
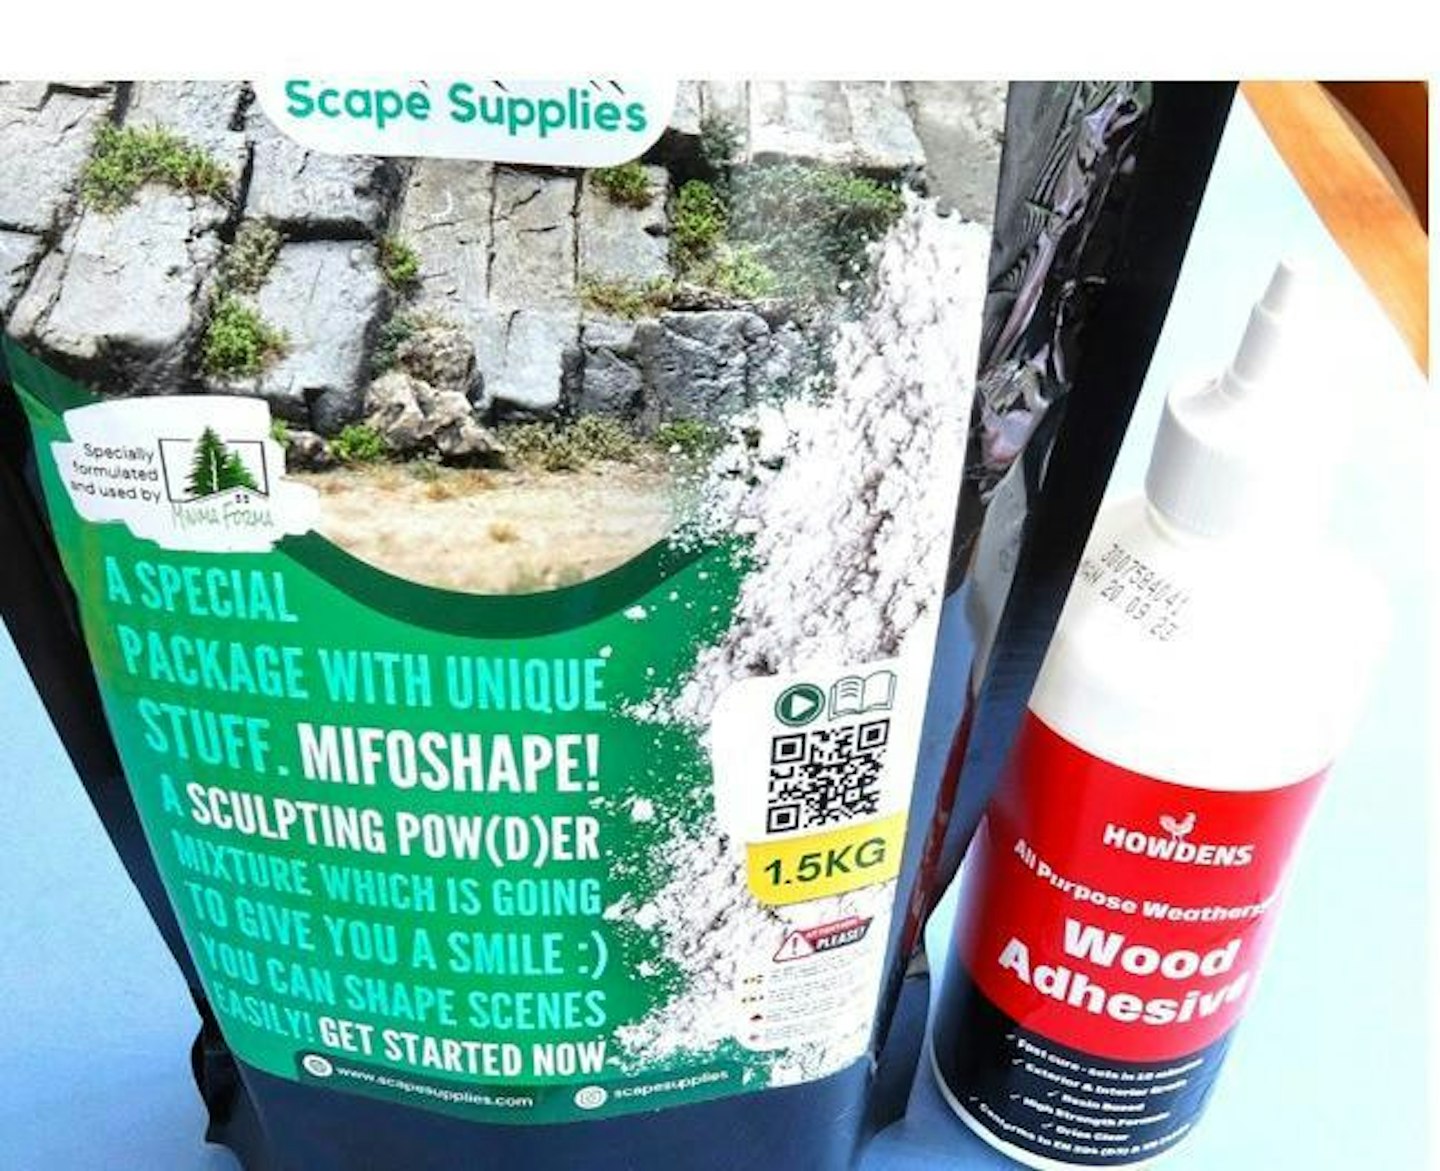
2 Mifoshape is a new powder from a Belgian manufacturer, designed for creating landscapes and rock faces. It has been formulated with modellers in mind, with the aim of making it easier to with than most regular plasters.
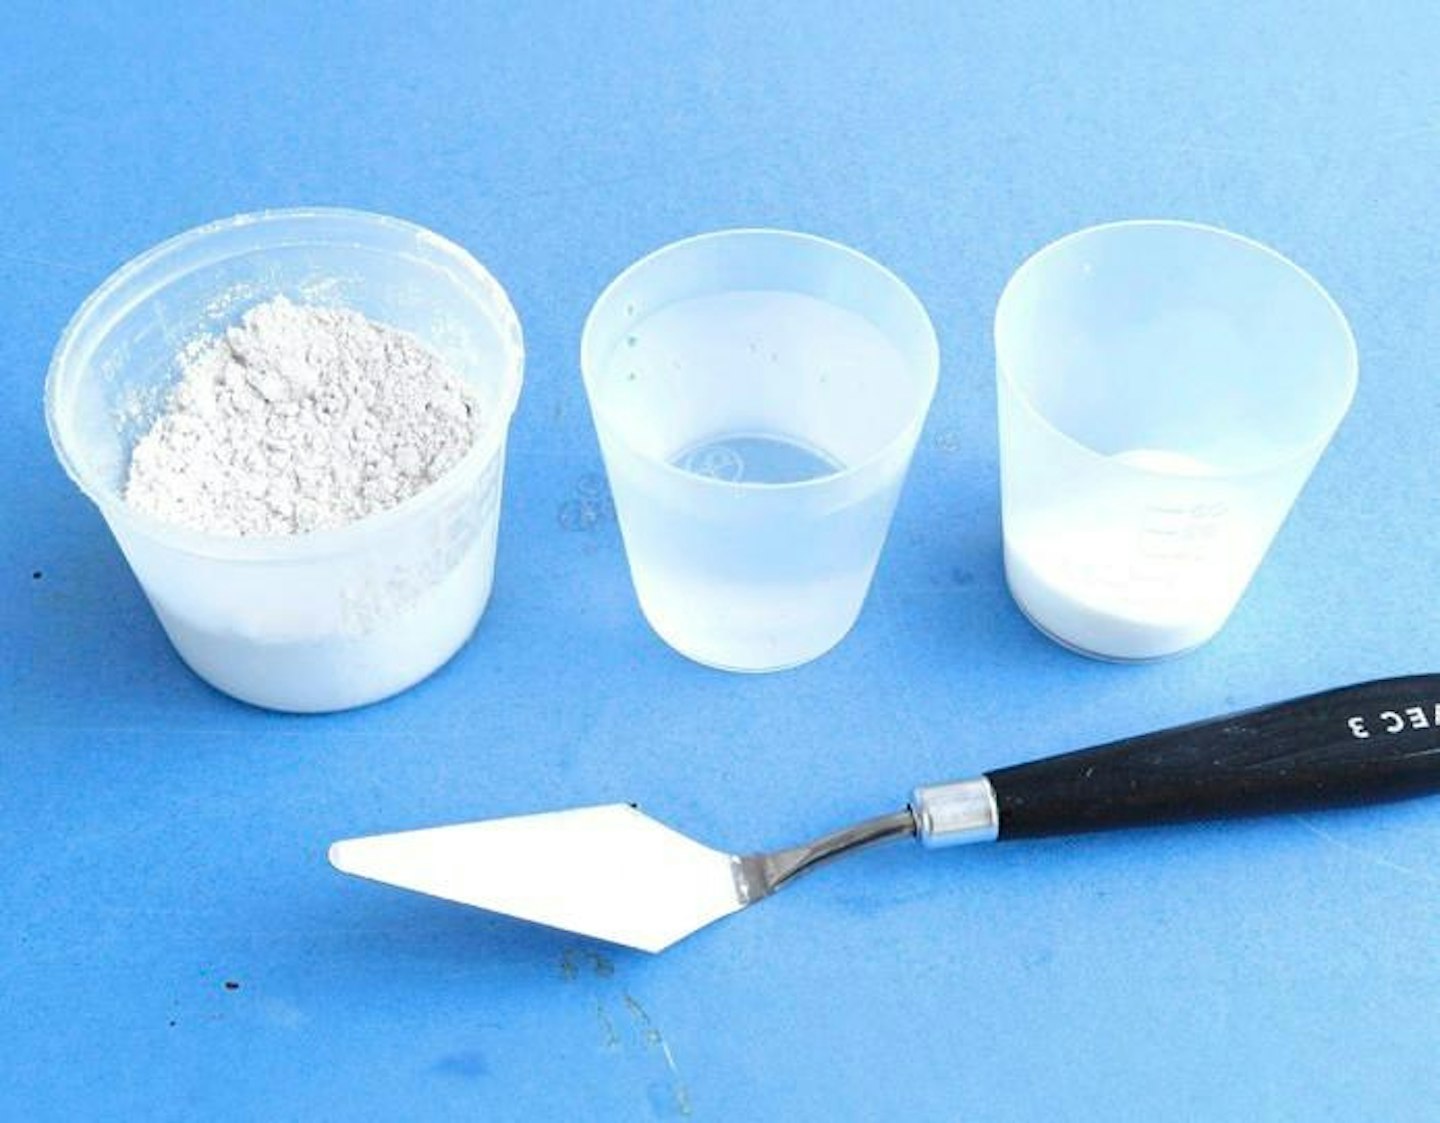
3 You can tailor the mixing ratio, but I opted for the ‘regular’ 3:1 blend of Mifoshape and water, measured out in plastic cups. To improve adhesion of the mixed Mifoshape I mixed in 10% by volume of PVA woodworking glue.
4 It’s important to fully close the protective strip along the top of the Mifoshape packaging, to lock out any moisture from the air and ensure the product remains usable for up to six months after first opening.
5 After mixing the water, PVA glue and Mifoshape powder thoroughly, the mixture becomes ‘claggy’, which is easy to pick up with a miniature trowel. It’s now ready to apply to the model scene.
6 I applied the mixture over the dried plaster cloth, to a depth of around 2mm. The miniature trowel (about 20cm long) proved an ideal tool (they’re available from art/craft stores), helping to apply and spread the mixture accurately.
7 After spreading the mixture over the area, I waited about 15minutes before using the cleaned trowel to create a more refined texture, as well as strata lines, wiping the tip of the tool with a cloth at regular intervals.
8 The Mifoshape remained workable for a good 30 minutes, so there was no need to rush during the treatment of this small diorama. When happy with the appearance, I set the scene aside overnight in a warm room to dry out.

9 Next day I created various washes from several Revell acrylic paints, diluted heavily with water (about 90% water and 10% paint). Water-based paints will be absorbed easily by the porous surface, so only a small amount is required.
BEHIND THE SCENES
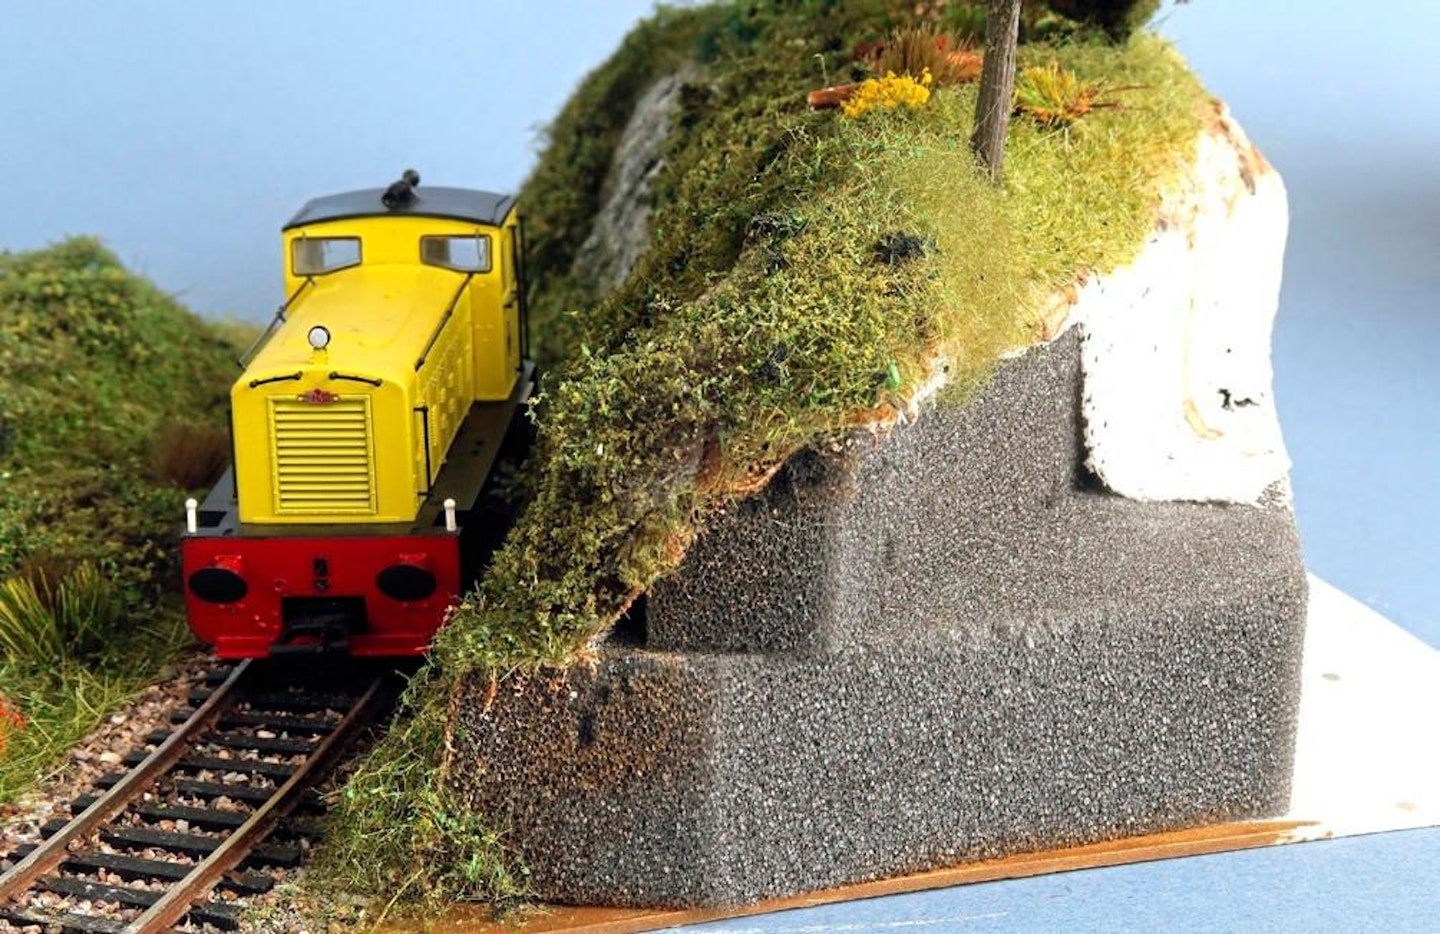
The sheets of foam packaging provided a perfect – and free – material with which to form the landscape. A layer of plaster cloth allowed the basic scenic contour to be created, while also providing a more rigid surface.
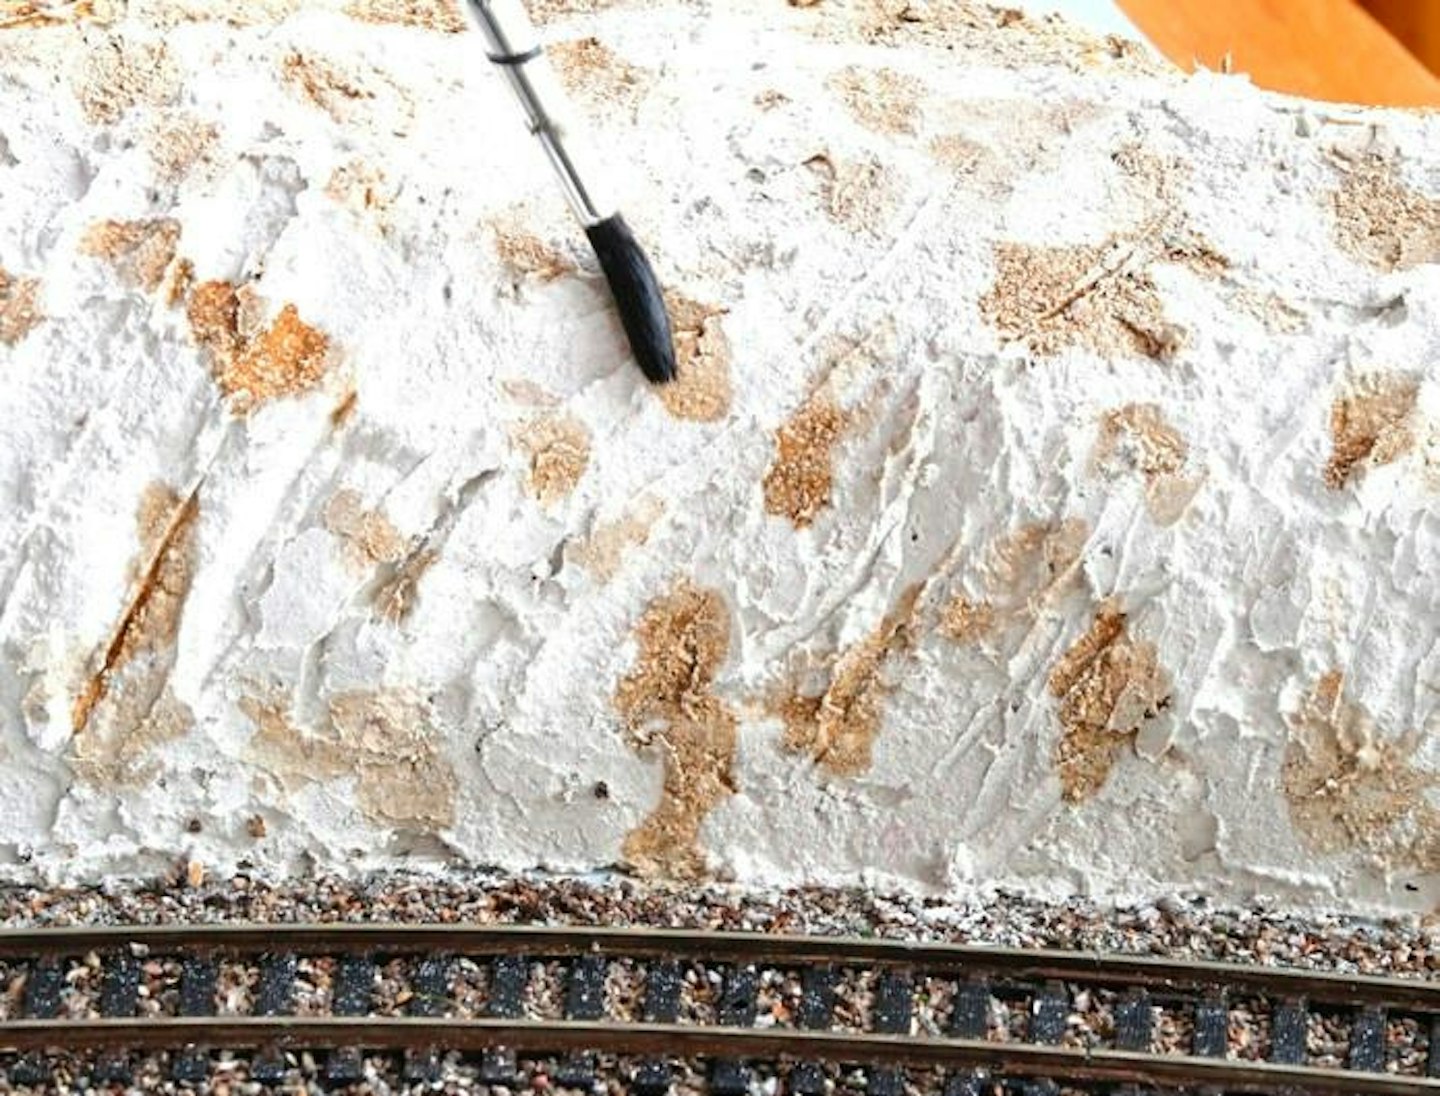
10 Starting with a mid-brown wash shade, and using the ‘leopard spot’ technique, I applied it in modest spots with a round brush along the rockface. The process was repeated with a few lighter and darker brown washes.
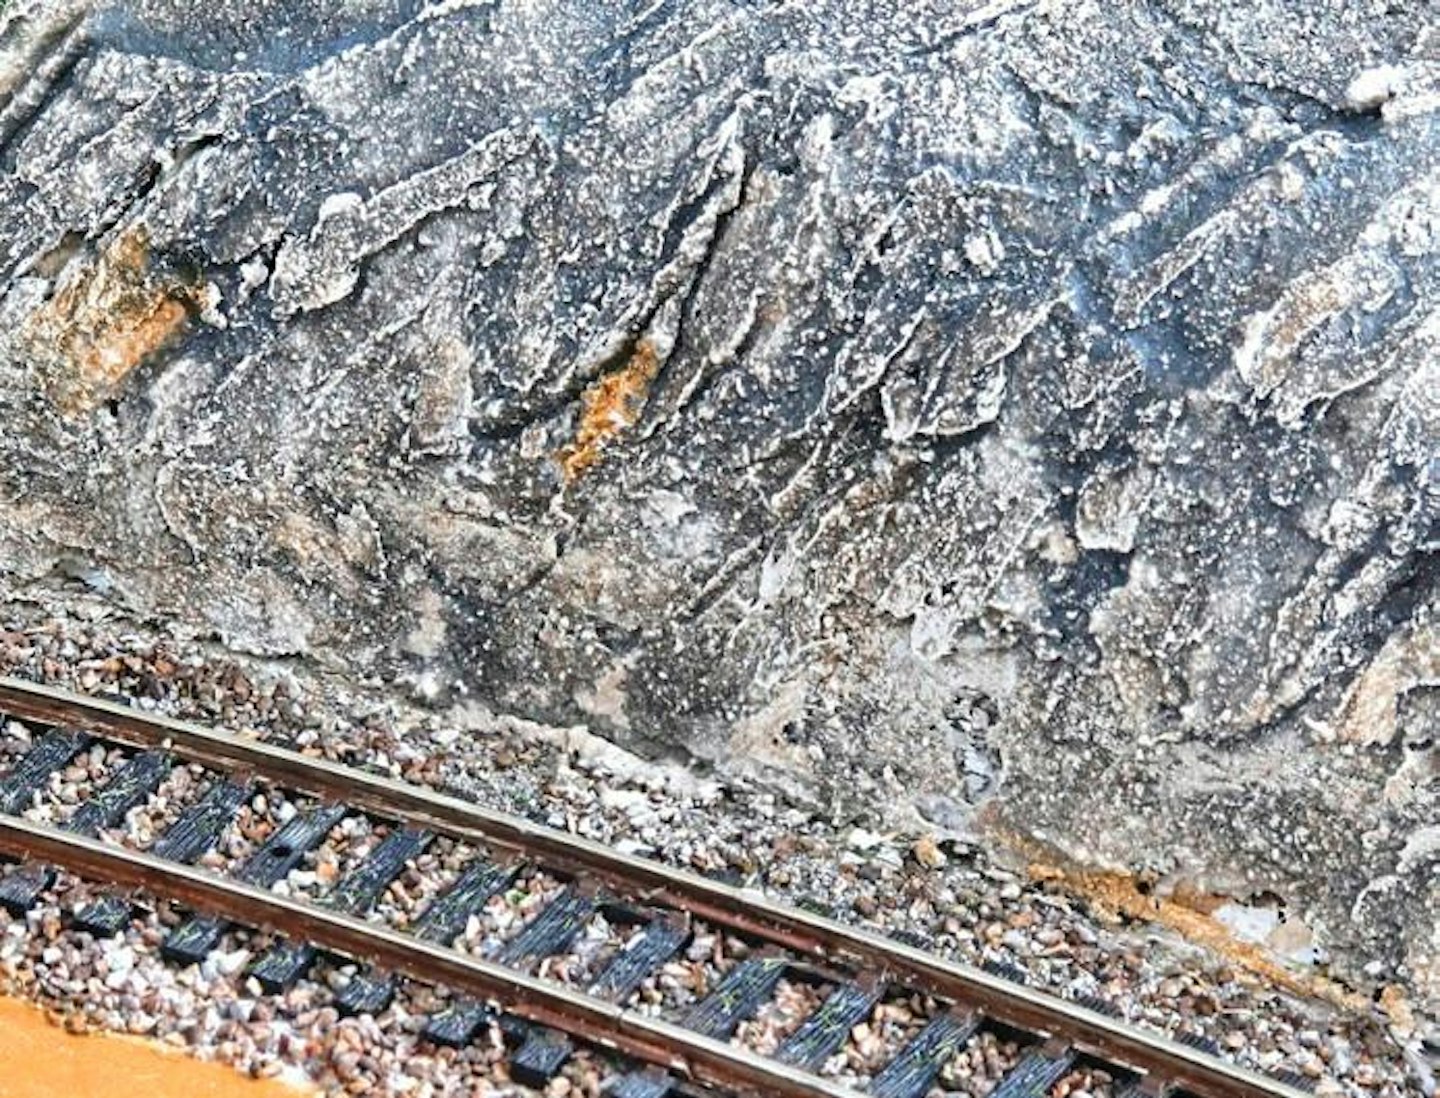
11 After the ‘dotted’ brown colours had started to dry, I applied a thin black wash over the rockface, which naturally found its way into all the recessed texture and crannies, bringing out the surface relief.
12 The surrounding areas were also painted at this time, allowing the thinned paints to dry before applying more coats and different shades where necessary.
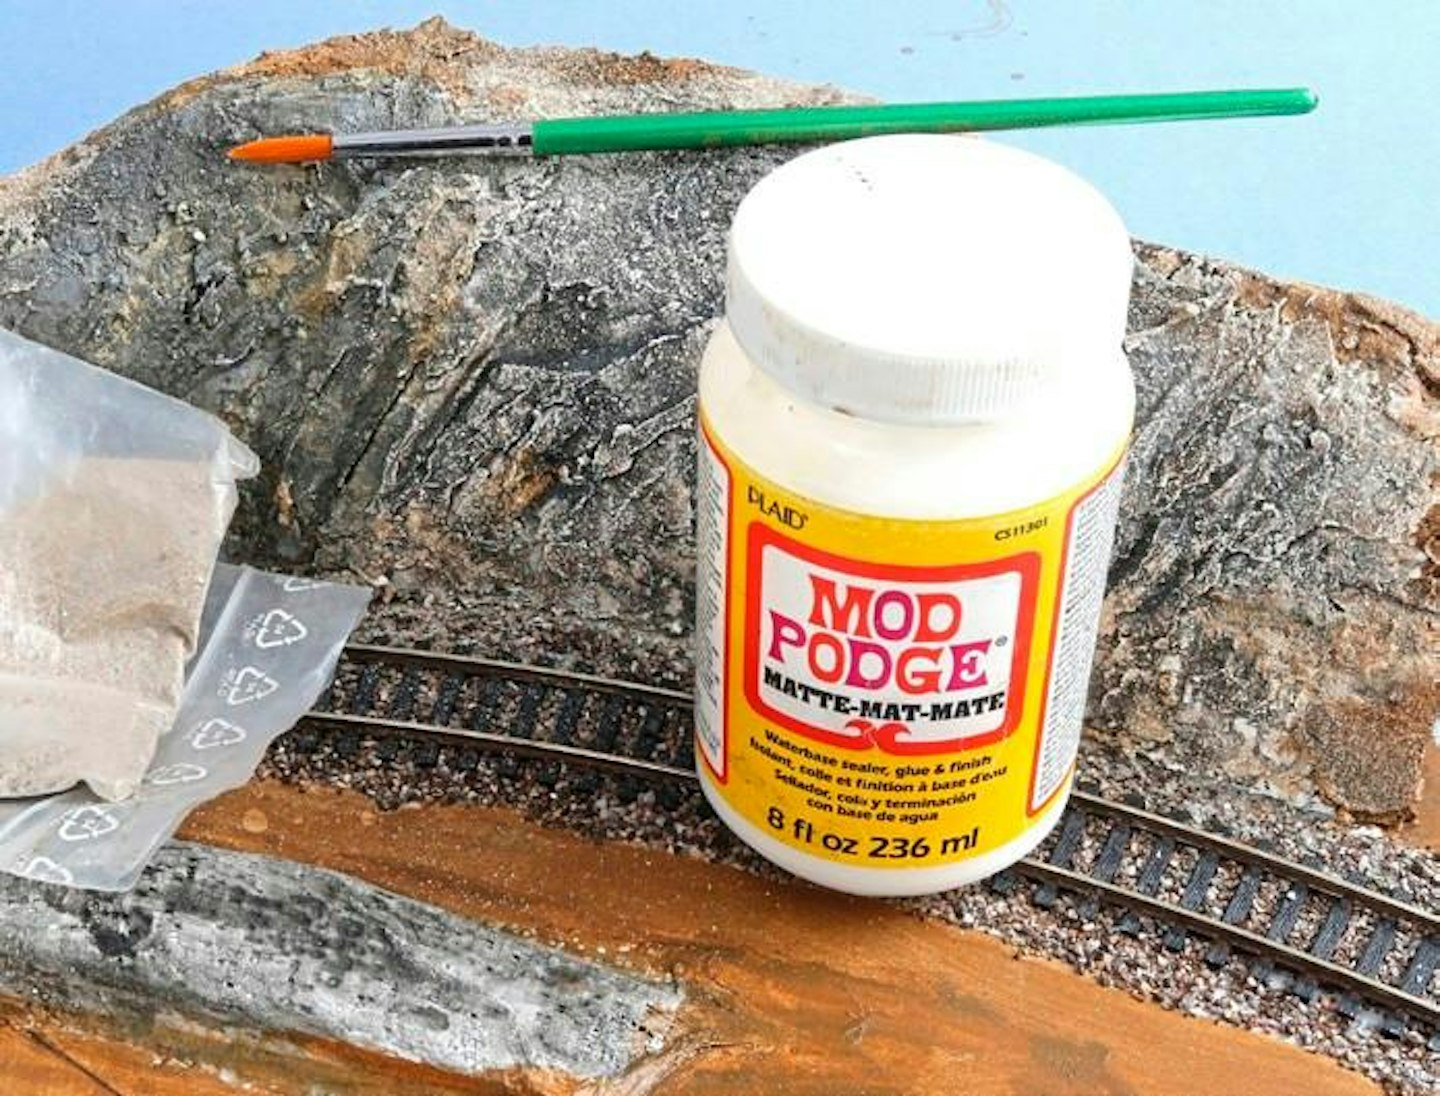
13 In certain areas, I applied patches of fine sand, having brushed on a layer of adhesive. PVA or scenic glue will suffice, but I used a light coat of matt Mod Podge, with the fine sand sprinkled on while it was wet.

14 Short static grass fibres were added to the top of the rockface, applied over wet PVA. The pin from the electrostatic grass tool was pressed into the landscape and then more glue was added with a sponge…
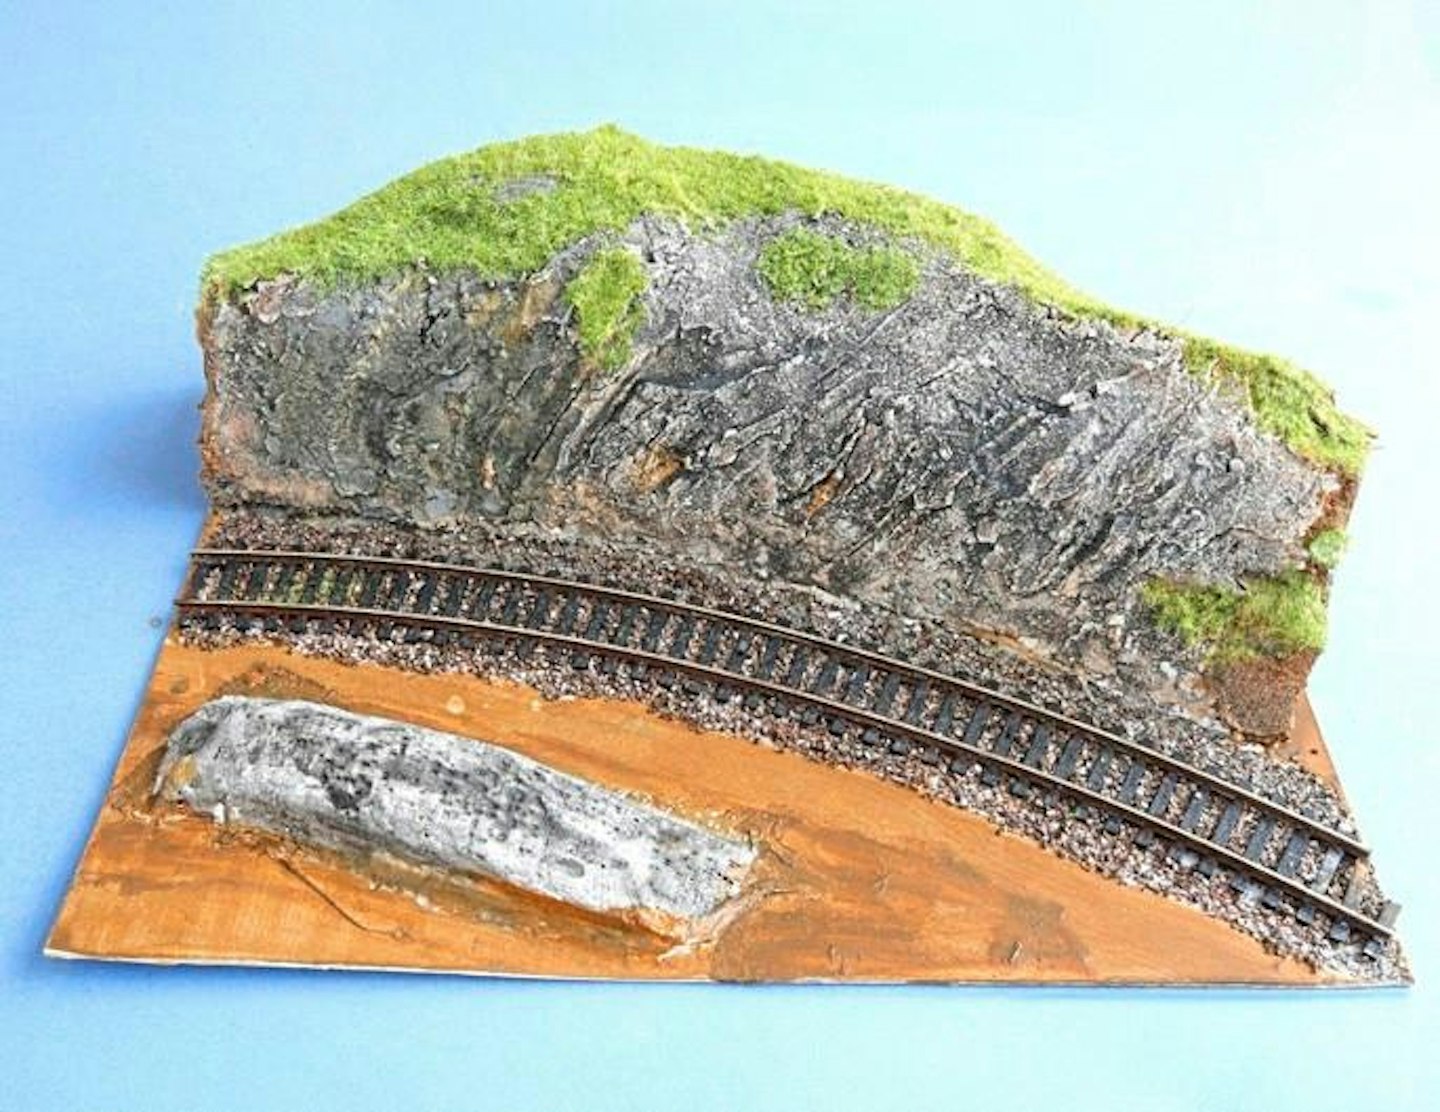
15 …before a second layer of static grass was applied, this time using slightly taller fibres. Adding these taller fibres, in random areas, creates a more natural texture, especially if slightly different shades of fibres are mixed.

16 A believable transition was needed between the trackbed and rockface, so more PVA glue was brushed along the cess area, between the track and base of the cutting.
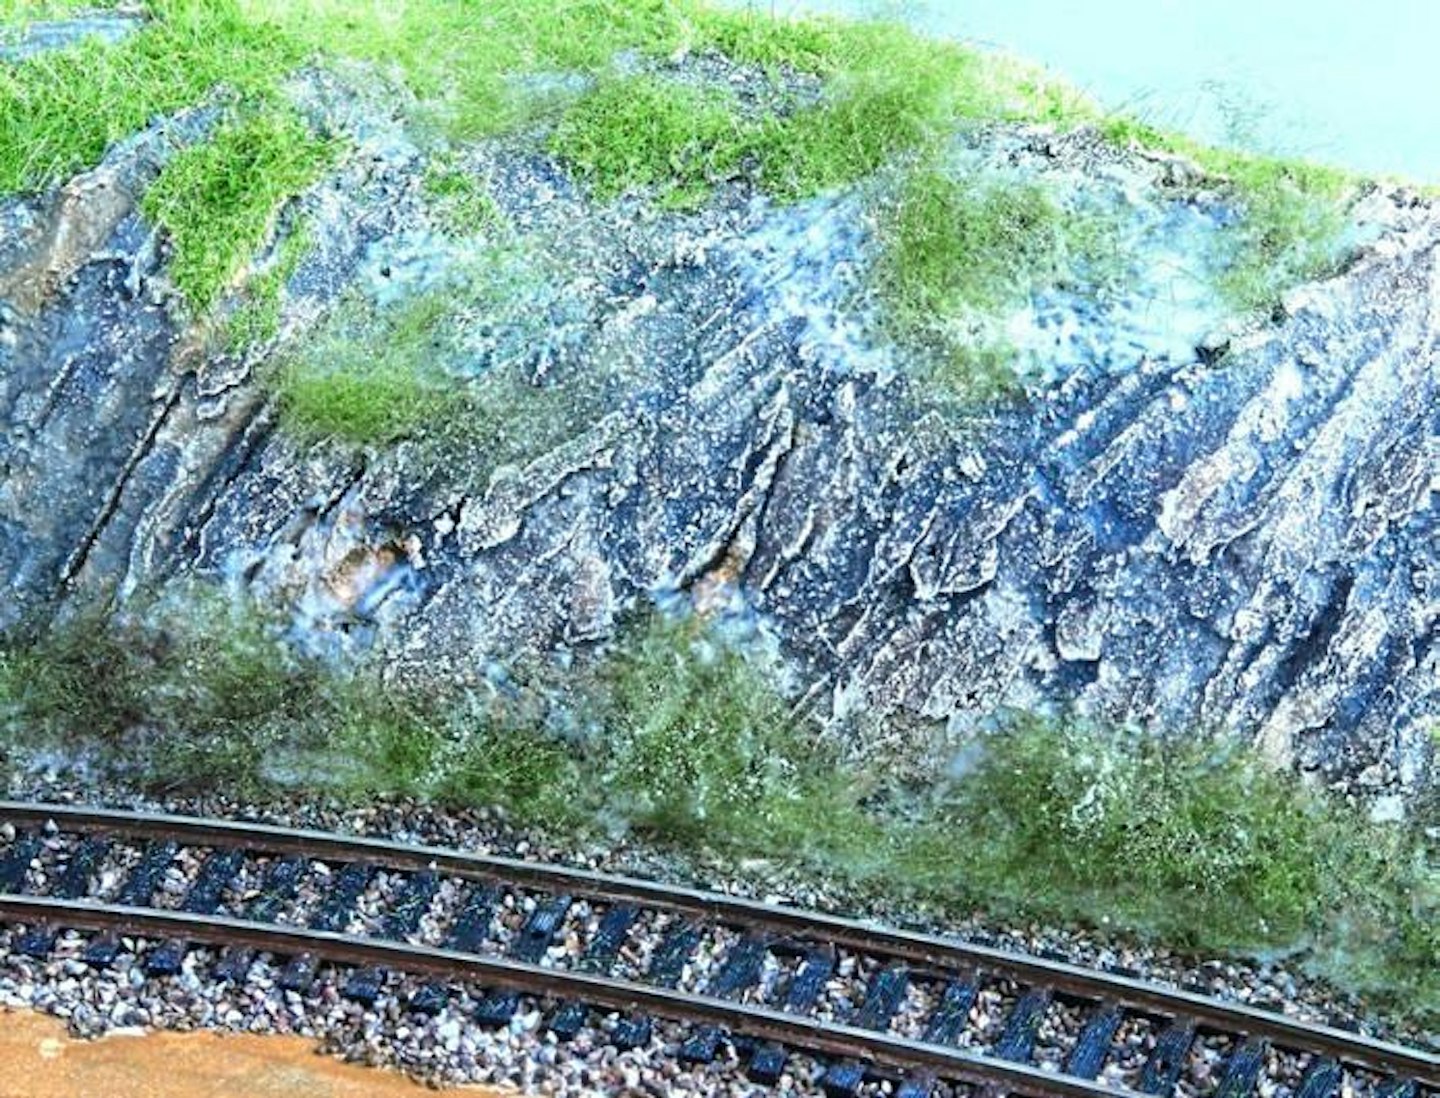
17 Some teased-out Woodland Scenics Poly Fibre was pressed gently into the wet glue and allowed to dry. I then used hairspray, targeted over the Poly Fibre, and sprinkled on a selection of fine scatter materials to represent foliage.
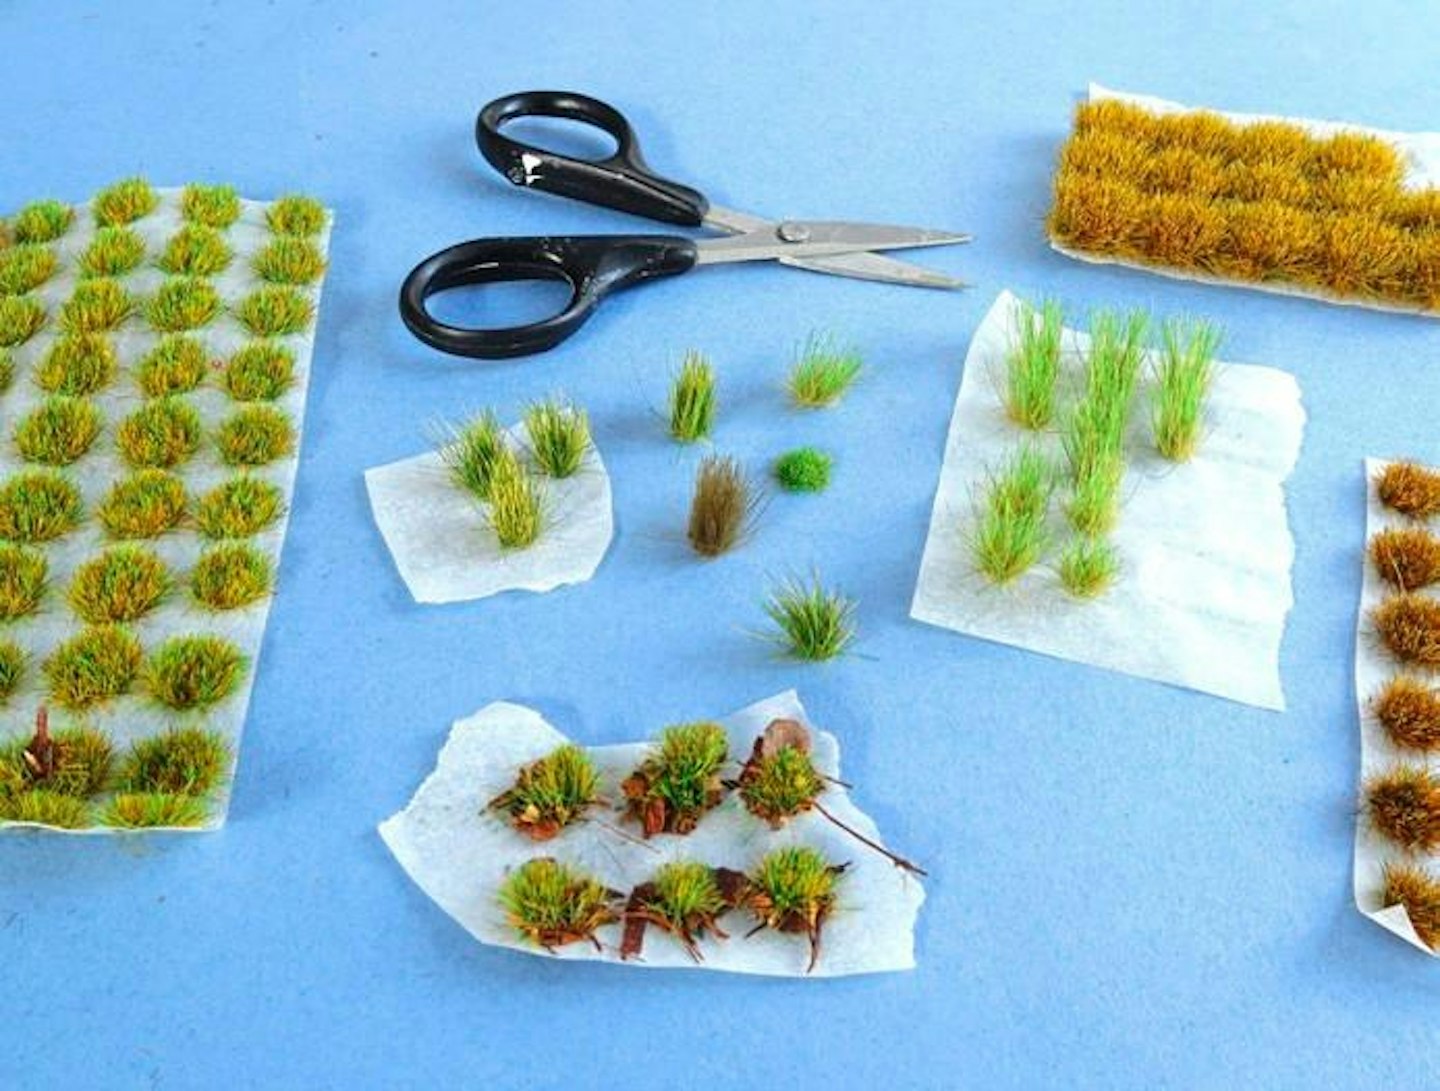
18 Scenic modellers are now blessed with a multitude of grass tufts available in different colours and heights. Some of the tufts can be cut down to make smaller tufts of grass with a small pair of scissors.
19 The grass tufts were fixed on to the landscape with PVA glue, while more areas of Poly Fibre were added, followed by layers of scatter materials secured with hairspray, to build up various layers of vegetation.
20 A row of trees were planted, consisting of a selection by Anita Décor, Primo Models and two created from Noch tree armatures coated with clump foliage and finer scatter materials.